Showing posts with label Nuts. Show all posts

Monday, August 10, 2015

Secret Recipe Club: Honey Almond Scones

Pin It
It's been a while since my last non-Secret Recipe Club post. I know I've been unfair to my other SRC members by not posting regularly. And so, as I've said a few times, this will be my last post for a while. I hope to be back with my regular posts and back in SRC in a few months - God willing! 

I was eager to see who I was assigned to for my last month before the break, and man - I wasn't disappointed! Goodie Godmother 's website is just awesome. This time I had to enlist my husband's help in choosing just one awesome recipe to cook! And after 15 minutes of browsing through, he just gave up and said, "everything looks so good. I can't choose. It's too hard!"

Mary, you've created a beautiful space for your readers! I love your blog and I love your '10 facts about me'. We are alike in a lot of ways - the love of caramel, the sweet tooth and a lot more. It was awesome getting to know a little bit about you through your blog!

So - back to choosing! Did I make these smooth and creamy, chocolate dreamy cookies which are so similar to a particular store-bought cookie that my kids love? Or do I make these vanilla bean marshmallows that remind me so much of my mom's homemade marshmallows? Ugh. So tough!

In the end, I made two recipes - the first one was these Red Velvet Baked Doughnuts. No surprise with my pick considering my love for all things red velvet is well-known. Unfortunately for me, just as I pulled the doughnuts out of the oven and I was waiting for them to cool, we had company. And before I could even think of photographs, they were all gone - yummy cream cheese glaze and all. :( Oh well! 

Finally, knowing my husband's love for scones, I settled on these Honey Scones. The flavour sounded lovely and it would be perfect for a Saturday morning breakfast with the family. 
The only modification I made was the addition of almonds. My husband needs the crunch of nuts in scones for them to be 'perfect' and almonds and honey made perfect sense to me. I also didn't use the Chantilly cream Mary recommended, but instead added a sprinkling of sugar over the top of the scones to add crunch and some extra sweetness.

Honey-Almond Scones
Recipe adapted from this one on the Goodie Godmother 

Ingredients 
2 cups all purpose flour
1 tbsp baking powder
1/4 tsp salt
7 tbsp unsalted butter, cold & cubed
3/4 heavy cream
1 tsp vanilla
1/4 cup honey
2 tbsp sugar, for topping
1/3 cup almonds, roughly chopped

Method
1. Preheat your oven to 180C/350F and line a baking tray with greaseproof paper or Silpat.
2. Combine the flour, baking powder and salt in a large bowl.
3. Add the butter and work it into the flour using a pastry cutter, two knives or your finger tips. You want the mixture to look crumbly with the butter still in small pieces.
4. In a small bowl or measuring cup, combine the cream, vanilla and honey.
5. Add the wet mixture into the dry mixture and combine with a wooden spoon just until the dough comes together.
6. Transfer the dough onto the prepared baking tray. Pat it down and shape it into a square about 8"x8".
7. Sprinkle the sugar and chopped almonds over the top of the scones in an even layer.
8. Using a sharp knife, cut the large square into 8-12 smaller squares depending on how large you want your scones.
9. Bake in the preheated oven for 10-12 minutes until the base and edges are a beautiful light golden brown.
10. Transfer to a cooling rack and allow to cool before serving with a glaze, preserve, cream or spread of your choice!
The flavour of these scones were really good. I mean - how can you go wrong with honey and almonds. The texture was something different from what we're used to in a scone. I guess that's from the total lack of any kind of sugar in the recipe. The honey gives the scones a spongy, soft texture. There were no complaints :)
Thank you, Mary, for this recipe, and for all the other yummy recipes on your site. Everything looks scrumptious and I can't wait to try all the others I've bookmarked. 

Thanks to Sarah, Camilla and everyone else at SRC - especially Group B, for being so kind and sweet and welcoming! I've enjoyed my time here, and I hope I can bake with you again in a while.

Until next time, dear readers and friends - blessings and hugs to you all... 

XOX 


Pin It

Monday, July 13, 2015

Secret Recipe Club: Brown Butter Granola Breakfast Cookies

Pin It
For the last few months, I've only been blogging once a month with my Secret Recipe Club group. I hate that I am not posting regularly (owing to many reasons), but I am grateful to SRC for keeping me posting at least once a month. But I have to take a break even from SRC because it just isn't fair to the other members when I'm not posting regularly. August will be my last SRC post. I will be applying for a break from the group. I hope to be back to blogging in a few months.

This month, I just LOVED the blog I was assigned to. Not only did I find some awesome, mouth-watering recipes, but I also found so much that built me up in my spirit. Jessie Weaver is a gorgeous woman of faith, an awesome mom, wife and cook and I don't think you will be disappointed with the range of posts you will discover on her amazing blog. Thank you for everything, Jessie. I love what you write, and you have a regular reader in me!

If you've visited my blog before, you probably know all my love for breakfast baking. It's more like an obsession. Muffins, scones, rolls, quick breads - I've done it all and I do it waaaaay more often than I care to admit. I found a few awesome recipes in these categories on Jessie's blog - the gingerbread white chocolate muffins, the chai spice scones (another SRC recipe) and a few more, but there was one that grabbed my attention. I saw the words 'brown butter' in the title, and I was sold.
Brown Butter Granola Breakfast Cookies
Adapted from this recipe on jessieweaver.net
Ingredients
1 cup unsalted butter
3/4 cup honey
1 tsp salt
1 tsp baking soda
1 tsp cinnamon powder
1 tsp vanilla extract
2 eggs, lightly whisked
3/4 cup buttermilk
3 cups whole wheat flour (I used 2 cups wheat and 1 cup all-purpose)
1 cup granola (I used an unsweetened chunky one with slivered almonds, walnuts, raisins and oat clusters)
1 cup chocolate chips
1/2 cup oatmeal
3 tbsp coarse flaxseed meal

Method
1. Preheat your oven to 180C/350F and prepare a cookie sheet by lining with greaseproof paper or Silpat.
2. In a heavy-bottomed saucepan, melt the butter on low heat stirring until it is all melted. Allow it to keep cooking on low heat until the butter browns and gives off a heady, nutty aroma. This could take 10-12 minutes, and while it doesn't need stirring, you will need to watch it the whole time. It can go from browned to burnt in a matter of seconds.
3. Set the brown butter aside for 10 minutes to cool.
4. Stir in the honey, salt, baking soda, cinnamon powder and vanilla extract.
5. Add the eggs and buttermilk and stir well to combine.
6. Stir in the flour, granola, chocolate chips, oatmeal and flaxseed meal. Mix well.
7. Using an ice cream scoop, scoop out the cookie dough onto your prepared baking sheet. Allow some space between each cookie and the next. If you're shaping them by hand, form 2 inch sized balls and slightly flatten on the baking sheet. I got about 30 large cookies from this recipe.
8. Bake in batches, allowing each batch to bake 15-18 minutes. The cookies will be golden brown on the bottom and slightly risen.
9. Allow to cool on the sheet before transferring to a wire rack to cool completely.
10. Serve fresh if possible. Store leftovers in an airtight container.
I didn't make many changes to this recipes. Just added some oatmeal instead of the oat bran she recommends (I didn't have oat bran at hand), and some flaxseed meal. And I just mixed everything in the same saucepan in which I made the brown butter. It really is an amazing one-bowl recipe!

All of us absolutely loved this recipe! The cookies are not too sweet, have an amazing aroma and flavor and texture - crispy on the outside with a soft center, studded with nuts, raisins and chocolate chips. How could breakfast get any better! Thank you, Jessie! We LOVED this recipe :)

I will be back in August for one last SRC post. See you all then!


Pin It

Tuesday, January 13, 2015

Pecan Monkey Bread

Pin It
HAPPY NEW YEAR! I hope 2015 is a good year for all of us. 

I've been so bad at posting! And here I was, resolving to post more regularly in 2015! It has been a hectic year so far. We've been barely cooking and eating at home. For the last few days, things have become slightly less crazy, and we've all grown tired of eating out. So here's my first post for this year. 

This recipe is from a book I got as a Christmas gift. It's a compilation of baking recipes by Martha Day. The book has tons of awesome sounding recipes from all over the world! Unfortunately I'm unable to find a link to an online store that's selling this particular book. 
This morning for breakfast we ate this delicious Monkey Bread. It was really, really good! I made the dough, finished the first rise and assembled the bread last night and left it in the fridge overnight. This morning, I took it out of the fridge at about 5am and let it sit out on the counter till around 7:30. We had fresh Monkey Bread for breakfast, and lots of smiles all around!

Pecan Monkey Bread 
Adapted from "Baking" by Martha Day
Ingredients
4 1/3 cups all-purpose flour
1 tbsp instant yeast
1/2 tsp salt
2 tbsp sugar
1/2 cup whole milk
1/2 cup water
30g unsalted butter, softened
1 egg
1 egg yolk
Coating:
1/2 cup soft light brown sugar
1/4 cup soft dark brown sugar
2/3 cup coarsely chopped pecans
2 tsp ground cinnamon
1/3 cup melted butter

Method
1. In a saucepan, combine the milk, water and butter. Heat gently until the butter has almost dissolved completely. Set aside for 5 minutes and stir in the egg, and the egg yolk and whisk well to combine. Check the temperature and allow it to cool until the mixture is slightly warm - about 105-110F. 
2. In a large bowl, or in the bowl of your stand mixer, stir together the flour, instant yeast, salt and sugar. Set aside.
3. When the milk mixture is warm, create a well in the middle of the flour mixture and pour the milk mixture in. Stir will a wooden spoon until the dough comes together. Then knead the dough using the hook attachment on your stand mixer or by hand until the dough is smooth and elastic. This will take about 7-8 minutes on your stand mixer at medium speed, and about 10-15 minutes by hand.
4. Coat a large bowl with oil, and place the ball of dough into the bowl, giving it a turn in the bowl to coat it lightly with oil. Cover the top with clingfilm and set aside for about 1-1.5 hours. You want the dough to double in volume during this time. 
5. Prepare the coating ingredients by combing the sugars, pecans and cinnamon powder in a small bowl. Keep the melted butter in a separate bowl. Prepare a 9 or 10inch fluted baking tin by greasing it generously. I used a 10" angel cake tin. 
6. At the end of the proofing time, deflate the dough and divide it into 32 even sized pieces. 
7. Roll each piece of dough into a tight ball. Drop each ball into the butter and using a fork, fish out the ball and drop it into the bowl with cinnamon sugar. Roll the ball in this mixture until it is well coated, making sure that some pieces of pecan have stuck on to the ball. Drop the ball into the prepared tin.
8. Continue rolling and layering the balls of dough in the baking tin until you've used up all the dough. 
9. Cover the pan with clingfilm and set aside for about 45 minutes or until the dough is risen and puffy.
10. Preheat the oven to 200C/400F. Bake the Money Bread for about 30 minutes or so or until the bread is golden brown.
11. Allow to cool for 10 minutes, loosen the sides using a knife and flip the bread onto a plate.
12. Serve warm and let people rip off a ball or five and enjoy!
The original recipe contained 1/2 cup of raisins that are sprinkled over the balls of dough about halfway into layering. My husband isn't a great fan of raisins in cinnamon bread, and so I decided to omit.

What the recipe doesn't suggest is drizzling the bread with decadent cream cheese glaze before serving. I high recommend this. I tried it after the pictures were taken, and it was just divine! And that's not even the best part! The best part of this recipe is those little pecan halves that drop off the bread and are sugar roasted to perfection. Crunching on those candied pecans was just bliss!
I'll be back again soon (I hope!), with more delicious recipes to share for this year! God bless you all! :)


Pin It

Monday, December 15, 2014

SRC Cookie Carnival: Russian Tea Cakes

Pin It
The Christmas season is something I look forward to every single year. I love the music, the food and the fellowship. I love going to church extra early, and coming back home and watching my kids open their presents with squeals of joy. I guess you could say I just love celebrating the birth of my Saviour! 

I doesn't matter that I'm... um... as old as I am - the  season is just so festive, bright and full of life that I turn into an excited child who just can't wait for Christmas eve. But every year, come December, I am so exhausted and tired, that I can't wait for January to get here! :) Christmas is a lot of work, I guess! But at least most of the Christmas related 'work' is tons of fun! Like today's post!
This month, as a bonus, the Secret Recipe Club that I've joined just recently is having a Christmas Cookie Carnival! How fun... For this event, I was assigned a wonderful blog from my own Group B - meet Melissa from Smells Like Brownies! This chocolate-loving mom of an adorable toddler is so talented! I love her site. Her recipes look and sound fabulous, the photographs are great and her choice of recipes is amazing - I want to eat everything off the screen. And she makes the prettiest wedding cakes! I repeat - SO talented! 

Melissa had a wonderful array of cookie recipes for me to choose from and the super decadent-sounding Fleur de Sel Caramel Cookies were my first pick! Don't they sound divine? But then my eye caught these Mexican Hot Chocolate Crackle cookies! Oooooh cookies that taste like hot chocolate!? Yum! And then my very inquisitive 5 year old came peeping and as I looked through the cookies, this one caught her eye and she asked me what they were! And when I told her that they were snowball cookies, it was all settled. She said she had to have these cookies, and soon. I guess we had decided. And if I didn't give in, I was sure to hear 'snow cookies, mama' every hour for the next two weeks. Never mind that there were other cookies that sounded like heaven in a bite. We had to have snow. 
Thank you Melissa for this yummy recipe that didn't make me regret my daughter's pick. These cookies were really, really good! I've made snowball cookies before, and I've eaten my fair share. It was fun and exciting to try a new recipe! These cookies tasted rich, and nutty and were just the right level of sweet - even with all the 'snow'. The powdered sugar did make it a messy treat for the kids, but it was so worth it!
Russian Tea Cakes/Snow Cookies
Adapted from this recipe on smellslikebrownies.com 
Ingredients 
1 cup unsalted butter, softened
½ cup confectioner’s sugar, plus extra
1 tsp. vanilla extract
2¼ cups flour
1 tsp. salt
1 cup finely chopped walnuts 

Method 
1. Cream the butter and powdered sugar until smooth and fluffy. 
2. Stir in the vanilla and beat for a minute or so. 
3. Add the flour, salt and nuts and stir until it comes together. 
4. Set the mixing spoon aside and gently mix the dough with your fingers till it comes together into a ball. 
5. Pinch of bits of dough and form cookie balls about 1" in size. Lay them out on baking tray/cookie sheet leaving about an inch between each of the cookies. 
6. Bake in a preheated oven at 200C/400F for about 12 minutes. At this point the bottom of the cookie will have colored golden brown but the rest of the cookie will remain whitish. 
7. Remove the cookie sheet from the oven and working quickly, dredge each hot cookie in the powdered sugar and set on a cooling rack. The cookies aren't too hard to handle when they're hot. Just don't touch the hot baking tray. 
8. Leave the cookies on the cooling rack to cool completely. When they're completely cool, dredge them again in the powdered sugar. This time, the sugar will stick a lot better and the cookies will look like they're covered in snow. 
9. Store in an airtight cookie jar away from the reach of little hands - unless you want your whole house covered in a fine layer of powdered sugar. 

Thank you Melissa! Love love love your blog and I will also be making the other two cookies I wanted to make! I can't wait! These were so yummy and buttery and nutty and sugary and so good! The photographs turned out messy because of all the sugar and the two pairs of grubby little hands I had to keep swatting away while trying to get a decent picture! 
EDIT: Just saw the Chocolate Mint Butter Cookies! Yum! And more importantly, - CONGRATULATIONS, Melissa! :)

And thank you Sarah for all that you do for Secret Recipe Club. What a lot of work it must be! Thanks for organizing this cookie carnival! I loved being a part of it! :)

I hope you guys try this recipe. I'm sure it will get added to your Christmas baking list every year. Until next time...

Check out the links below for more awesome Christmas Cookie ideas!


Pin It

Monday, December 1, 2014

Banana, Date & Walnut Bread

Pin It
I've been just so bad at blogging. It has been a challenge for me to sit down and get a post out, and I apologise! I should be posting more regularly going forward. Fingers crossed!
This recipe came out of need - I just needed to use up some leftover, overripe bananas, and some dates that my daughters have outgrown. Yes, outgrown. These kids and their food choices. One day they love dates and they insist I buy them a large pack. And the next day - "Dates? Blechhhhh!" How am I supposed to keep up with that!

I loved the way this recipe turned out. It was loosely based on a recipe from taste.com.au. I changed it up quite a bit - the biggest changes being using mostly honey, and a lot less, in place of sugar, and the addition of some butter in the recipe. 

Banana, Date & Walnut Bread 
Ingredients
1/2 cup chopped walnuts
1 cup water
2 tbsp unsalted butter
1/3 cup honey
2 tbsp sugar
1 cup dates, pitted and chopped
1 1/4 cups all purpose flour
3/4 cup whole wheat flour
2 tsp baking powder
1/2 tsp baking soda
2 tbsp flaxseed powder
1/4 tsp salt
2 large overripe bananas, peeled and mashed (about 1 cup)

Method
1. Preheat the oven to 180C/350F. While the oven is preheating, lay the walnuts on a small oven-safe plate or tray and allow them to toast in the oven. Remember to remove them when the oven reaches temperature. Alternatively, toast the walnuts in a skillet or frying pan. 
2. Pour the water in a saucepan, add the butter, honey and sugar and place it on a stovetop on medium heat.
3. Heat until the sugar is completely dissolved and the mixture is starting to bubble.
4. Add in the dates and cook for approximately a minute. Turn off the heat and set the saucepan aside.
5. In a large bowl, combine the flours, baking powder, baking soda, flaxseed powder and salt. Stir well to combine.
6. Add the date mixture, which will be a little cooler now, and stir until combined. Stir in the mashed banana.
7. Fold in the walnuts. 
8. Pour the batter into a greased and floured 9" loaf tin and bake in the preheated oven for 35-40 minutes or until a skewer inserted into the centre of the tin comes out clean.
9. Remove from the oven, and allow the bread to cool in the pan for 15 minutes. Ease the loaf out of the tin and allow to cool down on a rack.
10. Serve warm or at room temperature.
Let me tell you - this is a hearty, healthy and filling bread. We loved it! It was great as a part of breakfast and a yummy tea-time treat!

I ate a couple of slices with some peanut butter. My husband liked it with a caramel spread. But my favourite was when I ate a leftover slice the next morning - toasted and slathered with butter. It was just awesome!
I love the flavours and textures that come together in this loaf, and I think you will too! 

Until next time… 
Pin It

Saturday, November 22, 2014

Sourdough Waffles

Pin It
This last couple of weeks has been quite crazy for me. We had a health related fright with a loved one (which turned out to be nothing serious - thank God!), celebrated a bunch of birthdays, baked three birthday cakes and caught up with a lot of friends. I have barely had the time to sit down and write a blog post. My apologies.
This recipe is one I've been using for a few months now. All of us prefer this over the regular waffle recipe. A sourdough waffle is superior in flavour, texture and it is better for your gut as well! The waffles are perfectly crisp on the outside with a fluffy interior, have a slight tang which boosts the flavor and they color up beautifully! 
I have a wonderful sourdough starter going. His name is Bub and he is a feisty fella. He is about 8 months old, very active and very demanding. I have a small jar in the fridge as a backup, but I have a large jar sitting on my kitchen counter which gets used a LOT. I've made breads, pizza dough, waffles, muffins, and most often, we make pancakes. I have shared my favorite sourdough pancake recipe on my Facebook page before, but I will get around to posting it soon.  
If you would like to start a sourdough starter from scratch, here are some great websites to guide you along in getting started.


Sourdough Waffles
Ingredients
1 cup all purpose flour
1 1/2 tsp baking powder
2-4 tbsp sugar
1 tsp salt
2 eggs
1/2 cup milk (I used skim)
8oz sourdough starter 
6 tbsp butter, melted

Method
1. In a medium bowl, combine the flour, baking powder, sugar and salt. Stir well to combine.
2. In a large bowl, whisk together the eggs and milk.
3. Stir in the sourdough starter and whisk together until combined.
4. Add the flour mixture to the egg mixture and stir until combined.
5. Mix in the melted butter.
6. Adjust the consistency of the batter by adding a little more milk or flour. You want a thick batter that is like pancake batter.
7. Cook the waffles according to the instructions of your waffle maker. 
8. Serve hot topped with a pat of salted butter and generous amounts of syrup.

I made half the batch and then decided to add some toasted pecans to the rest of the batter and we loved that addition as well!
I find that yeasted waffles are way superior in texture and flavor than the baking powder or baking soda recipes. If you don't have a sourdough starter, and aren't keen on starting and maintaining one, you should try an overnight waffle recipe! I'll post that recipe soon.

Until next time!
Pin It

Monday, November 10, 2014

Secret Recipe Club: Blueberry Muffin Streusel Cake

Pin It
It's time for another Secret Recipe Club post. This is only my second month but I am totally loving it!

This month I was assigned to Anne-Marie's wonderful blog, This Mama Cooks. And boy, does she cook! She cooks up a storm. Her website is a treasure trove of wonderful recipes of all kinds. And best of all - if you have a special dietary need, she probably has something for you. Just fantastic healthy recipes, eggless recipes, low-cal weight watchers recipes, and tons of gorgeous gluten free recipes! Plus she has so many other fun lifestyle and health posts! I think I am now addicted to her blog. 

It took me a while, and I almost made something else (it was my husband's birthday yesterday and I almost made this Gluten Free Flourless Chocolate Walnut Torte), but I ended up making a recipe that we all love eating around here. This is the kind of stuff that my family loves, and so I made this gorgeous muffin cake for breakfast one morning. And I was right - they loved it! I try not to make these indulgent breakfasts too often - maybe a couple of a times a month.
I didn't make too many changes in the recipe apart from substituting some of the all purpose flour with whole wheat, and reducing the sugar just a little.

Blueberry Muffin Streusel Cake
Adapted from this recipe on This Mama Cooks 
Ingredients 
Cake:
1 cup flour (I used equal parts of all purpose and whole wheat) 
1 1/2 tsp baking powder
1/3 cup granulated sugar
1/2 cup milk
1 egg
2 tbsp canola oil (or any neutral flavoured  oil)
1 cup blueberries, fresh or frozen 

Streusel Topping:
1/2 cup flour (I used equal parts of all purpose and whole wheat)
1/4 cup light brown sugar
1/4 cup granulated sugar
1 1/2 tsp ground cinnamon 
1 tsp vanilla 
3 tbsp unsalted butter, softened
1/2 cup raw pecans, roughly chopped 

Method
1. Preheat your oven to 180C/350F. Grease a 9x9x2 square baking pan and lightly dust with flour. Set aside. 
2. In a medium bowl, combine all the streusel ingredients and mix well to combine. I got a nice even mix by using my fingers. I think a food processor would work well too. Set aside. 
3. In another medium bowl, combine all the cake ingredients except the blueberries, and stir just until completely combined. You don't want any pockets of dry flour. 
4. Fold in the blueberries gently. 
5. Pour the cake batter into the prepared baking tin and sprinkle the whole top of the cake with an even layer of the prepared streusel topping. 
6. Bake for about 25 minutes or until a skewer inserted into the center of the cake comes out clean. 
7. Serve warm. 
My favourite thing about this recipes was how easy it was to put together. No fussing about. Combine all the ingredients, mix and bake! Just loved it!

Another fabulous thing is that even though the cake and topping have very little butter/oil, it doesn't taste that way. It tastes really, really good - especially that awesome crunchy streusel topping with those amazing toasty pecans! The whole thing was polished off in a matter of hours! 
The level of sugar was just right for us but if you have a sweet tooth, you should up the sugar and use what Anne-Marie originally recommends. And while you're visiting her, make sure to check out her other fabulous recipes, and don't forget to say hello from me. Right now, apart from that gorgeous walnut torte, I also plan to try my hand at her awesome looking homemade chorizo, and this totally tempting Baked Pumpkin Chocolate French Toast with Bananas. I mean, how good does that sound?!

I hope you enjoy this recipe as much as I did! Check out the other fabulous SRC recipes at the link below. 
Pin It

Friday, October 24, 2014

Healthy Banana Nut Muffins

Pin It
I've been making quite a lot of nice breakfast recipes lately, but just haven't been able to photograph them! 

My favorite were these yummy pistachio and cranberry scones. They were so good that even though I made a huge batch and froze them, they were gone within 4 days and then my husband complained when he realized there weren't any left over on the fifth day! That's how good they were. And I just didn't find the time to get a picture. Oh well! I'll just have to make them again. 
When I made these muffins, I just insisted on taking 10 minutes to take a few quick pictures! And I'm glad I did. We loved these muffins and I am sure you will too!

Healthy Banana Nut Muffins
Adapted from Tyler Florence's Banana Nut Muffin Recipe 
Ingredients 
2/3 cup all purpose flour
1/3 cup whole wheat flour
3/4 tsp baking soda
1/4 tsp baking powder
2 tbsp flaxseed meal
1/8 tsp ground cinnamon 
1/4 tsp salt
2 large overripe bananas
1/2 cup brown sugar
1 large egg
1/3 cup vegetable oil 
1/2 tsp vanilla extract 
1/3 cup chopped walnuts 

Method
1. Preheat the oven to 180C or 350F and prepare 6 large or 8 regular muffin cups in your tray by either greasing them or by lining them with paper muffin cups. 
2. In a large bowl, combine the flours, baking powder, baking soda, salt, ground cinnamon and flaxseed meal. Stir together and set aside. 
3. In a medium bowl, peel and mash the bananas until fairly smooth. 
4. Add in the sugar and whisk until combined and the mixture is a little frothy. 
5. Beat in the egg, oil and vanilla and whisk to combine. 
6. Make a well in the middle of the flour mixture and pour in the banana mixture. 
Stir until just combined. Don't over-mix. 
7. Stir in the walnuts and fold gently till incorporated. 
8. Spoon the batter into 6 large or 8 regular muffin cups. If there are any empty muffin cups in your tray, pour a little water into each to keep them from warping. 
9. Bake for 20-25 minutes or until ththe tops spring back when touched gently and are lightly browned. Serve warm or at room temperature. 
These muffins stay good at room temperature for a day but after that, I have like put them into the fridge or freezer. They're quite moist with the bananas and I would think they'd go back quite quickly.

These muffins are loaded with flavor. I was a little worried that they might be too sweet but they were just right! The only thing I would do different  the next time around would be to throw in some tart dried cranberries. I think they would be divine in there. Ooh ooh or maybe some chocolate chips! Chocolate is healthy too right? So that would work!
Until next time :)

Pin It

Saturday, September 27, 2014

Awesome Chocolate Chip Cookies

Pin It
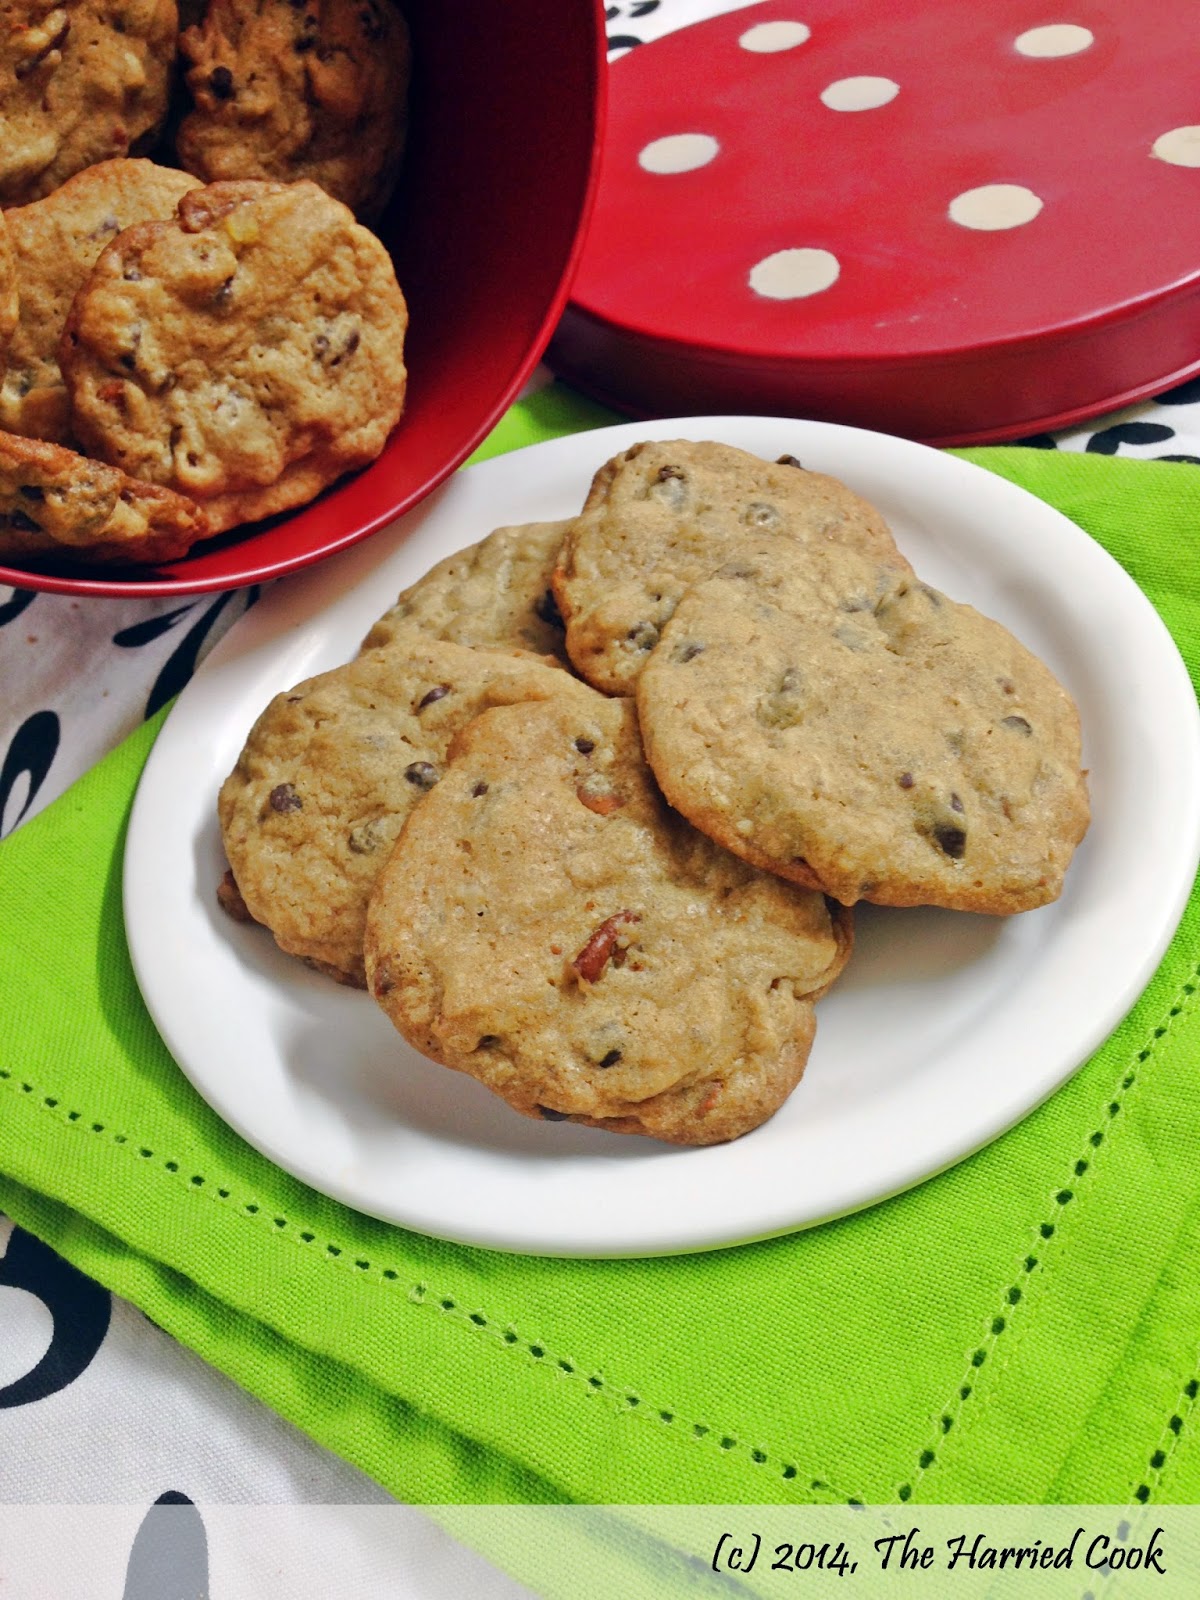
When I wrote the post with the recipe I shared of the Amish Chocolate Chip Cookies, I shared how I end up making oatmeal cookies every time I start making chocolate chip cookies. Those cookies cured me of that for a while, and then I went back to oatmeal cookies. But the other day, I wanted to make classic chocolate chip cookies and so I tried this recipe. And no one complained about the missing oatmeal.
This recipe makes a lot of cookies, and they were all gone in less than 2 days. We just couldn't stop eating them! Even my husband who watches everything he eats (unlike me!), enjoyed quite a few of these beauties!
At first bite, it feels like the cookie is a little too sweet. You feel you won't be able to eat more that one. But before you realize it, you've eaten 2 or maybe 6, and you're wondering how you're able to when it is so sweet. Don't feel too bad. Hey - its not all unhealthy, you know? Dark chocolate and pecans are good for you! They're considered health food! So there...

Awesome Chocolate Chip Cookies
Adapted from this recipe on allrecipes.com
Ingredients
1 cup unsalted butter, softened
3/4 cup granulated sugar
1 packed cup light brown sugar
2 eggs
2 tsp vanilla extract
1 tsp baking soda
2 tsp hot water
3 cups all purpose flour
1/2 tsp salt
1/2 tsp ground cinnamon
1 cup chopped dark chocolate or dark chocolate chips
1 cup chopped milk chocolate or milk chocolate chips
1 cup chopped pecans

Method
1. Preheat the oven to 180C/350F.
2. In a large bowl, cream the butter and the sugars until light and fluffy.
3. Beat in the eggs, one at a time, until the mixture is creamy and light.
4. Beat in the vanilla.
5. In a small cup, dissolve the baking soda in the hot water. Add this to the batter and mix in well.
6. Add the salt and ground cinnamon to the flour and mix well.
7. Add the flour to the batter and mix until combined.
8. Stir in the chocolate chunks and nuts.
9. Drop large tablespoonfuls of the batter onto an un-greased baking sheet. Allow a distance of at least 2 inches between each cookie dough mound.
10. Bake in the preheated oven for about 10 minutes, or until the edges are well browned.
11. Remove from the oven and allow to rest on the pan for 2-3 minutes.
12. Using a flat metal spoon or spatula, remove each cookie gently from the baking sheet and transfer to a cooling rack.
13. When completely cool, transfer to an airtight container for storage.
14. Eat.
Unlike the Amish Chocolate Chip Puff Cookies, these cookies are dense and chewy. Seriously good. I would go as far as saying - these are the BEST chocolate chip cookies! And they're highly addictive.
The edges and outside are nice and crunchy and they give way easily to that chewy, chocolaty center. I love the nuts in this cookie too. I've made it with pecans and with walnuts, and while I prefer the pecan version, most people seem to favor the walnuts in this particular cookies.

As I said earlier, this recipe makes a LOT of cookies. About 48 cookies to be exact. Feel free to halve the recipe if you don't want to drown in cookies. Pecans or walnuts, these cookies need to be made and enjoyed! I hope you like them as much as we did!

Until next time...


Pin It

Saturday, September 20, 2014

Cranberry Hazelnut Coffee Cake

Pin It
This is my favorite cake at the moment. It is PERFECT. I don't want those fancy cakes with fondant. I don't want a pretty cake with frosting. Heck, I don't even need a glaze. This is my kinda cake. Loaded with flavor, texture and just so much goodness!
I baked it in the evening yesterday, with the intention of cake for breakfast on Saturday morning. Saturday breakfasts are usually special around here. If I know everyone has the day off, I usually make something indulgent. So, my plan was that I would make the cake on Friday evening, photograph it in the morning when the light was good, and then serve it for breakfast. Well, we all know about best laid plans...

One look at the cake, and my husband wanted a slice for dessert after dinner. My daughter wanted a nibble and I was drooling every time I walked past the cake platter. So I did what I had to. Made the ultimate sacrifice. Who needs natural light!!? I just clicked a few shots and we dug in. It is an amazing cake! We had it for breakfast again in the morning....
Make sure all your ingredients are at room temperature for this recipe. You can replace the heavy cream and yogurt mixture with sour cream. I didn't have sour cream, and this worked great for me! If you're using sour cream, just use one 8 oz tub.

Cranberry Hazelnut Coffee Cake
Adapted from this recipe on myrecipes.com
Ingredients
115 grams or 1/2 cup heavy cream
115 grams or scant 1/2 cup natural yogurt
1 tsp vinegar
185 grams or 1 1/2 cups all purpose flour
25 grams or 3 tbsp corn starch
200 grams or 1 cup granulated sugar
1 1/2 tsp baking powder
1/4 tsp baking soda
1/4 tsp salt
1 large egg plus 1 large egg white
1 tsp vanilla extract
70 grams or 5 tbsp butter, softened
2 cups fresh or frozen cranberries, cleaned and halved

Streusel Topping:
30 grams or 1/4 cup sifted flour
1 tbsp flax seed powder
50 grams of 1/4 cup brown sugar
1/4 cup chopped hazelnuts
1/2 tsp ground cinnamon
15 grams or 1 tbsp butter, melted
A pinch of salt

Method
1. Prepare a 9" spring form cake tin by lining the base with grease proof parchment paper and brushing the sides with melted but or spraying with cooking spray.
2. In a small bowl, combine the yogurt, heavy cream and vinegar. Set aside while you get the rest of the ingredients assembled.
3. Combine all the streusel topping ingredients and set aside.
4. In a medium bowl, combine the flour, corn starch, sugar, baking powder, baking soda and salt. Whisk to combine.
5. In another medium bowl, whisk together the egg, egg white, vanilla and 1/4 cup of the yogurt mixture. Whisk to combine.
6. In a large bowl, combine the remaining yogurt mixture and the soft butter. Mix well using a whisk or an electric mixer. Beat for 3-4 minutes. 
7. Preheat your oven to 180C/350F.
8. Add 1/3 of the flour mixture and mix in until just combined.
9. Add 1/2 the egg mixture and mix till combined.
10. Add another third of the flour mixture and mix just until combined.
11. Add the remaining egg mixture and incorporate.
12. Add the last of the flour mixture and mix until just combined. Do not over mix.
13. Into your prepared tin, spoon half of the cake batter and spread it in an even layer.
14. Sprinkle the top of the cake batter with all halved cranberries.
15. Cover the cranberries with the remaining cake batter and spread it evenly.
16. Sprinkle the top of the cake with all the streusel topping.
17. Bake in your preheated oven for 45-50 minutes or until the cake is risen and golden and a skewer entered into the center of the cake comes out clean. The cake will fall a little as it cools. 
18. Remove from the oven and allow to cool for 10 minutes before releasing from the spring-form tin.
19. Transfer to a wire rack to cool.

This cake tasted best when it was slightly warm. I had no complaints the next morning either. The cake was amazingly delicious the next day too. Every one, including my 20 month old who doesn't have a sweet tooth, loved it.
The cake is not too sweet. Light, soft cake, tart berries and crunchy nuts - a taste of heaven! The tart cranberries and the crunchy hazelnuts and the nuttiness of the flax meal makes for an amazing combination of textures and flavors.

If you have company coming over, or are planning a brunch or an indulgent breakfast, this is the recipe for you. Make this and please write to me here or on my Facebook page, share a picture with me, and let me know how much you loved it! I just know you'll love it! Until next time :)
Pin It

Saturday, September 6, 2014

Healthy Banana Blueberry Breakfast Cake with Pecan Crumb

Pin It
I know I've said it before, and I'll say it again - I love breakfast baking!
This recipe is pretty special. Awesome for breakfast, tea time or just anytime you feel like snacking on something sweet. This recipe happened because I was stuck with a couple of really overripe bananas and I wanted to do something new with them. Those blackish, smelly overripe bananas are the best, aren't they?

The recipe looks a like it has a lot of ingredients, but once you've assembled all of them, the cake comes together easily. If you want it with fewer ingredients, and not as healthy, I've linked to the original recipe below. 

Healthy Banana Blueberry Breakfast Cake with Pecan Crumb
Adapted from this recipe on Food Network
Ingredients 
3/4 cup all purpose flour
3/4 cup whole wheat flour
1/4 cup wheat bran
1 tsp baking soda
3/4 tsp baking powder
1/2 tsp cinnamon powder 
1/4 tsp freshly grated cinnamon
1 scant tsp salt
1/3 cup sugar 
1/4 cup dark brown sugar 
1/2 cup olive oil (NOT extra virgin)
2 tsp vanilla 
2 large eggs
2 large overripe bananas, peeled & mashed well
1 cup frozen blueberries 
Crumb topping 
4 tbsp all purpose flour 
1 heaped tbsp wheat bran
1 tbsp dark brown sugar
1 tbsp sugar 
2 tbsp cold unsalted butter
1/4 cup pecans, chopped

Method 
1. In a large bowl, combine the flours, bran, baking soda, baking powder, spices and salt. Stir well to combine and set aside. 
2. Whisk the oil and sugars together in medium bowl. 
3. Whisk in the vanilla and eggs. 
4. Add the mashed banana and mix in well. 
5. Make a well in the center of the dry ingredients and pour in the wet mixture. 
6. Stir well until just combined. 
7. Stir in the blueberries. 
8. Pour or spoon the batter into a 7 inch round cake tin that has been greased and floured, and the bottom lined with a parchment paper circle. I used a disposable cake pan this time and so I didn't bother with any of that. 
9. Combine the flour, sugars and butter for the crumb topping in a small bowl. Using the tips of your fingers, work the mixture until it resembles fine crumbs. Don't knead or press the mixture together. You want it to be a light and crumbly. Gently mix in the chopped pecans 
10. Sprinkle the crumb mixture over the top of the cake in an even layer. 
11. Bake in an oven preheated to 180C/350F for 40-50 minutes or until a skewer inserted into the center of the cake comes out clean. It may take a little longer depending on your oven. 
12. Remove from the oven and allow to cool in the pan for 10 minutes before unmolding, gently slicing and serving. 
This cake is just so amazingly moist! When I cut the cake, the knife went through like a hot knife through butter! At that point, I was sure I was cutting through raw cake. Cooked cake couldn't be THAT soft! But it sliced beautifully, was cooked all the way through and was just so good!

The sweetness was also just right! The crumb is slightly sweeter than the cake and it all balances it out perfectly. The bursts of blueberry throughout the cake is just amazing!
All this, plus the fact  the whole wheat flour, bran, bananas, berries and nuts are so good for you, means that you must make this for your family soon! You won't regret it. I promise!

Pin It

Friday, August 29, 2014

Cinnamon Pecan Rolls with Salted Maple Glaze

Pin It
I recently became the proud owner of my very own Kitchenaid stand mixer. She's red and shiny and oh so beautiful! I've always wanted one, and I thank God for answered prayers and thank my family for fulfilling my dream!

As soon as Scarlett (yes, that's her name!) first arrived, I wondered about what to make first in my beauty of a machine. A simple but yummy loaf of bread? Some delicious, wholesome oatmeal cookies? Nah. I wanted to make something decadent and gooey and special. Cinnamon rolls, of course!
This cinnamon roll recipe is from the Kitchenaid cookbook, and it is pretty darn good! I adapted it to suit the ingredients I had available and it turned out awesome. A fabulous way to inaugurate a new machine!

Cinnamon Pecan Rolls w/ Maple Glaze
Adapted from the Kitchenaid cookbook
Ingredients
Sweet Dough:
3/4 cup milk, at room temperature
1/2 cup granulated sugar
1 1/4 tsp salt
1/2 cup butter
2 tbsp active dry yeast
1/2 cup warm water (110F)
3 large eggs 
6-6 1/2 cups all purpose flour 
Filling:
1 cup light brown sugar
1/2 cup granulated sugar
1/2 cup butter, softened
1 1/2 tbsp cinnamon powder
1/4 cup flour
1/2 cup chopped pecans

Method
1. Combine milk, sugar, salt and butter in a saucepan and heat gently until the butter has dissolved. Set aside to cool down completely. Stir in the eggs and mix till incorporated. 
2. In a large bowl, combine the yeast and the warm water and set aside for 10 minutes until the yeast is bubbly and frothy. If it isn't, there's either something wrong with your yeast or the water was too hot or too cold. If this is the case, discard the mixture and start over. If the problem is the yeast, you may need to buy a fresh pack.   
3. When the milk mixture is barely warm, combine it with the bubbly yeast mixture and stir to combine. 
4. Add 5 cups of flour and knead using your stand mixer for 5 mins. Add the remaining flour, 1/3 cup at a time until the dough doesn't stick to the sides of the bowl, but still sticks to the bottom. Knead for 5 minutes. 
If you're kneading by hand, starting with 5 cups, knead the dough adding flour until you have a slightly tacky dough. Too much flour will make your dough too dry. You want dough that is sticky but still can be kneaded. 
5. Gently coat the ball of dough with oil and place in a greased bowl covered with cling film for 1-2 hours and allow it to double in volume. 
6. Punch down and roll out into a 10" by 24" rectangle. 
7. Combine the sugars for the filling with the softened butter, cinnamon powder and flour. Stir well to combine. 
8. Spread this mixture evenly over the rolled out dough. 
9. Roll the dough tightly towards you into a 24" long roll or log. 
10. Using a sharp knife, slice the log into 24 slices. 
11. Place the rolls flat on one or two baking sheets, cover with a clean kitchen towel and allow to rise for 45 minutes. After 30 minutes, begin to preheat the oven to 180C/350F. 
12. Bake for 25 minutes until cooked through and slightly golden. 
13. Glaze while still warm. 

This would be awesome with a cream cheese glaze but I didn't have any cream cheese at home, and so I went with a salted maple glaze and it was AWESOME!

Salted Maple Glaze
1 1/2 cups powdered sugar
1 tsp maple extract 
2 tbsp melted butter
1/8 tsp salt
2 tbsp milk, or more as needed

Combine the melted butter, maple extract, milk and salt. Add in the powdered sugar and stir till smooth and glossy. If needed add some more milk 1 tbsp at a time. Pour evenly over the cinnamon rolls and enjoy!


These rolls were devoured in record time and both Scarlett and I were congratulated on a job well done! I've loved owning her and we've made a LOT of yummy stuff together since then. Here's to a long and happy life to Scarlett!

I hope you try this recipe and that you love these rolls as much as we did!

Until next time...


Pin It
Real Time Web Analytics