Saturday, September 27, 2014

Awesome Chocolate Chip Cookies

Pin It
When I wrote the post with the recipe I shared of the Amish Chocolate Chip Cookies, I shared how I end up making oatmeal cookies every time I start making chocolate chip cookies. Those cookies cured me of that for a while, and then I went back to oatmeal cookies. But the other day, I wanted to make classic chocolate chip cookies and so I tried this recipe. And no one complained about the missing oatmeal.
This recipe makes a lot of cookies, and they were all gone in less than 2 days. We just couldn't stop eating them! Even my husband who watches everything he eats (unlike me!), enjoyed quite a few of these beauties!
At first bite, it feels like the cookie is a little too sweet. You feel you won't be able to eat more that one. But before you realize it, you've eaten 2 or maybe 6, and you're wondering how you're able to when it is so sweet. Don't feel too bad. Hey - its not all unhealthy, you know? Dark chocolate and pecans are good for you! They're considered health food! So there...

Awesome Chocolate Chip Cookies
Adapted from this recipe on allrecipes.com
Ingredients
1 cup unsalted butter, softened
3/4 cup granulated sugar
1 packed cup light brown sugar
2 eggs
2 tsp vanilla extract
1 tsp baking soda
2 tsp hot water
3 cups all purpose flour
1/2 tsp salt
1/2 tsp ground cinnamon
1 cup chopped dark chocolate or dark chocolate chips
1 cup chopped milk chocolate or milk chocolate chips
1 cup chopped pecans

Method
1. Preheat the oven to 180C/350F.
2. In a large bowl, cream the butter and the sugars until light and fluffy.
3. Beat in the eggs, one at a time, until the mixture is creamy and light.
4. Beat in the vanilla.
5. In a small cup, dissolve the baking soda in the hot water. Add this to the batter and mix in well.
6. Add the salt and ground cinnamon to the flour and mix well.
7. Add the flour to the batter and mix until combined.
8. Stir in the chocolate chunks and nuts.
9. Drop large tablespoonfuls of the batter onto an un-greased baking sheet. Allow a distance of at least 2 inches between each cookie dough mound.
10. Bake in the preheated oven for about 10 minutes, or until the edges are well browned.
11. Remove from the oven and allow to rest on the pan for 2-3 minutes.
12. Using a flat metal spoon or spatula, remove each cookie gently from the baking sheet and transfer to a cooling rack.
13. When completely cool, transfer to an airtight container for storage.
14. Eat.
Unlike the Amish Chocolate Chip Puff Cookies, these cookies are dense and chewy. Seriously good. I would go as far as saying - these are the BEST chocolate chip cookies! And they're highly addictive.
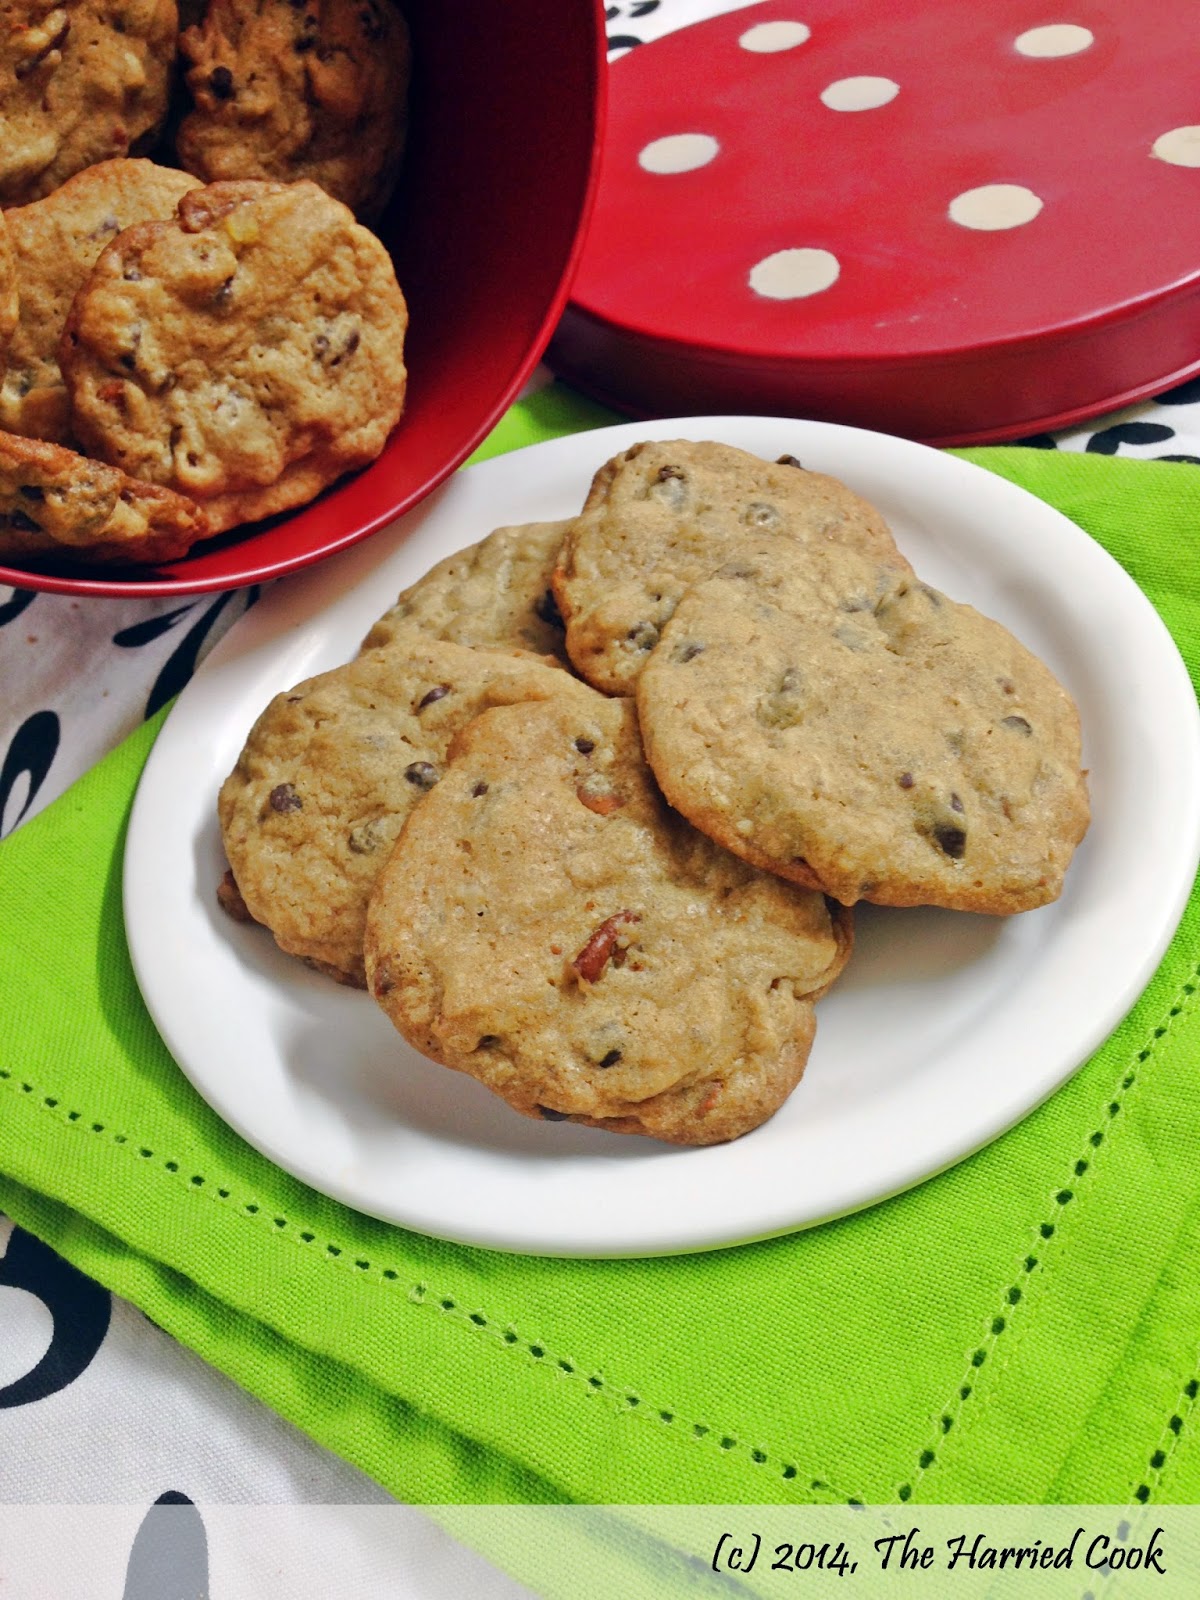
The edges and outside are nice and crunchy and they give way easily to that chewy, chocolaty center. I love the nuts in this cookie too. I've made it with pecans and with walnuts, and while I prefer the pecan version, most people seem to favor the walnuts in this particular cookies.

As I said earlier, this recipe makes a LOT of cookies. About 48 cookies to be exact. Feel free to halve the recipe if you don't want to drown in cookies. Pecans or walnuts, these cookies need to be made and enjoyed! I hope you like them as much as we did!

Until next time...


Pin It

Friday, September 26, 2014

Review: Bangali Bhuribhoj at Paprika, Courtyard Marriott, Chennai

Pin It
After a really, really long time, I'm putting up a review post. These days we're eating out less, and when we do, we rarely have the time to take pictures.

This week I spent a pleasant evening with a group of food bloggers from Chennai Food Guide at a preview dinner at the Paprika restaurant, at the Courtyard Marriott in Chennai. We were there to get an advance taste of their Bangali Bhuribhoj Food Festival - The Divine Taste of Bengal. I was quite excited because while I am quite familiar with many of the Indian cuisines, I am not very familiar with the cuisine of Bengal - except for the sweets, course! Bengali sweets are among my favorites when it comes to Indian sweets.

I sampled almost everything they had in offer that evening and I was told they had more dishes planned for when the food festival started. The buffet spread features not just Bengali cuisine but the usual continental and European cuisines as well to make sure every palate is catered to.

I skipped the soup like I usually do. They had a Chicken shorba on offer and the other reviewers said it was fine, but not fabulous. Among the Bengali starters, the thing that struck me as odd was that many of the starters were the same preparation - there was a eggplant variant, an egg and potato variant and a mutton mince variant of the famous bengali 'chop' or what we here in Chennai call a Bajji. It was kind of an overload. I enjoyed the flavor or all three though - especially the egg and potato version, which is something I am not used to. We do the egg but rarely with seasoned mashed potato thrown it. It was really nice!

The other stand out dishes for me were the mutton gravy (I forgot the name!) and the chicken gravy called Murghi Jhol. The mutton was tender, albeit a little too bony, and the gravy was tasty. The chicken was cooked to perfection and well seasoned. The fish gravy was the one that at first appealed to me the most, considering I love seafood, but personally it wasn't a favorite for me. You see, traditionally the fishes most commonly used are river fish which tend to be a little too bony. It isn't really possible to de-bone these fish, and it doesn't make eating it an easy task. If you don't mind ditching your fork and knife and getting your fingers dirty, the curry is tasty enough to make an effort! There were some regular rotis, naans, steamed rice and a pulao to go with the curries.


The fish biriyani was quite an interesting part of the menu for me. The fish in the biriyani was nicely cooked and flaky and tender unlike the fish in the curry. I enjoyed the fish. The biriyani was tasty too but slightly underseasoned. A little salt and a little more spice would have made the biriyani just perfect!

Among the vegetarian dishes, the stand out for me was the Aloo Poshto. I really enjoyed the flavor of that dish and it made me go back for seconds.

I also sampled some non-Bengali fare out of curiosity and I just loved the grilled tenderloin with peppers. It was really tender and perfectly cooked!
As I said earlier, Bengali sweets are my favorite kind of Indian sweets and I love love love the roshgulla! The roshgulla was nice here and so was the khoa filled cham-chams. The jalebis were very good and had that tangy finish that I love so much. I loved watching the jalebis and mapua being made fresh at the live dessert counter. The malpua which I was really anticipating was good in flavor but a little too rubbery for me to able to finish it. I wish it had been a little more tender and I would have polished it off.

This food festival was a taste of good Bengali home food, and I think I just might go back to sample the mishti doi and sandesh that I heard might be served in the coming days. You know me - desserts all the way! Chef even mentioned that there will be variations in the menu from day to day, and I think that would be awesome.

Bangali Bhuribhoj at the Courtyard Marriott is on from September 25th - October 3rd for dinner only, and is priced at Rs. 1250 per head plus taxes. Check it out! 
Pin It

Saturday, September 20, 2014

Cranberry Hazelnut Coffee Cake

Pin It
This is my favorite cake at the moment. It is PERFECT. I don't want those fancy cakes with fondant. I don't want a pretty cake with frosting. Heck, I don't even need a glaze. This is my kinda cake. Loaded with flavor, texture and just so much goodness!
I baked it in the evening yesterday, with the intention of cake for breakfast on Saturday morning. Saturday breakfasts are usually special around here. If I know everyone has the day off, I usually make something indulgent. So, my plan was that I would make the cake on Friday evening, photograph it in the morning when the light was good, and then serve it for breakfast. Well, we all know about best laid plans...

One look at the cake, and my husband wanted a slice for dessert after dinner. My daughter wanted a nibble and I was drooling every time I walked past the cake platter. So I did what I had to. Made the ultimate sacrifice. Who needs natural light!!? I just clicked a few shots and we dug in. It is an amazing cake! We had it for breakfast again in the morning....
Make sure all your ingredients are at room temperature for this recipe. You can replace the heavy cream and yogurt mixture with sour cream. I didn't have sour cream, and this worked great for me! If you're using sour cream, just use one 8 oz tub.

Cranberry Hazelnut Coffee Cake
Adapted from this recipe on myrecipes.com
Ingredients
115 grams or 1/2 cup heavy cream
115 grams or scant 1/2 cup natural yogurt
1 tsp vinegar
185 grams or 1 1/2 cups all purpose flour
25 grams or 3 tbsp corn starch
200 grams or 1 cup granulated sugar
1 1/2 tsp baking powder
1/4 tsp baking soda
1/4 tsp salt
1 large egg plus 1 large egg white
1 tsp vanilla extract
70 grams or 5 tbsp butter, softened
2 cups fresh or frozen cranberries, cleaned and halved

Streusel Topping:
30 grams or 1/4 cup sifted flour
1 tbsp flax seed powder
50 grams of 1/4 cup brown sugar
1/4 cup chopped hazelnuts
1/2 tsp ground cinnamon
15 grams or 1 tbsp butter, melted
A pinch of salt

Method
1. Prepare a 9" spring form cake tin by lining the base with grease proof parchment paper and brushing the sides with melted but or spraying with cooking spray.
2. In a small bowl, combine the yogurt, heavy cream and vinegar. Set aside while you get the rest of the ingredients assembled.
3. Combine all the streusel topping ingredients and set aside.
4. In a medium bowl, combine the flour, corn starch, sugar, baking powder, baking soda and salt. Whisk to combine.
5. In another medium bowl, whisk together the egg, egg white, vanilla and 1/4 cup of the yogurt mixture. Whisk to combine.
6. In a large bowl, combine the remaining yogurt mixture and the soft butter. Mix well using a whisk or an electric mixer. Beat for 3-4 minutes. 
7. Preheat your oven to 180C/350F.
8. Add 1/3 of the flour mixture and mix in until just combined.
9. Add 1/2 the egg mixture and mix till combined.
10. Add another third of the flour mixture and mix just until combined.
11. Add the remaining egg mixture and incorporate.
12. Add the last of the flour mixture and mix until just combined. Do not over mix.
13. Into your prepared tin, spoon half of the cake batter and spread it in an even layer.
14. Sprinkle the top of the cake batter with all halved cranberries.
15. Cover the cranberries with the remaining cake batter and spread it evenly.
16. Sprinkle the top of the cake with all the streusel topping.
17. Bake in your preheated oven for 45-50 minutes or until the cake is risen and golden and a skewer entered into the center of the cake comes out clean. The cake will fall a little as it cools. 
18. Remove from the oven and allow to cool for 10 minutes before releasing from the spring-form tin.
19. Transfer to a wire rack to cool.

This cake tasted best when it was slightly warm. I had no complaints the next morning either. The cake was amazingly delicious the next day too. Every one, including my 20 month old who doesn't have a sweet tooth, loved it.
The cake is not too sweet. Light, soft cake, tart berries and crunchy nuts - a taste of heaven! The tart cranberries and the crunchy hazelnuts and the nuttiness of the flax meal makes for an amazing combination of textures and flavors.

If you have company coming over, or are planning a brunch or an indulgent breakfast, this is the recipe for you. Make this and please write to me here or on my Facebook page, share a picture with me, and let me know how much you loved it! I just know you'll love it! Until next time :)
Pin It

Wednesday, September 17, 2014

DIY Series: Homemade Pancake Syrup

Pin It
This pancake syrup was made because I just had to! For some reason, the price of good pancake syrup TRIPLED in a matter of weeks. I am not really the kind of person who pinches pennies, but I couldn't imagine paying that much for a bottle of syrup!

We use syrup at least once a week around here. When I decided to look up the recipe for syrup, I just couldn't believe my eyes. It was SO SIMPLE! I looked at the ingredients listed at the back of the syrup bottle and there were around 15 ingredients listed - most of which had chemically names. This homemade syrup has 6 ingredients, including 2 optional ingredient and water. And I guarantee you won't taste the difference.
The first time I made this syrup was late one night, I think it was around 10:30 PM, when I realized that I had everything ready for my overnight waffles but I had run out of syrup. I was telling my husband that I was probably going to make some caramel sauce or coulis for breakfast because we were out of syrup. During the night, I found this recipe, made it in under 10 minutes and let it cool overnight. The next morning, my husband was halfway through his waffles when he suddenly asked, "Where did you get the syrup? I thought we were out. You couldn't have gone out that late at night! Did you find an unopened bottle in your pantry?" When I told him it was homemade, he was really impressed! He couldn't even tell that it was different from the store bought brand we use.

I've made the both versions - with and without the maple extract - and while the maple flavor is yummy, the vanilla one is just as good, and no one complained about the missing maple flavor. 

Pancake Syrup
Slightly adapted from Taste of Home
Ingredients
1 cup brown sugar, tightly packed
1 cup white sugar
A large pinch of salt, (optional but recommended)
1 cup water
1 tsp vanilla extract
1 tsp maple extract, optional

Method
1. Combine the brown sugar, white sugar, salt and water in a heavy bottom saucepan.
2. Cooking on medium heat, bring the syrup to a boil while stirring frequently.
3. Simmer for 5 minutes.
4. Remove from heat and stir in the vanilla extract and the maple extract, if you're using it.
5. Allow to cool and transfer to a bottle for use.
If you like your syrup pancake thick, reduce the water in the recipe to 3/4 cup. We like our syrup a little runny and so these proportions work well for us. I sometimes add a few extra tablespoons of water. Just remember that the syrup thickens as it cools. So don't let it cook down too much. You could even experiment with other flavors of extracts!

There are a few popular brands like Aunt Jemima, Log Cabin and American garden that make this kind of syrup. It is no substitute for maple syrup, really. But when real maple syrup is very expensive here, and while we are so blessed that we receive a few bottles a year from abroad, it is definitely not enough to last us through the year.
This recipe is just amazing! If you use pancake syrup at home, this is sometime you MUST try. You won't regret it! 
Pin It

Saturday, September 13, 2014

Apple & Oat Muffins

Pin It
Ah - muffins! My favorite of all baked goods. I don't think it is a secret how much I love muffins. I mean, just look at all the muffin recipes on my blog! And I have so many more muffin recipes I want to share with you.
Today, I want to share a recipe for a simple and healthy muffin recipe. Flavorful, really moist and laced with tart apple and warm spice - I just love this one.

Apple & Oat Muffins
Makes 12 muffins
Adapted from this recipe on Taste.com.au
Ingredients
1 1/2 cups all purpose flour
1/2 cup whole wheat flour
3 tsp baking powder
3/4 tsp salt
1 tsp cinnamon powder
1/4 tsp nutmeg powder
3/4 cup light brown sugar, tightly packed
1/2 cup rolled oats, plus 2 tbsp for topping
2 eggs, at room temperature
1 1/2 cups natural yoghurt, at room temperature
1 1/2 tsp vanilla extract
100 ml canola oil
1-2 crisp apples, peeled, cored and grated (I used one Granny Smith and one Red Delicious)

Method
1. Preheat the oven to 180C/350F and line your muffin tray with liners, or grease & flour them.
2. In a large bowl, combine the flours, baking powder, salt, cinnamon, nutmeg, sugar, and the 1/2 cup of oats.
3. In a small bowl, lightly whisk the eggs.
4. Add the yoghurt, vanilla and oil and whisk well till smooth.
5. Make a well in the center of the dry ingredients and pour the wet ingredients in. Stir just until combined. Don't over-mix it or you'll be stuck with tough muffins.
6. Stir in the sliced apple.
7. Spoon the batter into the prepared muffin tins, filling each cup not more that 3/4 full.
8. Sprinkle the reserved oats over the tops of the muffins.
9. Bake for 20-25 minutes or until cooked through and lightly golden brown.
10. Remove from the oven and allow to cool for 10 minutes before transferring to the cooling rack.Allow the muffins to cool down till they're just warm before serving.
As in the case of most muffin recipes, these muffins freeze great!

Because we had an early day the next day, the previous evening, I grated the apples and refrigerated them in an airtight box. I also combined all the dry ingredient in a jar. In the morning, I let the apples sit out for 20 minutes while I got the batter mixed and the oven preheated. I just stirred together the wet ingredients and added it to the dry ingredients, stirred in the apples, filled, baked and the muffins were done in 20 minutes.
Until next time!! :)
Pin It

Saturday, September 6, 2014

Healthy Banana Blueberry Breakfast Cake with Pecan Crumb

Pin It
I know I've said it before, and I'll say it again - I love breakfast baking!
This recipe is pretty special. Awesome for breakfast, tea time or just anytime you feel like snacking on something sweet. This recipe happened because I was stuck with a couple of really overripe bananas and I wanted to do something new with them. Those blackish, smelly overripe bananas are the best, aren't they?

The recipe looks a like it has a lot of ingredients, but once you've assembled all of them, the cake comes together easily. If you want it with fewer ingredients, and not as healthy, I've linked to the original recipe below. 

Healthy Banana Blueberry Breakfast Cake with Pecan Crumb
Adapted from this recipe on Food Network
Ingredients 
3/4 cup all purpose flour
3/4 cup whole wheat flour
1/4 cup wheat bran
1 tsp baking soda
3/4 tsp baking powder
1/2 tsp cinnamon powder 
1/4 tsp freshly grated cinnamon
1 scant tsp salt
1/3 cup sugar 
1/4 cup dark brown sugar 
1/2 cup olive oil (NOT extra virgin)
2 tsp vanilla 
2 large eggs
2 large overripe bananas, peeled & mashed well
1 cup frozen blueberries 
Crumb topping 
4 tbsp all purpose flour 
1 heaped tbsp wheat bran
1 tbsp dark brown sugar
1 tbsp sugar 
2 tbsp cold unsalted butter
1/4 cup pecans, chopped

Method 
1. In a large bowl, combine the flours, bran, baking soda, baking powder, spices and salt. Stir well to combine and set aside. 
2. Whisk the oil and sugars together in medium bowl. 
3. Whisk in the vanilla and eggs. 
4. Add the mashed banana and mix in well. 
5. Make a well in the center of the dry ingredients and pour in the wet mixture. 
6. Stir well until just combined. 
7. Stir in the blueberries. 
8. Pour or spoon the batter into a 7 inch round cake tin that has been greased and floured, and the bottom lined with a parchment paper circle. I used a disposable cake pan this time and so I didn't bother with any of that. 
9. Combine the flour, sugars and butter for the crumb topping in a small bowl. Using the tips of your fingers, work the mixture until it resembles fine crumbs. Don't knead or press the mixture together. You want it to be a light and crumbly. Gently mix in the chopped pecans 
10. Sprinkle the crumb mixture over the top of the cake in an even layer. 
11. Bake in an oven preheated to 180C/350F for 40-50 minutes or until a skewer inserted into the center of the cake comes out clean. It may take a little longer depending on your oven. 
12. Remove from the oven and allow to cool in the pan for 10 minutes before unmolding, gently slicing and serving. 
This cake is just so amazingly moist! When I cut the cake, the knife went through like a hot knife through butter! At that point, I was sure I was cutting through raw cake. Cooked cake couldn't be THAT soft! But it sliced beautifully, was cooked all the way through and was just so good!

The sweetness was also just right! The crumb is slightly sweeter than the cake and it all balances it out perfectly. The bursts of blueberry throughout the cake is just amazing!
All this, plus the fact  the whole wheat flour, bran, bananas, berries and nuts are so good for you, means that you must make this for your family soon! You won't regret it. I promise!

Pin It
Real Time Web Analytics