Showing posts with label Chocolate. Show all posts

Monday, July 13, 2015

Secret Recipe Club: Brown Butter Granola Breakfast Cookies

Pin It
For the last few months, I've only been blogging once a month with my Secret Recipe Club group. I hate that I am not posting regularly (owing to many reasons), but I am grateful to SRC for keeping me posting at least once a month. But I have to take a break even from SRC because it just isn't fair to the other members when I'm not posting regularly. August will be my last SRC post. I will be applying for a break from the group. I hope to be back to blogging in a few months.

This month, I just LOVED the blog I was assigned to. Not only did I find some awesome, mouth-watering recipes, but I also found so much that built me up in my spirit. Jessie Weaver is a gorgeous woman of faith, an awesome mom, wife and cook and I don't think you will be disappointed with the range of posts you will discover on her amazing blog. Thank you for everything, Jessie. I love what you write, and you have a regular reader in me!

If you've visited my blog before, you probably know all my love for breakfast baking. It's more like an obsession. Muffins, scones, rolls, quick breads - I've done it all and I do it waaaaay more often than I care to admit. I found a few awesome recipes in these categories on Jessie's blog - the gingerbread white chocolate muffins, the chai spice scones (another SRC recipe) and a few more, but there was one that grabbed my attention. I saw the words 'brown butter' in the title, and I was sold.
Brown Butter Granola Breakfast Cookies
Adapted from this recipe on jessieweaver.net
Ingredients
1 cup unsalted butter
3/4 cup honey
1 tsp salt
1 tsp baking soda
1 tsp cinnamon powder
1 tsp vanilla extract
2 eggs, lightly whisked
3/4 cup buttermilk
3 cups whole wheat flour (I used 2 cups wheat and 1 cup all-purpose)
1 cup granola (I used an unsweetened chunky one with slivered almonds, walnuts, raisins and oat clusters)
1 cup chocolate chips
1/2 cup oatmeal
3 tbsp coarse flaxseed meal

Method
1. Preheat your oven to 180C/350F and prepare a cookie sheet by lining with greaseproof paper or Silpat.
2. In a heavy-bottomed saucepan, melt the butter on low heat stirring until it is all melted. Allow it to keep cooking on low heat until the butter browns and gives off a heady, nutty aroma. This could take 10-12 minutes, and while it doesn't need stirring, you will need to watch it the whole time. It can go from browned to burnt in a matter of seconds.
3. Set the brown butter aside for 10 minutes to cool.
4. Stir in the honey, salt, baking soda, cinnamon powder and vanilla extract.
5. Add the eggs and buttermilk and stir well to combine.
6. Stir in the flour, granola, chocolate chips, oatmeal and flaxseed meal. Mix well.
7. Using an ice cream scoop, scoop out the cookie dough onto your prepared baking sheet. Allow some space between each cookie and the next. If you're shaping them by hand, form 2 inch sized balls and slightly flatten on the baking sheet. I got about 30 large cookies from this recipe.
8. Bake in batches, allowing each batch to bake 15-18 minutes. The cookies will be golden brown on the bottom and slightly risen.
9. Allow to cool on the sheet before transferring to a wire rack to cool completely.
10. Serve fresh if possible. Store leftovers in an airtight container.
I didn't make many changes to this recipes. Just added some oatmeal instead of the oat bran she recommends (I didn't have oat bran at hand), and some flaxseed meal. And I just mixed everything in the same saucepan in which I made the brown butter. It really is an amazing one-bowl recipe!

All of us absolutely loved this recipe! The cookies are not too sweet, have an amazing aroma and flavor and texture - crispy on the outside with a soft center, studded with nuts, raisins and chocolate chips. How could breakfast get any better! Thank you, Jessie! We LOVED this recipe :)

I will be back in August for one last SRC post. See you all then!


Pin It

Friday, January 30, 2015

Fudgy Lime Curd Brownies

Pin It
I've been dying to post this recipe! I had it all ready to post about a week ago, and I just had some editing to do. And then I got sick. And really sick. It took me a week to get back on my feet, and so, here I am! Better late than never, huh?
These brownies are phenomenal! They happened because I got this weird craving (no I'm not pregnant again!) for something with dark chocolate and lime or lemon. I don't know why and how I craved this unusual combination, but I was just determined to do something about it. I have this awesome baker friend whose opinion I like to get. When I told her what I had planned, she said "Don't do it!" Gosh. I was confused and almost didn't make these. But, I'm happy to report that for once, she was wrong. And she rarely is! 
This recipe totally, totally rocks! The base recipe for the brownies is one of my favourite cocoa brownie recipes - Alice Medrich's best cocoa brownies. For the lime element, I used my favourite homemade lime curd recipe. I'm sure this would work just as well with good quality store-bought lime or lemon curd too. Orange curd would work too, if that floats your boat. And the rest is history.

Fudgy Lime Curd Brownies
Adapted from this recipe by Alice Medrich
Ingredients
1 1/4 sticks or 140g of unsalted butter
1 1/4 cups or 250g of sugar
1 cup or 120g cocoa powder 
1/4 tsp salt
1 tsp vanilla
2 large eggs, cold
1/2 cup or 63g all-purpose flour
1/3 - 1/2 cup lime (or lemon) curd 

Method
1. Preheat the oven to 180C/350F. Grease a 7" or 8" square tin and line with parchment paper covering the base and all the sides. To do this, cut out two long pieces of paper. Press one into the tin, leaving an overhang on opposite sides. Press it in well so that the paper is sticking to the base and the two opposite sides. Now do the same thing with the other paper, covering the base and the remaining sides. Again make sure you leave an overhang on the sides. I've done this with plain old aluminium foil, and it works just as well. 
2. In a heavy bottomed saucepan, melt the butter along with the sugar, cocoa powder, and salt. Stir until the butter has completely dissolved and the mixture has heated through and is feels hot when you stick your finger in the mixture. Set aside to cool until warm - about 15 minutes.
3. Stir in the vanilla and beat well to incorporate.
4. Beat in the eggs, one at a time, making sure you beat well after each addition. Spend some time on this step and beat for at least 3-4 minutes vigorously. 
5. Add the flour to this mixture and stir until you can't see flour streaks anymore. At this point. Alice Medrich recommends beating the mixture with forty vigorous strokes. So really get those arm muscles working and beat the batter at least 40 strokes. I think we may have gotten in 60-70 strokes.
6. Pour half the batter into the prepared tin. Smooth out to make sure you get the batter into the corners.
7. Dollop the lemon curd all over the surface of the batter. Gently spread the curd so it is a fairly even layer. Don't beat it in but try to keep it as a distinct layer.
8. Top the lemon curd layer with the remaining brownie batter and smooth the surface.
9. Bake in the preheated oven for for about 20-25 minutes or until a toothpick inserted into the middle comes out with gloopy lemon curd and a slight moist brownie batter. 
10. Allow to cool completely before using the overhanging paper to lift out the brownies onto your work surface. 
11. Cut into 16 (or 25) squares. 
The combination was really awesome. This base brownie recipe is one of my favorites and gives you really deep, dark and fudgy brownies. This combined with the tart, oozy lemon curd cutting through the rich chocolate was just perfect. As always, I intentionally undercooked them. So getting perfect squares was impossible. But my husband said it best when he said "If you could cut the brownies into perfect squares, I probably wouldn't like them as much!" I guess we sacrificed looks for something totally decadent! 

I think some white chocolate chips would work great in the recipe. I'm not sure about what nuts would work here. Personally, I don't like any nuts in my brownies. I feel like ruins the fudgy texture I so crave and enjoy. If you try this recipe and decide to use nuts, please let me know if it works! 

You should try this recipe. I am sure you won't regret it!

Until next time! :) 
Pin It

Friday, November 7, 2014

Jaffa Cake Muffins

Pin It
I have never liked the combination of orange and chocolate. But when I saw this muffin recipe, I was intrigued by the unusual method of preparation, and the rave reviews that I read. And I just had to make them!
And hey - they're really good! The thing I liked the most is the fresh orange hit that you get from this muffin. I HATE fake orange flavoured stuff. Orange candy. Orange soda snd orange flavoured anything actually. But fresh oranges are awesome in my book. And when you read this recipe, you'll see that this is as fresh as it gets! 

Jaffa Cake Muffins
Adapted from this recipe 
Ingredients 
1 whole orange, quartered and deseeded 
1/2 cup fresh orange juice 
1/2 cup unsalted butter, at room temperature 
1 large egg
1 3/4 cup all purpose flour
1/2 cup sugar 
1 tsp baking powder 
3/4 tsp baking soda 
A pinch of salt
3oz or 85g of mini dark chocolate chips 

Method 
1. Preheat the oven to 180C/350F and prepare a 12 cup muffin tray by greasing the cups or lining with paper muffin cups. 
2. In a blender jar, purée the quartered orange - peel and all, and the orange juice until completely smooth. 
3. Add the butter and the egg and blitz for about 20 seconds until smooth. Transfer this mixture into a medium sized bowl. 
4. In a small bowl, stir together the flour, sugar, baking powder, baking soda and salt. 
5. Add this dry mixture to the purée and mix until completely combined. 
6. Gently stir in the chocolate chips. 
7. Divide the batter among the 12 muffin cups. 
8. Bake for about 18-20 minutes or until the tops of the muffins are lightly browned and spring back when touched. 
9. Remove from the oven and allow the muffins to cool in the tin for about 10 minutes before removing and serving. 

The intense orangyness is really surprisingly good. The original recipe calls for more sugar and when I tried that I found it way too sweet for us. So the next time I made it, I cut down the sugar by a third and found it a lot better. The chocolate chips also add to the sweetness. 

These muffins aren't dense. They're very cakey and light. Honestly, I prefer a dense muffin and I even had difficult referring to this as a muffin for a while. But whatever you choose to call it, I'm sure you'll enjoy it. 

If you are a fan of this orange-chocolate combination, you should totally try this recipe. And even if you're like me, and aren't a fan, you should still give it a try. You might be surprised. I was!

Until next time :) And watch out for my next Secret Recipe Club post on Monday! Cheers :)

Pin It

Monday, October 13, 2014

Secret Recipe Club: Chewy Red Velvet Cookies

Pin It
Can you believe I got to do TWO posts in my very first SRC month? I love Secret Recipe Club! One of the Group B bloggers wasn't able to do her post since she just had a little baby! How fun! Congrats! Enjoy your little one :)

The second site I was assigned to was Cheese Curd In Paradise! Wow. Ashley's SUCH a great cook, and has SOOOOO many lovely recipes. I loved looking at pictures of her little fella too... Such a cutie! Oh I must say I had such a hard time picking out a recipe I was going to make! I just kept bookmarking and going. It actually took me a few DAYS to find this recipe, but the minute I saw it, I knew this was the one for me! You know me and my love for Red Velvet, don't you?
Are you groaning "not another red velvet recipe"? Don't you dare! I may have done red velvet ice cream and red velvet madeleines and red velvet whoopie pies and even more red velvet stuff. Heck, I even have a recipe for a red velvet emergency - because that IS a real thing! But I have never made red velvet cookies before.

Chewy Red Velvet Cookies
Adapted from this recipe on Cheese Curd in Paradise
Ingredients
1/2 cup unsalted butter, softened
1/2 cup granulated sugar
1/2 cup brown sugar
1 egg
1 tsp vanilla
1/2 tsp red food coloring
1/2 tsp white vinegar
1 1/2 cups all purpose flour
1 tsp baking soda
1/4 tsp salt
1/3 cup cocoa powder
1/2 cup white chocolate chips

Method
1. Preheat the oven to 180C/350F and line a baking/cookie sheet with grease-proof paper.
2. Cream the butter and sugars together in a large bowl.
3. Beat in the egg and vanilla and beat until light and fluffy.
4. Stir in the food coloring
5. Stir in the vinegar.
6. Stir in the flour, baking soda, salt and cocoa powder and mix in well.
7. Fold in the white chocolate chips.
8. Drop the cookie dough using an ice cream scoop or large spoon. You want about 2 tbsp worth of dough for each cookie. Make sure you have a distance of at least 2 inches between the cookies.
9. Bake for 10-12 minutes.
10. Allow to cool on the pan for 3-4 minutes and then transfer to cooling rack to cool completely.
11. Store in an airtight container.
I love the dense, chewiness of these cookies. And I have always been a fan of white chocolate with red velvet and that's why I substituted the regular chocolate for white. My only major changes to the recipe were reducing the amount of food coloring, and adding a splash of vinegar. Somehow in my mind, red velvet recipes need to have some vinegar in them. I guess you could say I am a red velvet purist - if there's such a thing!
I loved visiting your site, Ashley! In the days that I spent browsing through your site, I have bookmarked quite a few more recipes to try! My favorites so far are your Bang Bang Chicken Skewers, the peanut butter popcorn - (which I'm planning to make this weekend!!!), and the Strawberry Basil Shortcakes - which sound divine! Thank you for sharing your awesome recipes with all of us! You are such a prolific cook...

I loved having two wonderful sites to explore and share with you on my very first month of SRC! Can't wait for my next Group B assignment!

You can visit my other SRC post for this month here.

Click on the cute froggy face below to see the other awesome recipes from SRC's Group B!


Pin It

Saturday, September 27, 2014

Awesome Chocolate Chip Cookies

Pin It
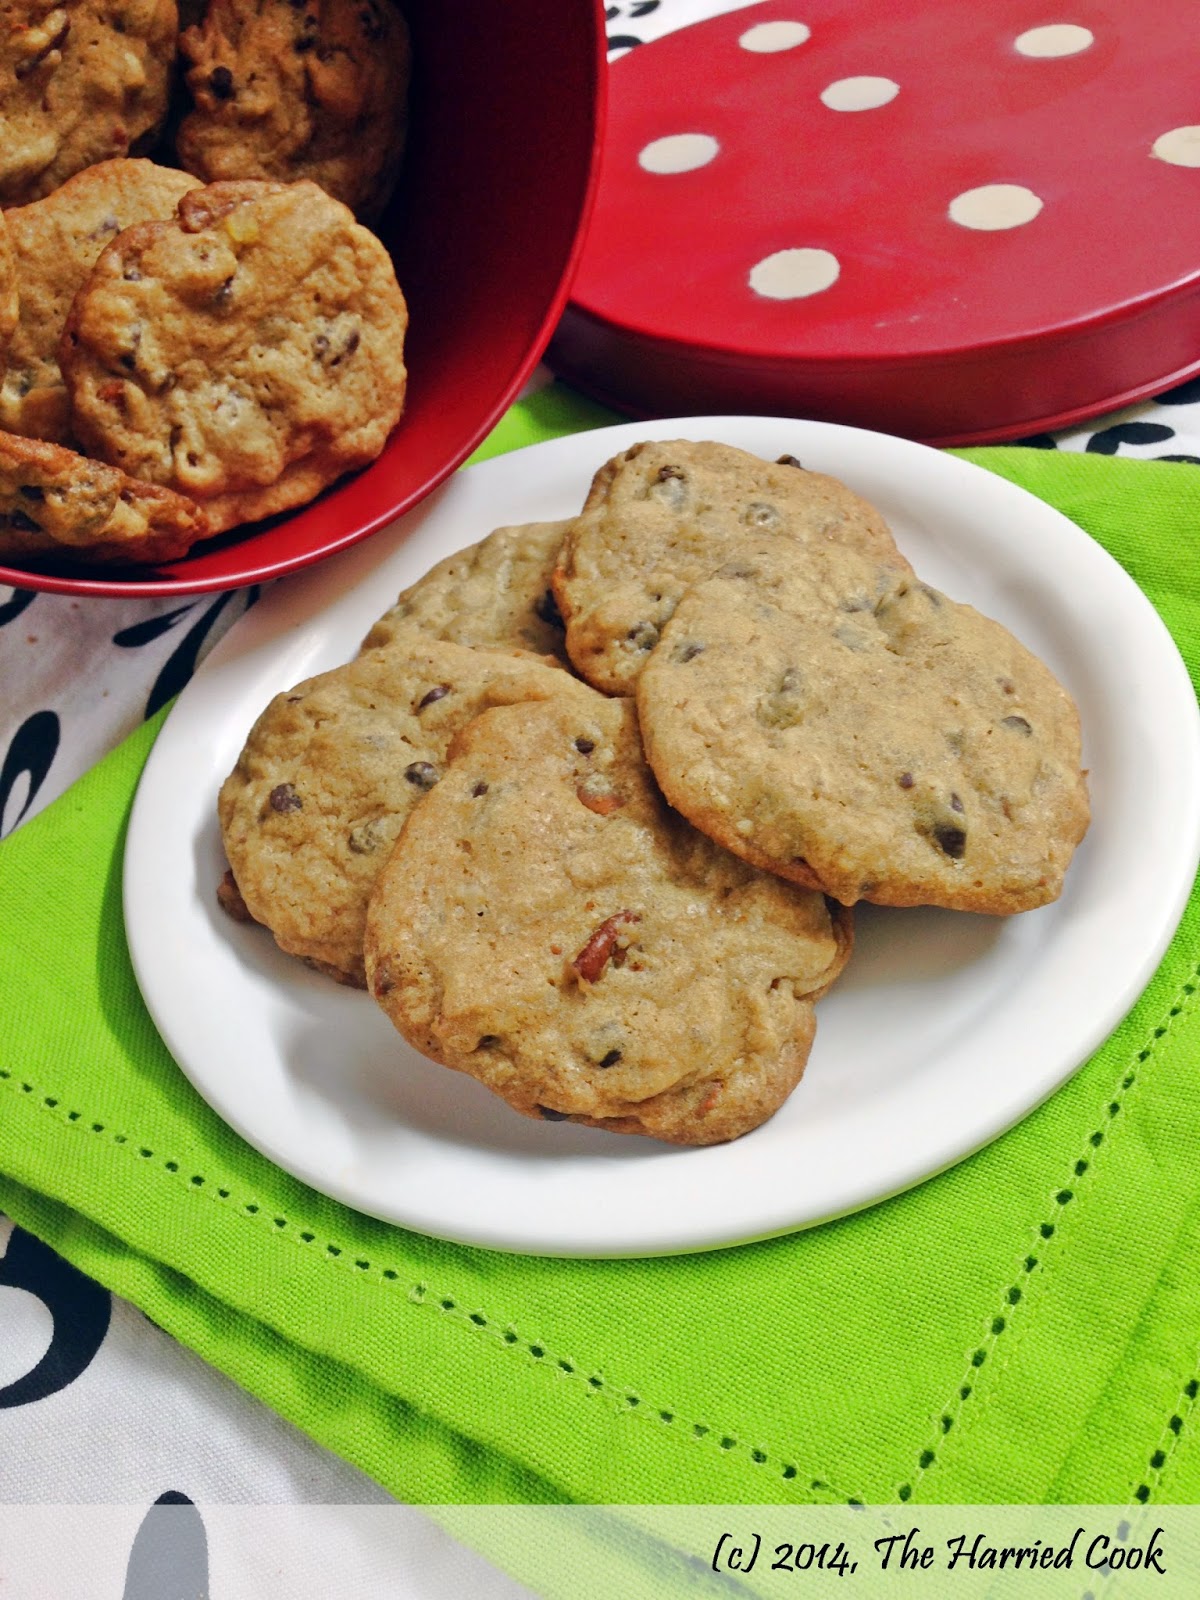
When I wrote the post with the recipe I shared of the Amish Chocolate Chip Cookies, I shared how I end up making oatmeal cookies every time I start making chocolate chip cookies. Those cookies cured me of that for a while, and then I went back to oatmeal cookies. But the other day, I wanted to make classic chocolate chip cookies and so I tried this recipe. And no one complained about the missing oatmeal.
This recipe makes a lot of cookies, and they were all gone in less than 2 days. We just couldn't stop eating them! Even my husband who watches everything he eats (unlike me!), enjoyed quite a few of these beauties!
At first bite, it feels like the cookie is a little too sweet. You feel you won't be able to eat more that one. But before you realize it, you've eaten 2 or maybe 6, and you're wondering how you're able to when it is so sweet. Don't feel too bad. Hey - its not all unhealthy, you know? Dark chocolate and pecans are good for you! They're considered health food! So there...

Awesome Chocolate Chip Cookies
Adapted from this recipe on allrecipes.com
Ingredients
1 cup unsalted butter, softened
3/4 cup granulated sugar
1 packed cup light brown sugar
2 eggs
2 tsp vanilla extract
1 tsp baking soda
2 tsp hot water
3 cups all purpose flour
1/2 tsp salt
1/2 tsp ground cinnamon
1 cup chopped dark chocolate or dark chocolate chips
1 cup chopped milk chocolate or milk chocolate chips
1 cup chopped pecans

Method
1. Preheat the oven to 180C/350F.
2. In a large bowl, cream the butter and the sugars until light and fluffy.
3. Beat in the eggs, one at a time, until the mixture is creamy and light.
4. Beat in the vanilla.
5. In a small cup, dissolve the baking soda in the hot water. Add this to the batter and mix in well.
6. Add the salt and ground cinnamon to the flour and mix well.
7. Add the flour to the batter and mix until combined.
8. Stir in the chocolate chunks and nuts.
9. Drop large tablespoonfuls of the batter onto an un-greased baking sheet. Allow a distance of at least 2 inches between each cookie dough mound.
10. Bake in the preheated oven for about 10 minutes, or until the edges are well browned.
11. Remove from the oven and allow to rest on the pan for 2-3 minutes.
12. Using a flat metal spoon or spatula, remove each cookie gently from the baking sheet and transfer to a cooling rack.
13. When completely cool, transfer to an airtight container for storage.
14. Eat.
Unlike the Amish Chocolate Chip Puff Cookies, these cookies are dense and chewy. Seriously good. I would go as far as saying - these are the BEST chocolate chip cookies! And they're highly addictive.
The edges and outside are nice and crunchy and they give way easily to that chewy, chocolaty center. I love the nuts in this cookie too. I've made it with pecans and with walnuts, and while I prefer the pecan version, most people seem to favor the walnuts in this particular cookies.

As I said earlier, this recipe makes a LOT of cookies. About 48 cookies to be exact. Feel free to halve the recipe if you don't want to drown in cookies. Pecans or walnuts, these cookies need to be made and enjoyed! I hope you like them as much as we did!

Until next time...


Pin It

Thursday, July 31, 2014

Emergency Red Velvet Mug Cakes

Pin It
Yes, that IS a real thing!

Haven't you ever had a red velvet emergency? 

If you've followed my blog from the beginning, you probably know how red velvet crazy I am! I've done a lot of red velvet posts. Heck, I had a whole week dedicated to the wonder that is red velvet. 

Lately, I've been hearing people say "oh this red velvet is just a fad. What's the big deal about it anyways?" I say they've been eating their red velvet at the wrong places! Good red velvet just cannot be dissed!! If it is the food coloring bothers you, as it often does me, just omit it! Or go easy on it. Most of the time, when I make red velvet just for the family, I skip the color altogether. Doesn't affect the taste at all!

So back to my emergency. This particular day, also know as today, I had two feverish kids with runny noses that wouldn't stop whining. It took me hours to get them to finish just half their lunches! The dog peed inside the house. In the midst of all this, I went to the supermarket and came back with three bagfulls and without the ONE thing I went for! Now, if that isn't a red velvet emergency, what is? Pray tell. 
Emergency Red Velvet Cakes
Makes 2 small coffee mug cakes
Adapted from a recipe by Teri Lyn Fisher found on buzzfeed
Ingredients
1 large egg
3 tbsp vegetable oil
1/2 tsp (or less) red food coloring
1 tsp vanilla
3 tbsp buttermilk (or whisked yoghurt)
1/4 cup granulated sugar
1-2 tbsp cocoa powder (I prefer less)
1/4 cup self raising flour
(Or 1/4 cup all purpose flour mixed with 1/4 slightly heaped tsp baking powder)
A pinch of salt
1/4 tsp apple cider (or white) vinegar 

Method
1. In a small bowl or a large mug or measuring jug, whisk together the first five ingredients till smooth. 
2. Add the sugar and cocoa powder and whisk till smooth. 
3. Add the remaining ingredients and stir till combined. 
4. Divide the batter between two coffee mugs. 
5. Microwave each cup separately for 1.5 minutes until the top of the cake is springy to the touch. Add another 30-60 seconds if needed. This will depend on the wattage of your microwave. 
6. Serve topped with cream cheese frosting, whipped cream or white chocolate ganache or just white chocolate shavings. 

This makes just enough for two and is extremely satisfying. As you can see, I topped it with just white chocolate shavings. I didn't have the energy or time to make anything more elaborate. 
The cake is amazing, and not just for a mug cake. It is a superior cake. It is super moist, amazingly flavorful and makes you go mmmmm. 

I settled down on the couch with a mug and spoon and I had barely taken two yummy spoonfuls when a pair of small hands carrying a pink spoon appeared out of nowhere, grabbed my mug and disappeared with a strange giggly-sniffly sound. Thankfully I had a back-up mug. Whew!
So when you have a day like mine, take five minutes and make yourself this mug cake recipe. You'll be glad this recipe makes two!
Pin It

Thursday, July 10, 2014

Cherry & Dark Chocolate Chunk Muffins

Pin It
Between a bout of food poisoning, an awful wisdom tooth extraction and the mayhem of daily life, I've hardly been able to blog. Sometimes I wonder how the other bloggers manage to post so many times a week! Some even manage one post a day! Kudos to you guys! 

This morning I decided I would share our breakfast with you. You see, the cherries are still calling out to me every time we go to the fruit market. They're so flavorful and we've been eating a lot of them this season! I made crumbles, a cobbler and the cherry brown butter squares I shared earlier. 
These muffins are a great way to use and showcase the cherries. The combination of the sweet-tart cherries and the dark chocolate is really awesome. These muffins will keep you coming back for more! 

This is a small batch recipe but can be multiplied quite easily!
Cherry & Dark Chocolate Chunk Muffins
Loosely adapted from here
Makes 6 muffins
Ingredients
1 cup all purpose flour
1.5 tsp baking powder
1/6 cup light brown sugar, plus extra for sprinkling 
A dash of cinnamon powder 
1/4 tsp salt 
1/4 cup yoghurt 
1/4 cup milk 
1 large egg
1/2 tsp vanilla extract 
3 tbsp vegetable/canola oil 
1/2 cup pitted fresh/frozen cherries
1/3 cup dark chocolate chunks/chips

Method 
1. Preheat the oven to 190C/375F. Line a six-cup muffin tray with paper liners. 
2. In a medium bowl, combine the flour, baking powder, sugar, salt & cinnamon powder. Stir to combine and set aside. 
3. In another medium bowl, whisk together the milk, yoghurt, egg, vanilla and oil. 
4. Create a well in the center of the dry ingredients and pour in the wet ingredients. Fold gently to combine. Do not over mix. 
5. Add the cherries and chocolate. Mix gently to distribute evenly. 
6. Divide the batter into the prepared muffin cups. 
7. Sprinkle the tops of the muffins with a generous dusting of light brown sugar.
8. Bake in the preheated oven for 18-20 minutes or until a toothpick inserted into the center of a muffin comes out clean. 

My husband particularly liked the way the cherries held their own in this muffin. I was a little afraid the dark chocolate would overpower them, but I was wrong! The cherry flavor was intense and really yummy!

The brown sugar sprinkle on the top was really done very impulsively, and I loved how that turned out too. Gave the muffins a beautiful crunch! 

Make these muffins while the cherries are still around. I'm planning to put a stash of fresh cherries in the freezer so we can enjoy this and other baked cherry treats when they're not around anymore. 

Until next time... <3


Pin It

Tuesday, May 27, 2014

Awesome Zucchini Bread

Pin It
I'm always thinking up interesting things to make for Saturday morning breakfast. It's one of those things that has become a tradition in my head. All the other days of the week, we eat something simple like porridge, toast or cereal, but Saturday's the day we generally eat the muffins, scones, cinnamon rolls, waffles and the other interesting baked goods. Sometimes, I make the special stuff mid-week too, but I feel like I'm doing something wrong if I serve porridge or cereal on a Saturday.
This week, when I spotted beautiful looking zucchini at the supermarket, I knew what we were having for Saturday morning breakfast. It had to be moist zucchini bread. I've made this recipe before and it never fails to please. 

I usually do a walnut zucchini bread, maybe with some raisins or chocolate chips thrown in, but this time I pulled out all the stops! This zucchini bread is loaded with cinnamon chips, 70% dark chocolate chunks, milk chocolate chips, dried cranberries and walnuts. And the resulting bread was insanely good!
My kids loved it and between the four of us, we were kinda fighting over the last slice. So so good!

Awesome Zucchini Bread
Loosely adapted from Smitten Kitchen
Ingredients 
3 1/4 cups all-purpose flour
1 1/4 tsp salt
3 teaspoons cinnamon powder 
1/4 teaspoon grated nutmeg
1 teaspoon baking soda
1/2 teaspoon baking powder
4 medium eggs
1 scant cup vegetable oil, or any neutral flavored oil 
1 1/2 cups granulated sugar
1 tbsp vanilla extract 
3 packed cups grated zucchini
Optional:
1/2 - 3/4 cup chopped walnuts (I used 1/2 cup)
Upto 1 cup add-ins of your choice
(I used 1/4 cup dark chocolate chips, 1/4 cup milk chocolate chips, 1/4 cup cinnamon chips & 1/4 cup chopped dried cranberries. 
Other options include any dry fruit - figs, dates, raisins etc. and any kind of chocolate chips or chunks you fancy!)

Method 
1. Preheat the oven to 200C/400F. 
2. Grease and flour a large loaf tin. The non-stick tin I used measures 9 1/2" x 5 1/2". If using a standard 8x4 tin, I would divide the batter between two tins. 
3. In a medium bowl, combine the flour, salt, cinnamon powder, freshly grated nutmeg, baking powder & baking soda. Stir well to combine. 
4. If using any nuts or add-ins, stir them into the flour mixture. Set aside. 
5. In a large bowl, whisk the eggs for 2-4 minutes. 
6. Add the oil, sugar, vanilla and grated zucchini. Stir well to combine. 
7. Add the flour mixture into the wet mixture and mix until completely incorporated and no dry flour pockets are visible. 
8. Pour the batter into your baking tin(s). Bake for 60-75 minutes or until a skewer inserted into the center of the loaf comes out clean 
9. Remove from the oven and allow to cool before slicing. 
The slices of this loaf disappeared fast. Chock-full of flavors - mildly sweet, super moist zucchini bread studded with morsels of sweet and bitter chocolate, melts cinnamon chips, tart cranberries and crunchy, toasty walnuts - who can resist?
Whether you're a zucchini bread fan, someone who hasn't had good experiences with zucchini bread in the past, or someone who's never ever tried zucchini bread - please make this loaf. You won't regret it!
Pin It

Tuesday, May 6, 2014

Triple Chocolate Muffins

Pin It
This last month has been so insanely busy for us. More work than I could handle, sick baby and then a sick momma and so much more! I hardly cooked, baked even less and didn't even think about blogging. We survived on the simplest, quick fix meals, and one-pot dishes, generously sent food from my Mom's home and of course, take-out. 

In celebration of things slowing down, for our first lazy morning breakfast together, I decided to make something decadent for breakfast. It's not often that our family eats chocolate for breakfast, but today we went all out! Not just chocolate muffins, but TRIPLE chocolate muffins. 

These are really soft, moist and chocolatey and are studded with oozy chunks of chocolate. And easy to throw together too! Give this recipe a try. You won't regret it!
Triple Chocolate Muffins
Adapted from a recipe found in this book
Makes 6-8 muffins
Ingredients 
3 tablespoons butter
60gm dark chocolate, chopped 
1 cup all purpose flour 
1/3 cup granulated sugar
1/4 cup cocoa powder
1/4 tsp salt
1 1/4 tsp baking powder 
1/4 tsp baking soda 
1 egg, beaten 
3/4 cup natural yoghurt
1 tsp vanilla extract 
60gm dark chocolate chips or chunks 

Method
1. In a microwave or in saucepan, melt the butter and the chocolate together. Set aside to cool. 
2. In large bowl, combine the flour, sugar, cocoa powder, salt, baking powder and baking soda. Mix until well combined. 
3. In a small bowl, stir together the egg, yoghurt and vanilla. Add in the cooled chocolate-butter mixture and stir well. 
4. Add the yoghurt mixture into the flour mixture and mix just until the two mixtures are completely combined. Do not over-mix. 
5. Fold in the chocolate chips/chunks evenly. 
6. Spoon into your muffin tray, filling more than 3/4 of the cup. I used a smallish tray and got 8 muffins. 
7. Bake for 15-20 minutes in an oven preheated to 180C/350F or until the top of the muffins spring back when touched gently. 
8. Remove from the oven and allow to cool for 5 minutes before unmolding. 

The triple dose of melted chocolate, dark cocoa powder and chocolate chunks makes these muffins seriously, seriously good. They aren't too sweet and are amazingly moist!

My husband, who loves peanut butter on just about anything, ate them generously 'frosted' with crunchy peanut butter. A fabulous muffin to bake for a special occasion or a lazy day!

Until next time :)


Pin It

Monday, December 2, 2013

Strawberry White Chocolate Chip Muffins

Pin It It's been a while, hasn't it? It has been a roller-coaster ride around here. First the kids were sick. Then I joined them and now it's my husband. It has been almost one whole month of coughs, colds and fevers. Thankfully, nothing more serious than that. We're well on our way to recovery - thanking God for that!

I have been doing a lot of baking and cooking but haven't had time to post. Will post those recipes in the coming weeks. 
Baked goods for breakfast seems to be becoming a favorite in our household! I've been making muffins, scones, rolls and so much more! And I am trying to keep them as healthy as possible! 

This muffin recipe is so good, easy and quick to put together, and really healthy too - made with whole wheat flour and oatmeal. Fresh strawberries & white chocolate - who can deny that's a match made in heaven? And add to that a crunchy topping and you're all set. Tartness from the strawberries, explosive sweetness from the chunks of white chocolate and crunchy, toasty hazelnuts. What a way to start your day!
Strawberry White Chocolate Chip Muffins
Ingredients 
(Makes 6 large or 8 regular sized muffins)
1/2 cup oatmeal
1/2 cup whole wheat flour
1/2 cup all purpose flour
1/4 tsp salt
1/4 tsp baking soda
2 tsp baking powder
1/3 cup canola oil 
1/2 cup yoghurt (I used low fat)
1/3 cup light brown sugar 
1 egg
3/4 cup roughly chopped strawberries
1/3 cup white chocolate, chopped into small chunks 
1/4 cup roughly chopped hazelnuts 

Method
1. Preheat your oven to 180C/350F. Line your muffin tin with paper muffin cases. 
2. In a large bowl stir together the oatmeal, flours, salt, baking soda and baking powder until well combined. 
3. In a small bowl, stir together the oil, yoghurt, sugar and egg. Whisk until completely blended. 
4. Make a well in the center of your dry ingredients and pour in the wet mixture. With a rubber spatula or wooden spoon fold gently until you can't see dry streaks anymore. Stop mixing at this point. Don't over-mix. 
5. Gently stir in the chopped strawberries and white chocolate. Stir lightly until well-distributed. 
6. Spoon the mixture into your lined muffin tins, filling them about 2/3 full. 
7. Sprinkle the tops of each muffin with the chopped hazelnuts
8. Bake in the preheated oven for
15-18 minutes or until the tops of the muffins spring back when touched. 

Serve these warm while the chocolate chunks are oozy soft and the hazelnuts are still crunchy. Add that to bursts of freshness from the strawberries, and everyone's happy!
These are a crowd pleaser, for sure! Try them and tell me what you think! :)


Pin It

Wednesday, September 18, 2013

Chocolate Chip Amish Puff Cookies

Pin It
I have a confession to make. I seldom bake chocolate chip cookies. In fact, I may have only baked 1-2 batches my whole life. Sounds weird, I know! For some reason, every time I consider making chocolate chip cookies, I end up thinking, "We're eating cookies. Why not get some oatmeal, fruit and nuts in there too?" And so I've always baked only oatmeal cookies with chocolate chips/nuts/dried fruit in them. But never classic chocolate chip cookies. Well, at least not till about a month ago. When I discovered these beauties. Well, I suppose these aren't your CLASSIC chocolate chip cookies either, but I am more than happy to stick with these. They are SO good! Really addictive!
I found the recipe on babble.com but the recipe is originally from The Field Guide to Cookies. I want to get my hands on this book! I am totally a cookie person! :)
Instead of chocolate chips, I used chopped chocolate chunks and I added some good vanilla extract because somehow it seemed incomplete to me without vanilla! This recipe yields 32 regular sized chocolate chip cookies, or 18-20 large ones.

Chocolate Chip Amish Puff Cookies
Ingredients (Makes 32 cookies)
1/2 cup  (113g) butter, softened
1/2 cup light brown sugar, tightly packed
1/4 cup white sugar
1 large egg
3/4 tsp vanilla extract 
1 1/2 cups all purpose flour
1/2 tsp baking powder 
1/2 tsp baking soda
1/2 tsp cream of tartar
1/4 tsp salt
150g chopped chocolate or chocolate chips 
1/4 cup sugar + 1/2 tsp ground cinnamon for rolling 

Method  
1. Cream the butter and sugars together for 2-3 minutes until light and fluffy. 
2. And the egg and vanilla and whisk for a further 2 minutes. 
3. Sift in the flour with the baking powder, baking soda, cream of tartar and salt. Mix into the butter mixture until completely incorporated. 
4. Stir in the chocolate and mix well to combine thoroughly. 
5. Form into one inch balls and roll in the cinnamon-sugar mixture. If you find the cookie dough too sticky to handle, refrigerate for 5-10 minutes and then form the balls. You should get around 32 cookie balls.
6. Place the cookie dough balls on a plate and chill thoroughly from anywhere from 1/2 hour to overnight. 
7. When you're ready to bake, preheat your oven to 180C/350F and place the balls at least two inches apart on a parchment/Silpat lined baking sheet. Don't press to flatten the balls. 
8. Bake for 8-12 minutes or until the edges start turning golden and the cookies are still soft to the touch. They'll firm up while cooling! Turn the tray around once if needed, for even baking.
9. Allow to cool for 5 minutes on the baking sheet, and transfer to a cooling rack. 
10. When completely cool, transfer to an airtight box for storage
If you are making larger cookies, like I did once, increase the baking time, and keep an eye on the cookies! They turn out just fine.

These cookies are have a lovely buttery flavor, and are slightly chewy, just like a good chocolate chip cookie should be, but they are much lighter than your average chocolate chip cookie. Personally, I love the texture of these cookies and I love the cinnamon-sugar crunch on the outside. Adds another dimension and makes them absolutely yummy!

Classic or not, these are really exceptional cookies. I have baked three batches of these in the one month since I discovered them, and they've turned out great every single time. An absolute winner and a must-try recipe!
Pin It

Tuesday, September 3, 2013

Rich Moist Chocolate Cake

Pin It
know I said on my Facebook page that I was going to share a cookie recipe next, but I loved this cake so much, I just had to share! I hope you love it too! The cookie recipe is coming up soon too! :)

Today, we celebrate 9 years of marriage. What a roller coaster ride it has been! :) And the best part of the 9 years? Our little girls, of course! I wanted to make a chocolate cake for my husband because that is his favorite kind of cake.
Usually, I keep my pantry well stocked with baking essentials. Mainly because you don't know when a baking urge is going to hit! Today, I was just a little low on almost everything - surprisingly even on basics like flour and sugar - I blame it on the sleep deprivation! When baby has a cold, no one sleeps. Sigh!

When you're baking at 5:30 AM while the kids are still asleep and the husbands still at work, you can't really hop down to the neighborhood store. After a little middle of the night googling, I found a recipe for which I was certain I could (almost) scrape up the ingredients for. Joy the Baker to the rescue!
The recipe sounded perfect and I would have made it exactly as she wrote it, if I wasn't running short on flour and sugar. I made minor substitutions. I was short of about 1/4 cup flour and used a mix of whole wheat flour and corn starch to make up the difference. I am going to say that cake flour would work well here. The recipe called for 3/4 cup of white sugar, but I could only manage 1/2. So I used 1/4 cup of light brown sugar. Apart from that I followed the recipe as she wrote it. 

Rich, Moist Chocolate Cake
Adapted from Joy the Baker
Ingredients 

1 cup freshly made strong black coffee
3/4 cup cocoa powder, sifted 
1 tsp vanilla extract 
1/2 cup milk 
2 cups cake flour 
1 1/4 tsp baking soda
1/2 tsp salt
1 cup (227 grams) unsalted butter, at room temperature 
1 1/4 cups dark brown sugar, packed
1/2 cup white granulated sugar
1/4 cup light brown sugar 
4 eggs 

Method
1. Mix together the cocoa and the coffee until smooth. Stir in the milk and vanilla and set aside. 
2. Sift together the flour, baking soda and salt and set aside. 
3. In a large bowl, cream the butter with the sugars until light and fluffy. 
4. Beat in the eggs one at a time, beating in each egg until completely incorporated. 
5. Alternating between the flour mixture and the cocoa slurry, add the remaining ingredients to the bowl. Make sure you start and finish with the flour mixture. The mixture may look a little curdled, but that's fine. 
6. Divide the mixture between two greased and floured 8-inch/ 9-inch round cake tins and bake in an oven preheated to 180 degrees Celsius/350 Fahrenheit. I used 8 inch rounds and got a pretty tall cake. 
7. Bake until the a toothpick inserted into the middle of the cake comes out clean and the cake begins to come away from the sides of the tin. This took about 30 minutes in my oven. 
8. Allow the cakes to cool in the tins, remove from the tins and frost with your favorite chocolate buttercream or with a chocolate ganache like I have. 
I loved the flavor and texture of this cake. It had a rich, complex flavor due to the brown sugar-coffee-cocoa combination. Divine! The cake was perfectly moist and dense - exactly how a good chocolate cake should be. And I just LOVED how beautifully this cake sliced up. Gorgeous, neat slices! Don't you hate when your moist cakes sometimes don't yield clean slices?
I blame my silliness for the uneven layers. I measured them out and they came out of the oven perfectly even! And then when I took them out of their tins and left them to cool on the rack, I put one of them (the lower layer) upside down. That flattened out the layer of course. And the top layer retained the height. I know this happens, but I was negligent this time. Next time, they're both cooling in the same direction!

Uneven layers or not, this cake did not disappoint at all!! Everyone here loved this cake and I am sure you will too! You must try it!

I'll be back in a few days with the cookie recipe! Until then... xoxox
Pin It
Real Time Web Analytics