Showing posts with label Dessert. Show all posts

Friday, January 30, 2015

Fudgy Lime Curd Brownies

Pin It
I've been dying to post this recipe! I had it all ready to post about a week ago, and I just had some editing to do. And then I got sick. And really sick. It took me a week to get back on my feet, and so, here I am! Better late than never, huh?
These brownies are phenomenal! They happened because I got this weird craving (no I'm not pregnant again!) for something with dark chocolate and lime or lemon. I don't know why and how I craved this unusual combination, but I was just determined to do something about it. I have this awesome baker friend whose opinion I like to get. When I told her what I had planned, she said "Don't do it!" Gosh. I was confused and almost didn't make these. But, I'm happy to report that for once, she was wrong. And she rarely is! 
This recipe totally, totally rocks! The base recipe for the brownies is one of my favourite cocoa brownie recipes - Alice Medrich's best cocoa brownies. For the lime element, I used my favourite homemade lime curd recipe. I'm sure this would work just as well with good quality store-bought lime or lemon curd too. Orange curd would work too, if that floats your boat. And the rest is history.

Fudgy Lime Curd Brownies
Adapted from this recipe by Alice Medrich
Ingredients
1 1/4 sticks or 140g of unsalted butter
1 1/4 cups or 250g of sugar
1 cup or 120g cocoa powder 
1/4 tsp salt
1 tsp vanilla
2 large eggs, cold
1/2 cup or 63g all-purpose flour
1/3 - 1/2 cup lime (or lemon) curd 

Method
1. Preheat the oven to 180C/350F. Grease a 7" or 8" square tin and line with parchment paper covering the base and all the sides. To do this, cut out two long pieces of paper. Press one into the tin, leaving an overhang on opposite sides. Press it in well so that the paper is sticking to the base and the two opposite sides. Now do the same thing with the other paper, covering the base and the remaining sides. Again make sure you leave an overhang on the sides. I've done this with plain old aluminium foil, and it works just as well. 
2. In a heavy bottomed saucepan, melt the butter along with the sugar, cocoa powder, and salt. Stir until the butter has completely dissolved and the mixture has heated through and is feels hot when you stick your finger in the mixture. Set aside to cool until warm - about 15 minutes.
3. Stir in the vanilla and beat well to incorporate.
4. Beat in the eggs, one at a time, making sure you beat well after each addition. Spend some time on this step and beat for at least 3-4 minutes vigorously. 
5. Add the flour to this mixture and stir until you can't see flour streaks anymore. At this point. Alice Medrich recommends beating the mixture with forty vigorous strokes. So really get those arm muscles working and beat the batter at least 40 strokes. I think we may have gotten in 60-70 strokes.
6. Pour half the batter into the prepared tin. Smooth out to make sure you get the batter into the corners.
7. Dollop the lemon curd all over the surface of the batter. Gently spread the curd so it is a fairly even layer. Don't beat it in but try to keep it as a distinct layer.
8. Top the lemon curd layer with the remaining brownie batter and smooth the surface.
9. Bake in the preheated oven for for about 20-25 minutes or until a toothpick inserted into the middle comes out with gloopy lemon curd and a slight moist brownie batter. 
10. Allow to cool completely before using the overhanging paper to lift out the brownies onto your work surface. 
11. Cut into 16 (or 25) squares. 
The combination was really awesome. This base brownie recipe is one of my favorites and gives you really deep, dark and fudgy brownies. This combined with the tart, oozy lemon curd cutting through the rich chocolate was just perfect. As always, I intentionally undercooked them. So getting perfect squares was impossible. But my husband said it best when he said "If you could cut the brownies into perfect squares, I probably wouldn't like them as much!" I guess we sacrificed looks for something totally decadent! 

I think some white chocolate chips would work great in the recipe. I'm not sure about what nuts would work here. Personally, I don't like any nuts in my brownies. I feel like ruins the fudgy texture I so crave and enjoy. If you try this recipe and decide to use nuts, please let me know if it works! 

You should try this recipe. I am sure you won't regret it!

Until next time! :) 
Pin It

Saturday, September 27, 2014

Awesome Chocolate Chip Cookies

Pin It
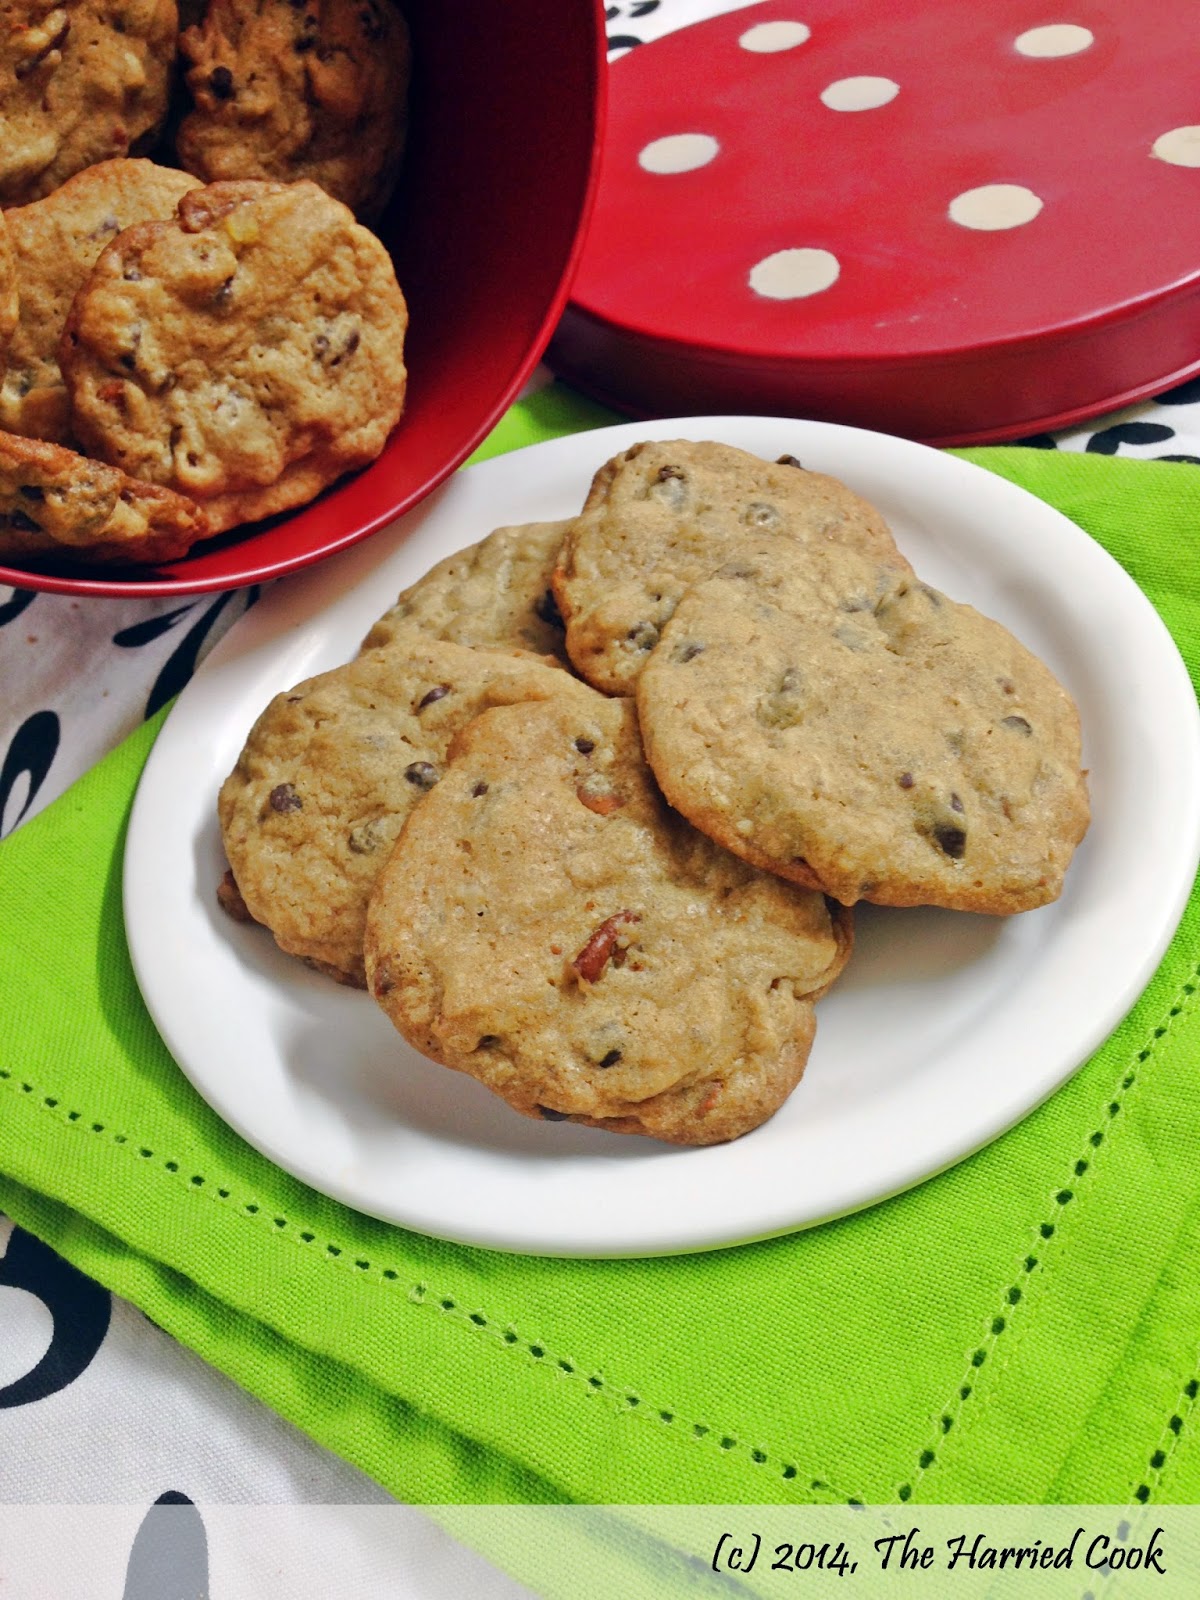
When I wrote the post with the recipe I shared of the Amish Chocolate Chip Cookies, I shared how I end up making oatmeal cookies every time I start making chocolate chip cookies. Those cookies cured me of that for a while, and then I went back to oatmeal cookies. But the other day, I wanted to make classic chocolate chip cookies and so I tried this recipe. And no one complained about the missing oatmeal.
This recipe makes a lot of cookies, and they were all gone in less than 2 days. We just couldn't stop eating them! Even my husband who watches everything he eats (unlike me!), enjoyed quite a few of these beauties!
At first bite, it feels like the cookie is a little too sweet. You feel you won't be able to eat more that one. But before you realize it, you've eaten 2 or maybe 6, and you're wondering how you're able to when it is so sweet. Don't feel too bad. Hey - its not all unhealthy, you know? Dark chocolate and pecans are good for you! They're considered health food! So there...

Awesome Chocolate Chip Cookies
Adapted from this recipe on allrecipes.com
Ingredients
1 cup unsalted butter, softened
3/4 cup granulated sugar
1 packed cup light brown sugar
2 eggs
2 tsp vanilla extract
1 tsp baking soda
2 tsp hot water
3 cups all purpose flour
1/2 tsp salt
1/2 tsp ground cinnamon
1 cup chopped dark chocolate or dark chocolate chips
1 cup chopped milk chocolate or milk chocolate chips
1 cup chopped pecans

Method
1. Preheat the oven to 180C/350F.
2. In a large bowl, cream the butter and the sugars until light and fluffy.
3. Beat in the eggs, one at a time, until the mixture is creamy and light.
4. Beat in the vanilla.
5. In a small cup, dissolve the baking soda in the hot water. Add this to the batter and mix in well.
6. Add the salt and ground cinnamon to the flour and mix well.
7. Add the flour to the batter and mix until combined.
8. Stir in the chocolate chunks and nuts.
9. Drop large tablespoonfuls of the batter onto an un-greased baking sheet. Allow a distance of at least 2 inches between each cookie dough mound.
10. Bake in the preheated oven for about 10 minutes, or until the edges are well browned.
11. Remove from the oven and allow to rest on the pan for 2-3 minutes.
12. Using a flat metal spoon or spatula, remove each cookie gently from the baking sheet and transfer to a cooling rack.
13. When completely cool, transfer to an airtight container for storage.
14. Eat.
Unlike the Amish Chocolate Chip Puff Cookies, these cookies are dense and chewy. Seriously good. I would go as far as saying - these are the BEST chocolate chip cookies! And they're highly addictive.
The edges and outside are nice and crunchy and they give way easily to that chewy, chocolaty center. I love the nuts in this cookie too. I've made it with pecans and with walnuts, and while I prefer the pecan version, most people seem to favor the walnuts in this particular cookies.

As I said earlier, this recipe makes a LOT of cookies. About 48 cookies to be exact. Feel free to halve the recipe if you don't want to drown in cookies. Pecans or walnuts, these cookies need to be made and enjoyed! I hope you like them as much as we did!

Until next time...


Pin It

Friday, December 13, 2013

Gingerbread Mini Cakes

Pin It
I think December is the favorite month of the year for most people here, and I am no exception. The weather is nice and there's so much yummy stuff to eat this month - thanks to Christmas! 

Christmas is a such a blessed and wonderful time of year, and this year I've been spending a lot of time explaining to Aimee that Christmas isn't all about Santa and cookies! We've been telling the Christmas story to her and she's starting to understand the significance of Christ's birth. And she's as excited about Christmas as any four year old would be - especially after she found Santa's been leaving her candy in the advent calendar every morning!  
And Christmas baking is just amazing, isn't it? This past week, Aimee and I baked some gingerbread together. The aroma of gingerbread is just so Christmassy!

This recipe is adapted from a Martha Stewart book on cakes and I was pretty pleased with it! The flavors are amazing and the hardest part of making this cake is getting the cake into the oven - the batter is that yummy!

Gingerbread Trees  
Makes one 9x5 loaf or 8-10 cupcakes or mini-cakes like these trees
Ingredients 
150g all purpose flour (about 1 1/4 cups)
1 tsp salt
1/2 tsp baking powder 
1/2 tsp baking soda
1 tsp ground cinnamon 
3/4 tsp freshly grated nutmeg
1 tsp ground ginger 
1/4 tsp ground cloves
180g unsalted butter, soft (slightly more than 3/4 cup) 
1/2 cup dark brown sugar
1/2 cup granulated sugar 
4 eggs
1 tsp vanilla 
Icing sugar, for dusting

Method 
1. Preheat the oven to 180C or 350f. 
2. Sift together the flour, salt, baking powder, baking soda and spices and set aside. 
3. In large bowl, cream the butter with the sugars until light and fluffy - about 3-4 minutes. 
4. Add the eggs, one at a time, beating each egg into the mixture before adding the next egg. The mixture may appear curdled at this point but that's perfectly fine. 
5. Add the vanilla and beat into the mixture. 
6. Add the flour mixture and mix just until completely incorporated. Don't over-mix the batter. 
7. Pour into a greased and floured mould and bake for approximately 45 minutes for the loaf or approximately 25 minutes for the cupcakes, or until a toothpick inserted into the thickest part of the cake comes out clean. 
8. Allow to cool in the baking pan for 10 minutes and turn out onto a plate. Allow to cool some more and dust generously with icing sugar. 
If you want to make your house smell like Christmas, this is the recipe you want to make. 

I love my little Christmas tree moulds, and dusted with icing sugar 'snow' and decorated with jimmies, they sure make a a very pretty picture. 


Pin It

Tuesday, September 3, 2013

Rich Moist Chocolate Cake

Pin It
know I said on my Facebook page that I was going to share a cookie recipe next, but I loved this cake so much, I just had to share! I hope you love it too! The cookie recipe is coming up soon too! :)

Today, we celebrate 9 years of marriage. What a roller coaster ride it has been! :) And the best part of the 9 years? Our little girls, of course! I wanted to make a chocolate cake for my husband because that is his favorite kind of cake.
Usually, I keep my pantry well stocked with baking essentials. Mainly because you don't know when a baking urge is going to hit! Today, I was just a little low on almost everything - surprisingly even on basics like flour and sugar - I blame it on the sleep deprivation! When baby has a cold, no one sleeps. Sigh!

When you're baking at 5:30 AM while the kids are still asleep and the husbands still at work, you can't really hop down to the neighborhood store. After a little middle of the night googling, I found a recipe for which I was certain I could (almost) scrape up the ingredients for. Joy the Baker to the rescue!
The recipe sounded perfect and I would have made it exactly as she wrote it, if I wasn't running short on flour and sugar. I made minor substitutions. I was short of about 1/4 cup flour and used a mix of whole wheat flour and corn starch to make up the difference. I am going to say that cake flour would work well here. The recipe called for 3/4 cup of white sugar, but I could only manage 1/2. So I used 1/4 cup of light brown sugar. Apart from that I followed the recipe as she wrote it. 

Rich, Moist Chocolate Cake
Adapted from Joy the Baker
Ingredients 

1 cup freshly made strong black coffee
3/4 cup cocoa powder, sifted 
1 tsp vanilla extract 
1/2 cup milk 
2 cups cake flour 
1 1/4 tsp baking soda
1/2 tsp salt
1 cup (227 grams) unsalted butter, at room temperature 
1 1/4 cups dark brown sugar, packed
1/2 cup white granulated sugar
1/4 cup light brown sugar 
4 eggs 

Method
1. Mix together the cocoa and the coffee until smooth. Stir in the milk and vanilla and set aside. 
2. Sift together the flour, baking soda and salt and set aside. 
3. In a large bowl, cream the butter with the sugars until light and fluffy. 
4. Beat in the eggs one at a time, beating in each egg until completely incorporated. 
5. Alternating between the flour mixture and the cocoa slurry, add the remaining ingredients to the bowl. Make sure you start and finish with the flour mixture. The mixture may look a little curdled, but that's fine. 
6. Divide the mixture between two greased and floured 8-inch/ 9-inch round cake tins and bake in an oven preheated to 180 degrees Celsius/350 Fahrenheit. I used 8 inch rounds and got a pretty tall cake. 
7. Bake until the a toothpick inserted into the middle of the cake comes out clean and the cake begins to come away from the sides of the tin. This took about 30 minutes in my oven. 
8. Allow the cakes to cool in the tins, remove from the tins and frost with your favorite chocolate buttercream or with a chocolate ganache like I have. 
I loved the flavor and texture of this cake. It had a rich, complex flavor due to the brown sugar-coffee-cocoa combination. Divine! The cake was perfectly moist and dense - exactly how a good chocolate cake should be. And I just LOVED how beautifully this cake sliced up. Gorgeous, neat slices! Don't you hate when your moist cakes sometimes don't yield clean slices?
I blame my silliness for the uneven layers. I measured them out and they came out of the oven perfectly even! And then when I took them out of their tins and left them to cool on the rack, I put one of them (the lower layer) upside down. That flattened out the layer of course. And the top layer retained the height. I know this happens, but I was negligent this time. Next time, they're both cooling in the same direction!

Uneven layers or not, this cake did not disappoint at all!! Everyone here loved this cake and I am sure you will too! You must try it!

I'll be back in a few days with the cookie recipe! Until then... xoxox
Pin It

Monday, May 14, 2012

Sun Cake: Celebrating 100 posts & Summer!

Pin It
I made it. I finally made it.

I never thought it would happen, but this is my 100th post.

I remember when I reached my 25th post. Feels like forever ago! I made a Mini-cake to celebrate the occasion and felt quite silly for doing it.

Now that I have made it to 100 posts, I really feel like celebrating. So much has happened since I started blogging, and you know I've almost quit a couple of times! But I hung around, and I am still here! Yay! So I won't feel silly for celebrating this milestone. And what celebration is complete without cake, I ask you?

I call this creation my Sun Cake. You'll see why!
The cake is my new favorite recipe for a Classic Butter Cake. I love the simplicity of a butter cake. It is flavorful, moist and just perfect. 

But what really makes this cake special is the filling! I filled the layers with a flavorful, nutty, slightly salty sunflower seed butter! Yes - you read right! Butter made from sunflower seeds. If you're asking  "what's that?!", it is kinda like peanut butter but different.

I got my sunflower seed butter as a part of an awesome package I received from my friend Ruchira from The Great Cookaroo, as a part of a Foodie Exchange program! More about the awesomeness of the package in the next post. The sunflower seed butter is really lovely on a lot of things and I am feeling a little sad that the bottle's almost empty, and I haven't seen it in any stores around here! But you know what - you can make your own sunflower seed butter! Yay! I've got to try that soon!

I wanted this cake to be a celebration of summer, too. Yes. Why fight it? Summer is here to stay, and we might as well accept it. I know - the heat and humidity is quite unbearable. I fuss and moan about it a lot, too. But summer means a lot of nice things too - vacation (I hope I get one this year!), bright colors, watermelon and most of all - the mangoes! I colored the layers of this cake in three summery colors - a light lemony yellow, a bright sunflower yellow and a lovely orange. I didn't do a great job with the yellows because they're kinda similar looking, but you get what I was trying to do, right?
The outside of the cake is a classic vanilla butter cream. I love butter cream. It's rich, sweet and luscious. I don't understand when people say "I don't like butter!". Really? What's wrong with you?

SUN CAKE

Butter Cake Layers
Adapted from Allrecipes.com
Ingredients
3 cups all purpose flour
1 tsp baking powder
1/2 tsp baking soda
3/4 tsp salt
1 cup unsalted butter, softened
1 3/4 cup sugar
4 eggs, at room temperature
2 tsp vanilla extract
1 cup buttermilk

Method
1. Sift together the flour, baking powder, baking soda and salt and set aside.
2. In a large bowl, cream the butter until light and fluffy.
3. Add the sugar and cream until completely combined.
4. Add the eggs in one at a time, beating well after each addition.
5. Beat in the vanilla extract.
6. Add 1/3 of the flour mixture to the butter mixture, followed by 1/2 of the buttermilk, another 1/3rd of the flour mixture, the remaining buttermilk and finish off with the rest of the flour mixture. Stir well to combine between each addition.
7. If desired, divide the batter equally into three bowls and color as desired.
8. Bake in greased and floured 8" round cake tins at 350F/180C until a toothpick inserted into the center of the cake comes out clean - about 20-25 minutes per layer.
9. Allow to cool in the pans for 15 minutes, and transfer onto racks to cool completely.
10. Fill and frost as desired.

Sunflower Seed Butter Filling
Adapted from Allrecipes.com
Ingredients
1/2 cup unsalted butter, softened
3/4 cup sunflower seed butter
1 tsp vanilla extract
2 - 2.5 cups confectioner's sugar, sifted
1-3 tbsp milk
A few drops of yellow food coloring, if desired

Method
1. Cream the butter and sunflower seed butter in a bowl until light and fluffy.
2. Add the vanilla (and the food coloring, if you're using it) and continue creaming for about 30 seconds.
3. Add 2 cups of sugar - 1/2 cup at a time - until completely incorporated and fluffy.
4. If you find the filling too thick, lighten it with milk, adding 1 tbsp at a time, beating well after each addition.
5. If you find the filling too running, add more powdered sugar.

Vanilla Butter Cream
Adapted from Allrecipes.com
Ingredients
1 cup unsalted butter
3 tsp vanilla extract
3 1/2 cups confectioner's sugar, sifted
1/4 tsp salt
2-3 tbsp whipping cream

Method
1. Cream the butter until light and fluffy.
2. Add the vanilla and salt and cream for about 30 seconds.
3. Add 3 cups of the sugar - 1/2 cup at a time - until you have a light, fluffy frosting.
4. Add 1 tbsp of the whipping cream and beat for about a minute. 
4. If you find the filling too thick, lighten it with more whipping cream, adding 1 tbsp at a time, beating well after each addition.
5. If you find the filling too runny, add more powdered sugar.


Assembly: Divide the sunflower seed butter filling into two equal portions. Fill the cooled cake layers with the sunflower seed butter, and frost the sides and top of the cake with a plain vanilla butter cream. Decorate with yellow and orange fondant daisies, if desired.
With colors of summer and flavors of sunflower, I think Sun Cake is a good name, don't you? I love this cake because the salty sweet sunflower seed butter filling offsets the sweetness of the cake and frosting. I just love that sweet-salty hit! 

This post is also hopefully the beginning of more regular blogging. Life has been crazy this past month and I really miss posting regularly. And more than that - I miss visiting all my favorite blogs! Don't be mad at me for not visiting you, okay? I am going to start being more regular this week. 

I am a lot more active on Facebook these days, and if you haven't connected with me on Facebook yet, please visit my page and say 'hello'! 
I wish I could share a slice of this cake with each and every one of the people I've met through this blog. Who knew, when I started posting 100 posts ago, that I would meet so many awesome new people, and make some friends who will stay with me for life? Thank you all for the love and support!


This post is dedicated to each & every person that I have met through The Harried Cook. 

Have a blessed week, all!
Pin It

Thursday, May 3, 2012

Sesame Overload Cookies - My Guest Post at Priya's Bon Appetit

Pin It
Can I just say how much I love my readers and blogger friends? I really, truly do!

I know I said in my last post that I was considering quitting the blog, but now I know I most definitely won't be doing that! I love and enjoy this too much! And I couldn't bear it if I lost touch with you guys, you know? :)

This week has been crazy because we're in the middle of Summer Camp (V.B.S.) at church and just like last year it is 600 wild kids who are full of energy! So sorry I still haven't gotten around to visiting your site... I am just catching up on my Google Reader updates (which is at a CRAZY number!) and I will get around to you soon... I can't wait to see what you've been cooking! <3

Today, I am I guest posting over at Priya's fabulous blog - Bon Appetit - where she has given me the title "Blogger of the Month - May 2012"! Very cool :) I was really excited when she asked me to share a recipe with her readers. Priya makes some yummy food - check out impressive recipe list! She has also had some really amazing guest bloggers on her site. I am so glad to be guest posting there today.

If you are a regular follower of The Harried Cook, you already know about my love for sesame. This cookie recipe is a tribute to the awesomeness that is the humble sesame seed!
To see the recipe and read more about it, you must go visit Priya's site! And while you're there, don't forget to leave her a comment and tell her I said hello!

Also, I would like to thank Manu of Manu's Menu (she's just such an AWESOME cook, baker, blogger and friend!), for these awards. I am truly honored to accept them, Manu... Thank you and BIG hugs to you!
I will see you all next week with a very special post! :)

Have a wonderful weekend & God bless you!
Pin It

Monday, April 30, 2012

Christina Tosi's Crack Pie & Awards

Pin It
Have you missed me?

It's been a while, but I am back (with an extra-long post). It has been a crazy few weeks, and I really thought that I might have to give up blogging somewhere in between. No hasty decisions were made, and for now, I am here to stay. :)

Today, I am back with a recipe that's really popular right now - Christina Tosi's Crack Pie. I wanted to see what all the hype was about, now, post-crack (not the drug kind - please be smart and don't do drugs!), I am here to share my experiences.
Before we get into the recipe though, I must issue the following warnings. IMHO, this pie must be made ONLY under the following circumstances -

1. You have a LOT of people coming over.
2. You have supernatural self-control.
3. You are desperately skinny and need to gain weight rapidly.

Seriously. I was warned, and I didn't listen, and ended up eating half this pie by myself (and sharing the remaining 50% very grudgingly).
In case I haven't made myself clear enough, I LOVED this pie, and I think Christina Tosi is a genius.

As you can see, I made only half the recipe - which makes 2  10-inch pies. I made 1 9 inch pie and increased the cooking time a little, as recommended by the L.A. Times.. I am so glad I decided to go with only half. Who knows how much I would have eaten if I had made the whole recipe!


Christina Tosi's Crack Pie
Recipe from the L.A. Times, who adapted it from the Momofuku Milk Bar Cookbook

Ingredients - Cookie for crust
1/3 cup plus 1 tablespoon (3 ounces) flour
A large pinch of baking powder
A large pinch of baking soda
1/8 teaspoon salt
1/4 cup softened butter
1 1/4 oz (1/6  cup) light brown sugar
1 1/2 tablespoons sugar
1/2 an egg
Scant 1/2 cup rolled oats

Method
1. Heat the oven to 375 degrees.
2. In a medium bowl, sift together the flour, baking powder, baking soda and salt.
3. In another bowl, beat the butter and the sugars until fluffy and light.
4. Whisk in the egg and mix well until completely incorporated.
5. With the mixer running, add the flour mixture, a little at a time, until fully combined. 
5. Stir in the oats and stir to combine.
6. Spread the mixture onto a 9-inch-by-13-inch baking sheet and bake until golden brown and set. 
7. Remove from heat and cool to the touch on a rack. Crumble the cooled cookie to use in the crust.
Don't you love the giant cookie? I couldn't resist taking a small bite!

Making the Crust
Crumbled cookie for crust
1/8 cup butter
1 3/4 tsp brown sugar
A large pinch of salt

Method
1. Combine all the ingredients in a blender or food processor and pulse a few times until blended.
2. Press the crust into a 9 or 10 inch pie tin to form a thin, even layer along the bottom and sides. Set aside.

Ingredients - Filling
3/4 cup sugar
1/3 cup + 1 1/2 tbsp light brown sugar
1/8 teaspoon salt
1/6 cup plus 1/2 teaspoon milk powder
1/2 cup butter, melted
1/3 cup plus a scant tablespoon heavy cream
1/2 teaspoon vanilla extract
4 egg yolks
Prepared crust
Powdered sugar, garnish

Method
1. Heat the oven to 350/180.
2. In a large bowl, whisk together the sugars, salt and milk powder. 
3. Whisk in the melted butter, followed by the heavy cream and vanilla.
3. Gently whisk in the egg yolks, being careful not to add too much air.
4. Pour the filling into the prepared pie crust.
5. Bake the pie for 15 minutes, then reduce the heat to 325/160 and bake until the filling is slightly jiggly and golden brown on top (similar to a pecan pie), about 10 minutes (15 minutes if you are using a 9-inch tin). Remove the pie and cool on a rack.
6. Refrigerate the cooled pies until well chilled. 

It is a lot work, this pie, but SO worth it. The cookie crust needs to be made from the cookie recipe that is a part of this recipe, and not just any generic cookie. The amount of salt in the crust perfectly balances out the sweetness of the filling.
And the filling, - oh the filling - the filling is amazing. Buttery, creamy, butterscotch-y, sugary sweet brilliance.

Obviously, as the recipe says, it is meant to be served chilled. I tried it FOUR ways - it is lovely eaten slightly warm, it is great at room temperature, it is awesome chilled and it is fabulous frozen! In the picture below, you can see how ooey and gooey it is at room temperature.
At the end of this, here is my reasoning as to why this is called 'Crack Pie'.

1. I have not tried crack ever, but I am sure this pie is better.
2. It is addictive.
3. You are not willing to share it with ANYONE.
4. It gives you a high - a sugar high, that is!
5. You have withdrawal symptoms when the pie is all gone! :(
6. After the high, you have some serious lows.

I think my low lasted 2 weeks. Hence, the lack of posts.

I blame it on the pie & on Christina Tosi.

So there!

Here's my message for today - don't do drugs, make this pie!

Now, onto some important stuff that I have put off forever! Some awards :)

First up, a BIG (and very belated) thanks to Manu of Manu's Menu! If you haven't heard of Manu's blog, you seriously have been missing out! Please go visit her. Now!!!

Thanks to Manu for this award! Big hugs, Manu! <3

Second, thanks to Ruchira of The Great Cookaroo, for these two awards!


I met Ruchira through a Foodie Exchange just recently, and you will be seeing more of her on my blog soon, when I reveal what we exchanged! But in the meanwhile, go check out her site and do tell her I said hello!

Both bloggers asked me to share things about myself, and so here are some little known facts about The Harried Cook.

1. I was (emphasize WAS), a sportsperson - a swimmer to be more specific. I won a few medals here and there, represented my state and won a national medal too. Seems like ages ago, in another lifetime. I wrote it here today, just so I don't forget it myself.
2. I am a singer. I am in a band - though we're all very busy these days with kids and other stuff we're working on! But we do perform once in a while and have recorded on a few compilation albums too. I sing almost every week in church though.
3. I was a BIG nerd in school & college. Always did well in my exams. I still kinda like exams. Yes. You read right. Please don't un-like me on Facebook!
4. Before I became a mom, blogger and baker, I too was a stooge in the corporate world. Worked long hours, complained about my boss and all that jazz. That's one part of my life I don't miss!
5. I almost went to Paris to study cooking after I finished school. Long story, but it didn't happen, and things still worked out.

In other news, The Harried Cook is doing well. The baking workshop went very well, and was covered by a friend who is a very popular blogger in the city. You can read about the workshop and see some lovely pictures HERE.

The baking is going well! I've been making cupcakes, tarts, muffins, breads and a whole lot of stuff and it's been a blast! If you are in Chennai, and need to order something, write to me at marsha@theharriedcook.com

That's all from me for now, folks! Posting may not be very regular, but I am still around. Keep in touch!
Pin It

Thursday, April 5, 2012

Easter Cupcakes & Homemade Fondant!

Pin It
Okay, first things first... if you are here expecting a quark based recipe based on my last recipe post, I am sorry to disappoint you! I was going to make something really yummy. I swear!!! But then my friend came over, and told me all about how they eat quark in Germany (she's half German), and that was that! The next morning, we ate quark on toast, loved every bite of it, and now it's gone! Poof! Just like that!

So, I owe you one 'quarky' recipe. 

But until then, please have a cupcake?
It has been a while since I worked with fondant. And this week, when I was asked if I would make these for church, I jumped at the chance! It's so fun and it's been ages!

I don't know about you, but fondant isn't up there with my favorite frostings, in terms of flavor. I have tasted a lot of fondant and most of them are tasteless and dry. Homemade fondant to the rescue!

I followed the rolled fondant recipe from Zoe Bakes, and I was thrilled with the results. All the fondant recipes I have used before pale in comparison to this one. It rolls out beautiful and is really easy to work with! If you are afraid of working with fondant, this is the recipe to try. And you know what the BEST part is? It tastes nice! I increased the quantity of vanilla in the recipe just a little bit, and it tasted really nice. Of course, it is still really sweet, and so I can't eat too much of it, but at least it doesn't taste like cardboard!

Homemade Fondant
Adapted from Zoe Bakes
Ingredients
900gms Icing Sugar
1 tablespoon gelatin (unflavored)
3 tablespoon cold water
1/2 cup minus 1 tablespoon Liquid Glucose
1 1/2 tablespoons glycerin
1 tbsp + 1 tsp vanilla extract
(If you want pure white fondant, pure vanilla extract is too 'brown'. You will need to use clear vanilla which is usually an essence and not an extract.)

Method
1. Sift half the icing sugar into a large bowl and set aside.
2. In a medium heatproof bowl, pour the cold water and sprinkle the gelatin over the surface of it. Allow the gelatin to bloom by leaving it in the water for about 3-4 minutes.
3. Place the bowl over a double boiler and heat until the gelatin has completely dissolved. Don't allow the mixture to boil. Alternately, you can zap it in the microwave for short 10 second intervals, stirring in between, until the gelatin has completely dissolved. I haven't tried it in the microwave myself, and so I cannot vouch for this method.
4. As soon as the gelatin mixture comes off the stove, stir in the liquid glucose, glycerin and vanilla extract. Stir well to combine.
5. Make a well in the center of the icing sugar, and pour in the gelatin-glucose mixture.
6. On low speed, mix them together until completely combined and sticky.
7. Transfer onto a clean counter which has been sprinkled with some powdered sugar.
8. Add the remaining powdered sugar a little at a time, and begin to incorporate with your hands. Keep kneading until all the sugar as been added and you have a smooth ball of fondant.
9. Wrap the fondant in two layers of clingfilm and set aside to rest for 12-18 hours. Do not refrigerate.
10. When you are ready to use the fondant, if you find it is too dry, you can microwave it for 15-20 seconds and you will find it has softened slightly and is more pliable.
11. Divide into portions and color as desired. Gel food coloring is recommended because liquid coloring can make your fondant too wet.

There you go! Homemade fondant :)

In case you were wondering, the cupcakes are just regular vanilla cupcakes, and the 'grass' is a Swiss Meringue Buttercream Frosting tinted green!

I had fun playing with the fondant, and so did my little girl! We made eggs
eggs in nests
and chicks
and a rabbit, too!
I am sorry to report that this rabbit died an untimely death due to overweight.
This is a picture of him, minutes before his sudden demise. Poor guy. He didn't know what was coming! :(
He toppled off the cupcake platter, fell a good 5 1/2 feet into the dirt and had to be buried in the trash. The rabbit in the next picture is his square-jawed brother who stepped in to take his place.
In case you didn't notice, or if you were wondering why some of the pictures look different, some of the pictures in this post were taken by Zippora (my half German, quark eating friend), who also took the pictures of my Triple Dark Chocolate Cookies post. Her pictures and mine were taken in different lighting settings, and with different brands of camera (Nikon vs. Canon.... hmmmm) and lenses (hers is a 50mm lens, and mine is not). What a difference, right? :) You can check out her photography blog here.

I've been seeing so many cute and adorable fondant Easter toppers out there! Bunnies, chicks, flowers, eggs, and SO much more. But I just wanted to share this last cupcake to remind us what Easter is all about! Let's not forget about the death and resurrection of our Lord, which is the reason we celebrate!
If you are looking for some ideas for Easter cookies, you can check out my Easter post from last year. Not very professional looking cookies, but hey - I tried! :)

Happy Easter!


Praise be to the God and Father of our Lord Jesus Christ! In His great mercy He has given us new birth into a living hope through the resurrection of Jesus Christ from the dead, 1 Peter 1:3

Pin It

Thursday, March 15, 2012

Moist Chocolate Cupcakes w/ Whipped Ganache Frosting

Pin It
A really strange thing happened to me this week. If you know me well, you will know how totally out of character this is for me.

I wanted chocolate cake.

Well, 'wanted' seems like a mild word for what I felt. I longed for chocolate cake. So weird! Can you believe it?

Most of my cravings revolve around citrus or spice. Very, very, VERY rarely do I actually crave chocolate cake. Okay I'll stop now before you totally write me off as a lunatic.

In order to satisfy that craving, I made these.
Aren't they pretty?

Look at this one standing high & proud on his high chocolate tower! :)
The cupcake recipe isn't a new one. I have shared it with you before in my Rocky Road Cupcakes post. It is Alton Brown's Chocolate cake recipe that I made into cupcakes. It is a dense, moist cupcake. This time around I made it extra moist by under-baking it a little and it was really delicious!

The frosting is a whipped ganache - which is the easiest thing to make, and SO yummy! And it goes without saying - the better the quality of the chocolate you use, the better your frosting will taste.

Whipped Ganache Frosting
Ingredients
8oz (227g) dark/bittersweet chocolate
8oz (227g) heavy cream
1 tsp vanilla

Method
1. Chop up the chocolate and place in a large bowl.
2. In a saucepan, heat the cream until it just begins to simmer. Be careful not to let it boil or it will split.
3. Pour the hot cream over the melted chocolate. Allow this to sit for about 2 minutes.
4. Whisk until smooth, and add in the vanilla. Whisk until dissolved. Set aside to 'set' for about an hour or two. I put it into the fridge for about 15 minutes before I whipped it.
5. Beat using an electric mixer for 4-5 minutes until you achieve a piping consistency.
This frosting is absolutely delicious and very versatile. I used the same recipe with milk chocolate for some cupcakes I baked this week for a friend, and it tasted great!

I must report that with the craving completely satisfied, the strange chocolate phase has passed. Right after I hit 'Publish', I am headed to the kitchen to make a batch of lime curd to have with breakfast.

Now that feels normal!

In other news, next weekend I am teaching an 'Introduction to Baking' class in partnership with Chennai Food Guide and Crimson Chakra. Registrations have closed for this batch, and I am really looking forward to meeting all the participants who have registered! Before you come I must say: a word to the wise - baking is addictive!!! And I cannot wait to pass the baking bug on to you! I'll see you all at Crimson Chakra on the 24th of March.

Also - a BIG thank you to the lovely Pratiksha from Honeyed Pandemonium for the Leibster award! I really appreciate it :) Hugs to you!
Have a wonderful weekend and I will see you all on the other side! :)
Pin It

Wednesday, March 7, 2012

Triple Dark Chocolate Cookies & a Doubly Special Post!

Pin It
Happy International Women's Day!

Welcome to a very special post at The Harried Cook.

In today's post, I would like to introduce you to a campaign that a few of my friends have been working on. It is also an doubly special post (as you may have noticed in the title :p), because all the pictures in this post were taken by my friend, and one of the wonderful women working on this campaign, Zippora. She is a gorgeous woman, a great friend, a really fabulous photographer and is the mom of an absolutely adorable little two year old boy. You should check out her blog here. Why don't you leave her a comment, and let her know that I sent you? :)
On to these cookies.

Tell me this - how do you like your chocolate? White? Dark? Extra dark? I must say I often like my chocolate dark. To be honest, thanks to my sweet tooth, I am generally happiest with milk chocolate, but I love dark too. And I like my caramel dark! Mmmmmm dark caramel rocks my world!

When I think back to when I was growing up, dark chocolate was never popular. In fact, I am not sure it was even available. We only had regular, but delicious, milk chocolate and that was all we ever knew. But dark is very popular in India now.
But only when it comes to chocolate.

Not when it comes to skin color.

Millions of people in India grow up hearing, every single day, that they are not good enough because of the color of their skin. I have heard stories from my own friends about how they've been ridiculed at school, given mean nicknames, and how they've even been told by their own families, "Oh! How we wish you were fair!" It is tragic. Now, I am not fair by any standard. According to the Fairness Meter (oh yes, that is a real thing!), I am 'wheatish'. That means I am not fair, but I am not dark either. Whew. I dodged the bullet!

Things are getting worse! Everyday we are bombarded with advertisements for products claiming that they will make you fairer. But it doesn't stop there! Not only will you get fairer skin, you'll get the job, you'll make friends with the popular kids, you'll become a talented musician, you'll become a celebrity, you'll achieve great things in life and most importantly, you'll get the guy/girl that you've been in love with forever, but won't give you the time of day because you are not fair!

You can check out some of the fairness ads on YouTube and see for yourself how ridiculous they are. To normal people, these ads would be funny. I find them hilarious. But to people who have heard every day of their lives that they are dark, or lived through rejection, ridicule and torment because of their skin color, these ads would appear like a ray of hope. But none of these products can deliver what they promise.

Not. One. Of. Them.

I think the advertising industry needs to take more responsibility & be more aware messages they are sending out! They are setting people up for disappointment. Not just women. Men too!

I love this parody. It shows a fairness cream turns you into a blonde, white woman. Because that's what we all want to be, right? It's so funny how while on one side of the world, millions of fair skinned people are trying to get a tan, people with a naturally bronzed complexion, are trying to get fairer. Human nature?
The Dark is Beautiful campaign has been around since 2009. The main goal of this campaign is to try to make people realize that they ought to be comfortable in their own skins.

It is a lot harder than it sounds.

We are working against a mindset. We are working against an enormous industry. We are working against years, decades and possibly centuries of people telling you that you won't get far because of the way you look, or the color of your skin.

In my mind, Dark is Beautiful is not just about skin color issues. It speaks into every aspect of appearance. Short is beautiful. Curly hair is beautiful. Small eyes are beautiful. Dark hair is beautiful. Seriously people. Do we want to be clones of each other?

I believe God made each of us unique - in appearance, in personality, in the talents and abilities He has given us, and in the color of our skin. I believe that what we can achieve in life is determined by how hard we try, how hard we pray and how much of ourselves we put into what we do. Not by how we look. If the world has given an edge to the fairer, more 'perfect looking' people, let's take that edge back by raising our children to be confident in their skins!

And parents - don't make your kids feel anything less than gorgeous! Help them be the beautiful people God created them to be. It's part of your job.

Triple Dark Chocolate Cookies
Adapted from Annie's Eats
Ingredients
1 cup all purpose flour
2/3 cup cocoa powder
1 tsp baking powder
1/2 tsp salt
8 oz. (227g) dark chocolate (or semi-sweet)
2 large eggs
1 tsp vanilla extract
1.5 tsp instant coffee granules
5 tbsp (70g) unsalted butter, at room temperature
3/4 cup packed light brown sugar
1/4 cup granulated sugar
1 cup chopped dark chocolate, or dark chocolate chips

Method
1. In a small bowl, combine the flour, cocoa powder, baking powder and salt. Set aside
2. Melt the dark chocolate in a heat-proof bowl set over boiling water. Stir until smooth and molten. Set aside to cool. (You can also melt the chocolate in the microwave, but be very careful not to burn the chocolate. Nuke it 20 seconds at a time, stirring well between each 20 second interval.)
3. Whisk the eggs in a small bowl along with the vanilla and instant coffee granules. Set aside.
4. In a large bowl, cream the until smooth and light.
5. Add in the sugars and beat for about 30 seconds
6. Add in the egg mixture and beat for about a minute. Don't worry if the mixture looks a little 'separated'.
7. Pour in the melted chocolate in a slow stream, beating continuously. Beat on low speed for a further 45 seconds until completely incorporated. Scrape down the sides of the bowl, and beat for a further 20 seconds.
8. Add the flour mixture and beat on low speed until just incorporated. Don't over beat.
9. Using a spatula, stir in the chocolate chunks.
10. Set the bowl in the refrigerator for at least 30 minutes. I left mine in there over-night.
11. Preheat the oven to 180. Line a baking sheet with parchment paper or Silpat.
12. Scoop out tablespoon sized balls of dough and place them about 2 inches apart on the baking sheet. Do not flatten the balls.
13. Bake for about 12 minutes until the sides are set but the centers are still soft.
14. Remove from the oven, and leave on the baking sheet for 10 minutes. Transfer to a rack to cool completely.
15. Store in an airtight cookie jar.
These cookies are delicious! Chewy, fudgy, intensely chocolate-y in every bite. I thought, and my friend agreed, that they taste like brownies in a cookie form. A real treat for chocolate lovers!

You can learn more about the Dark is Beautiful campaign by checking out the website, Facebook page and our first local celebrity-endorsed commercial that is going to be on television soon!
P.S. - When we say 'Dark is Beautiful', we are not saying that other colors are not! :) All the colors in the world are special and make the world a more beautiful place! It's just that 'Dark is Beautiful' sounds a lot nicer than 'Dark is also beautiful'! :) :)
Love the photographs? I know I do! Don't forget to check out Zippora's blog, and tell her what a great job she's done!

Tell me - has skin color discrimination affected you or someone close to you? How has this impacted you? I would love to hear your stories and thoughts!


I am submitting this entry for the Stayfree Time to Change contest which encourages you to speak out about change you would like to see in the world around you.

You can learn more about this contest here on their Facebook page!
Pin It
Real Time Web Analytics