Showing posts with label Cookies and bars. Show all posts

Friday, January 30, 2015

Fudgy Lime Curd Brownies

Pin It
I've been dying to post this recipe! I had it all ready to post about a week ago, and I just had some editing to do. And then I got sick. And really sick. It took me a week to get back on my feet, and so, here I am! Better late than never, huh?
These brownies are phenomenal! They happened because I got this weird craving (no I'm not pregnant again!) for something with dark chocolate and lime or lemon. I don't know why and how I craved this unusual combination, but I was just determined to do something about it. I have this awesome baker friend whose opinion I like to get. When I told her what I had planned, she said "Don't do it!" Gosh. I was confused and almost didn't make these. But, I'm happy to report that for once, she was wrong. And she rarely is! 
This recipe totally, totally rocks! The base recipe for the brownies is one of my favourite cocoa brownie recipes - Alice Medrich's best cocoa brownies. For the lime element, I used my favourite homemade lime curd recipe. I'm sure this would work just as well with good quality store-bought lime or lemon curd too. Orange curd would work too, if that floats your boat. And the rest is history.

Fudgy Lime Curd Brownies
Adapted from this recipe by Alice Medrich
Ingredients
1 1/4 sticks or 140g of unsalted butter
1 1/4 cups or 250g of sugar
1 cup or 120g cocoa powder 
1/4 tsp salt
1 tsp vanilla
2 large eggs, cold
1/2 cup or 63g all-purpose flour
1/3 - 1/2 cup lime (or lemon) curd 

Method
1. Preheat the oven to 180C/350F. Grease a 7" or 8" square tin and line with parchment paper covering the base and all the sides. To do this, cut out two long pieces of paper. Press one into the tin, leaving an overhang on opposite sides. Press it in well so that the paper is sticking to the base and the two opposite sides. Now do the same thing with the other paper, covering the base and the remaining sides. Again make sure you leave an overhang on the sides. I've done this with plain old aluminium foil, and it works just as well. 
2. In a heavy bottomed saucepan, melt the butter along with the sugar, cocoa powder, and salt. Stir until the butter has completely dissolved and the mixture has heated through and is feels hot when you stick your finger in the mixture. Set aside to cool until warm - about 15 minutes.
3. Stir in the vanilla and beat well to incorporate.
4. Beat in the eggs, one at a time, making sure you beat well after each addition. Spend some time on this step and beat for at least 3-4 minutes vigorously. 
5. Add the flour to this mixture and stir until you can't see flour streaks anymore. At this point. Alice Medrich recommends beating the mixture with forty vigorous strokes. So really get those arm muscles working and beat the batter at least 40 strokes. I think we may have gotten in 60-70 strokes.
6. Pour half the batter into the prepared tin. Smooth out to make sure you get the batter into the corners.
7. Dollop the lemon curd all over the surface of the batter. Gently spread the curd so it is a fairly even layer. Don't beat it in but try to keep it as a distinct layer.
8. Top the lemon curd layer with the remaining brownie batter and smooth the surface.
9. Bake in the preheated oven for for about 20-25 minutes or until a toothpick inserted into the middle comes out with gloopy lemon curd and a slight moist brownie batter. 
10. Allow to cool completely before using the overhanging paper to lift out the brownies onto your work surface. 
11. Cut into 16 (or 25) squares. 
The combination was really awesome. This base brownie recipe is one of my favorites and gives you really deep, dark and fudgy brownies. This combined with the tart, oozy lemon curd cutting through the rich chocolate was just perfect. As always, I intentionally undercooked them. So getting perfect squares was impossible. But my husband said it best when he said "If you could cut the brownies into perfect squares, I probably wouldn't like them as much!" I guess we sacrificed looks for something totally decadent! 

I think some white chocolate chips would work great in the recipe. I'm not sure about what nuts would work here. Personally, I don't like any nuts in my brownies. I feel like ruins the fudgy texture I so crave and enjoy. If you try this recipe and decide to use nuts, please let me know if it works! 

You should try this recipe. I am sure you won't regret it!

Until next time! :) 
Pin It

Saturday, September 27, 2014

Awesome Chocolate Chip Cookies

Pin It
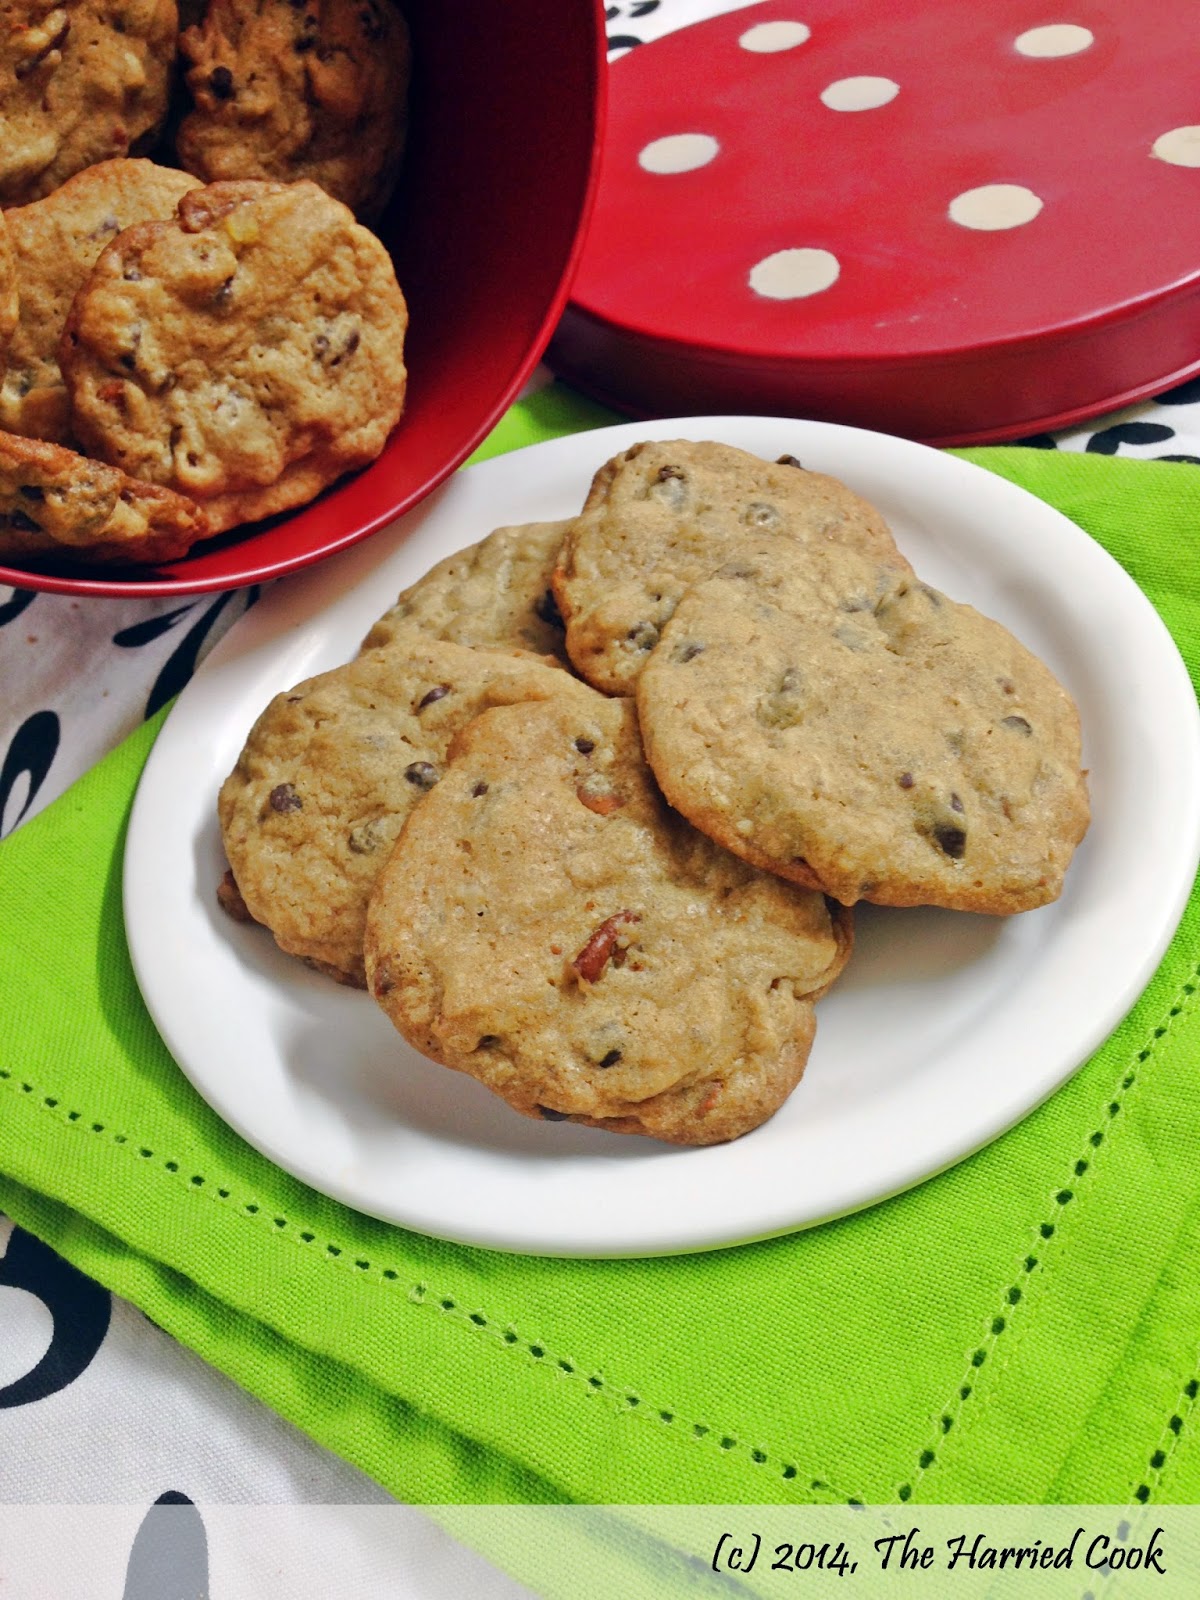
When I wrote the post with the recipe I shared of the Amish Chocolate Chip Cookies, I shared how I end up making oatmeal cookies every time I start making chocolate chip cookies. Those cookies cured me of that for a while, and then I went back to oatmeal cookies. But the other day, I wanted to make classic chocolate chip cookies and so I tried this recipe. And no one complained about the missing oatmeal.
This recipe makes a lot of cookies, and they were all gone in less than 2 days. We just couldn't stop eating them! Even my husband who watches everything he eats (unlike me!), enjoyed quite a few of these beauties!
At first bite, it feels like the cookie is a little too sweet. You feel you won't be able to eat more that one. But before you realize it, you've eaten 2 or maybe 6, and you're wondering how you're able to when it is so sweet. Don't feel too bad. Hey - its not all unhealthy, you know? Dark chocolate and pecans are good for you! They're considered health food! So there...

Awesome Chocolate Chip Cookies
Adapted from this recipe on allrecipes.com
Ingredients
1 cup unsalted butter, softened
3/4 cup granulated sugar
1 packed cup light brown sugar
2 eggs
2 tsp vanilla extract
1 tsp baking soda
2 tsp hot water
3 cups all purpose flour
1/2 tsp salt
1/2 tsp ground cinnamon
1 cup chopped dark chocolate or dark chocolate chips
1 cup chopped milk chocolate or milk chocolate chips
1 cup chopped pecans

Method
1. Preheat the oven to 180C/350F.
2. In a large bowl, cream the butter and the sugars until light and fluffy.
3. Beat in the eggs, one at a time, until the mixture is creamy and light.
4. Beat in the vanilla.
5. In a small cup, dissolve the baking soda in the hot water. Add this to the batter and mix in well.
6. Add the salt and ground cinnamon to the flour and mix well.
7. Add the flour to the batter and mix until combined.
8. Stir in the chocolate chunks and nuts.
9. Drop large tablespoonfuls of the batter onto an un-greased baking sheet. Allow a distance of at least 2 inches between each cookie dough mound.
10. Bake in the preheated oven for about 10 minutes, or until the edges are well browned.
11. Remove from the oven and allow to rest on the pan for 2-3 minutes.
12. Using a flat metal spoon or spatula, remove each cookie gently from the baking sheet and transfer to a cooling rack.
13. When completely cool, transfer to an airtight container for storage.
14. Eat.
Unlike the Amish Chocolate Chip Puff Cookies, these cookies are dense and chewy. Seriously good. I would go as far as saying - these are the BEST chocolate chip cookies! And they're highly addictive.
The edges and outside are nice and crunchy and they give way easily to that chewy, chocolaty center. I love the nuts in this cookie too. I've made it with pecans and with walnuts, and while I prefer the pecan version, most people seem to favor the walnuts in this particular cookies.

As I said earlier, this recipe makes a LOT of cookies. About 48 cookies to be exact. Feel free to halve the recipe if you don't want to drown in cookies. Pecans or walnuts, these cookies need to be made and enjoyed! I hope you like them as much as we did!

Until next time...


Pin It

Wednesday, September 18, 2013

Chocolate Chip Amish Puff Cookies

Pin It
I have a confession to make. I seldom bake chocolate chip cookies. In fact, I may have only baked 1-2 batches my whole life. Sounds weird, I know! For some reason, every time I consider making chocolate chip cookies, I end up thinking, "We're eating cookies. Why not get some oatmeal, fruit and nuts in there too?" And so I've always baked only oatmeal cookies with chocolate chips/nuts/dried fruit in them. But never classic chocolate chip cookies. Well, at least not till about a month ago. When I discovered these beauties. Well, I suppose these aren't your CLASSIC chocolate chip cookies either, but I am more than happy to stick with these. They are SO good! Really addictive!
I found the recipe on babble.com but the recipe is originally from The Field Guide to Cookies. I want to get my hands on this book! I am totally a cookie person! :)
Instead of chocolate chips, I used chopped chocolate chunks and I added some good vanilla extract because somehow it seemed incomplete to me without vanilla! This recipe yields 32 regular sized chocolate chip cookies, or 18-20 large ones.

Chocolate Chip Amish Puff Cookies
Ingredients (Makes 32 cookies)
1/2 cup  (113g) butter, softened
1/2 cup light brown sugar, tightly packed
1/4 cup white sugar
1 large egg
3/4 tsp vanilla extract 
1 1/2 cups all purpose flour
1/2 tsp baking powder 
1/2 tsp baking soda
1/2 tsp cream of tartar
1/4 tsp salt
150g chopped chocolate or chocolate chips 
1/4 cup sugar + 1/2 tsp ground cinnamon for rolling 

Method  
1. Cream the butter and sugars together for 2-3 minutes until light and fluffy. 
2. And the egg and vanilla and whisk for a further 2 minutes. 
3. Sift in the flour with the baking powder, baking soda, cream of tartar and salt. Mix into the butter mixture until completely incorporated. 
4. Stir in the chocolate and mix well to combine thoroughly. 
5. Form into one inch balls and roll in the cinnamon-sugar mixture. If you find the cookie dough too sticky to handle, refrigerate for 5-10 minutes and then form the balls. You should get around 32 cookie balls.
6. Place the cookie dough balls on a plate and chill thoroughly from anywhere from 1/2 hour to overnight. 
7. When you're ready to bake, preheat your oven to 180C/350F and place the balls at least two inches apart on a parchment/Silpat lined baking sheet. Don't press to flatten the balls. 
8. Bake for 8-12 minutes or until the edges start turning golden and the cookies are still soft to the touch. They'll firm up while cooling! Turn the tray around once if needed, for even baking.
9. Allow to cool for 5 minutes on the baking sheet, and transfer to a cooling rack. 
10. When completely cool, transfer to an airtight box for storage
If you are making larger cookies, like I did once, increase the baking time, and keep an eye on the cookies! They turn out just fine.

These cookies are have a lovely buttery flavor, and are slightly chewy, just like a good chocolate chip cookie should be, but they are much lighter than your average chocolate chip cookie. Personally, I love the texture of these cookies and I love the cinnamon-sugar crunch on the outside. Adds another dimension and makes them absolutely yummy!

Classic or not, these are really exceptional cookies. I have baked three batches of these in the one month since I discovered them, and they've turned out great every single time. An absolute winner and a must-try recipe!
Pin It

Thursday, May 3, 2012

Sesame Overload Cookies - My Guest Post at Priya's Bon Appetit

Pin It
Can I just say how much I love my readers and blogger friends? I really, truly do!

I know I said in my last post that I was considering quitting the blog, but now I know I most definitely won't be doing that! I love and enjoy this too much! And I couldn't bear it if I lost touch with you guys, you know? :)

This week has been crazy because we're in the middle of Summer Camp (V.B.S.) at church and just like last year it is 600 wild kids who are full of energy! So sorry I still haven't gotten around to visiting your site... I am just catching up on my Google Reader updates (which is at a CRAZY number!) and I will get around to you soon... I can't wait to see what you've been cooking! <3

Today, I am I guest posting over at Priya's fabulous blog - Bon Appetit - where she has given me the title "Blogger of the Month - May 2012"! Very cool :) I was really excited when she asked me to share a recipe with her readers. Priya makes some yummy food - check out impressive recipe list! She has also had some really amazing guest bloggers on her site. I am so glad to be guest posting there today.

If you are a regular follower of The Harried Cook, you already know about my love for sesame. This cookie recipe is a tribute to the awesomeness that is the humble sesame seed!
To see the recipe and read more about it, you must go visit Priya's site! And while you're there, don't forget to leave her a comment and tell her I said hello!

Also, I would like to thank Manu of Manu's Menu (she's just such an AWESOME cook, baker, blogger and friend!), for these awards. I am truly honored to accept them, Manu... Thank you and BIG hugs to you!
I will see you all next week with a very special post! :)

Have a wonderful weekend & God bless you!
Pin It

Wednesday, March 7, 2012

Triple Dark Chocolate Cookies & a Doubly Special Post!

Pin It
Happy International Women's Day!

Welcome to a very special post at The Harried Cook.

In today's post, I would like to introduce you to a campaign that a few of my friends have been working on. It is also an doubly special post (as you may have noticed in the title :p), because all the pictures in this post were taken by my friend, and one of the wonderful women working on this campaign, Zippora. She is a gorgeous woman, a great friend, a really fabulous photographer and is the mom of an absolutely adorable little two year old boy. You should check out her blog here. Why don't you leave her a comment, and let her know that I sent you? :)
On to these cookies.

Tell me this - how do you like your chocolate? White? Dark? Extra dark? I must say I often like my chocolate dark. To be honest, thanks to my sweet tooth, I am generally happiest with milk chocolate, but I love dark too. And I like my caramel dark! Mmmmmm dark caramel rocks my world!

When I think back to when I was growing up, dark chocolate was never popular. In fact, I am not sure it was even available. We only had regular, but delicious, milk chocolate and that was all we ever knew. But dark is very popular in India now.
But only when it comes to chocolate.

Not when it comes to skin color.

Millions of people in India grow up hearing, every single day, that they are not good enough because of the color of their skin. I have heard stories from my own friends about how they've been ridiculed at school, given mean nicknames, and how they've even been told by their own families, "Oh! How we wish you were fair!" It is tragic. Now, I am not fair by any standard. According to the Fairness Meter (oh yes, that is a real thing!), I am 'wheatish'. That means I am not fair, but I am not dark either. Whew. I dodged the bullet!

Things are getting worse! Everyday we are bombarded with advertisements for products claiming that they will make you fairer. But it doesn't stop there! Not only will you get fairer skin, you'll get the job, you'll make friends with the popular kids, you'll become a talented musician, you'll become a celebrity, you'll achieve great things in life and most importantly, you'll get the guy/girl that you've been in love with forever, but won't give you the time of day because you are not fair!

You can check out some of the fairness ads on YouTube and see for yourself how ridiculous they are. To normal people, these ads would be funny. I find them hilarious. But to people who have heard every day of their lives that they are dark, or lived through rejection, ridicule and torment because of their skin color, these ads would appear like a ray of hope. But none of these products can deliver what they promise.

Not. One. Of. Them.

I think the advertising industry needs to take more responsibility & be more aware messages they are sending out! They are setting people up for disappointment. Not just women. Men too!

I love this parody. It shows a fairness cream turns you into a blonde, white woman. Because that's what we all want to be, right? It's so funny how while on one side of the world, millions of fair skinned people are trying to get a tan, people with a naturally bronzed complexion, are trying to get fairer. Human nature?
The Dark is Beautiful campaign has been around since 2009. The main goal of this campaign is to try to make people realize that they ought to be comfortable in their own skins.

It is a lot harder than it sounds.

We are working against a mindset. We are working against an enormous industry. We are working against years, decades and possibly centuries of people telling you that you won't get far because of the way you look, or the color of your skin.

In my mind, Dark is Beautiful is not just about skin color issues. It speaks into every aspect of appearance. Short is beautiful. Curly hair is beautiful. Small eyes are beautiful. Dark hair is beautiful. Seriously people. Do we want to be clones of each other?

I believe God made each of us unique - in appearance, in personality, in the talents and abilities He has given us, and in the color of our skin. I believe that what we can achieve in life is determined by how hard we try, how hard we pray and how much of ourselves we put into what we do. Not by how we look. If the world has given an edge to the fairer, more 'perfect looking' people, let's take that edge back by raising our children to be confident in their skins!

And parents - don't make your kids feel anything less than gorgeous! Help them be the beautiful people God created them to be. It's part of your job.

Triple Dark Chocolate Cookies
Adapted from Annie's Eats
Ingredients
1 cup all purpose flour
2/3 cup cocoa powder
1 tsp baking powder
1/2 tsp salt
8 oz. (227g) dark chocolate (or semi-sweet)
2 large eggs
1 tsp vanilla extract
1.5 tsp instant coffee granules
5 tbsp (70g) unsalted butter, at room temperature
3/4 cup packed light brown sugar
1/4 cup granulated sugar
1 cup chopped dark chocolate, or dark chocolate chips

Method
1. In a small bowl, combine the flour, cocoa powder, baking powder and salt. Set aside
2. Melt the dark chocolate in a heat-proof bowl set over boiling water. Stir until smooth and molten. Set aside to cool. (You can also melt the chocolate in the microwave, but be very careful not to burn the chocolate. Nuke it 20 seconds at a time, stirring well between each 20 second interval.)
3. Whisk the eggs in a small bowl along with the vanilla and instant coffee granules. Set aside.
4. In a large bowl, cream the until smooth and light.
5. Add in the sugars and beat for about 30 seconds
6. Add in the egg mixture and beat for about a minute. Don't worry if the mixture looks a little 'separated'.
7. Pour in the melted chocolate in a slow stream, beating continuously. Beat on low speed for a further 45 seconds until completely incorporated. Scrape down the sides of the bowl, and beat for a further 20 seconds.
8. Add the flour mixture and beat on low speed until just incorporated. Don't over beat.
9. Using a spatula, stir in the chocolate chunks.
10. Set the bowl in the refrigerator for at least 30 minutes. I left mine in there over-night.
11. Preheat the oven to 180. Line a baking sheet with parchment paper or Silpat.
12. Scoop out tablespoon sized balls of dough and place them about 2 inches apart on the baking sheet. Do not flatten the balls.
13. Bake for about 12 minutes until the sides are set but the centers are still soft.
14. Remove from the oven, and leave on the baking sheet for 10 minutes. Transfer to a rack to cool completely.
15. Store in an airtight cookie jar.
These cookies are delicious! Chewy, fudgy, intensely chocolate-y in every bite. I thought, and my friend agreed, that they taste like brownies in a cookie form. A real treat for chocolate lovers!

You can learn more about the Dark is Beautiful campaign by checking out the website, Facebook page and our first local celebrity-endorsed commercial that is going to be on television soon!
P.S. - When we say 'Dark is Beautiful', we are not saying that other colors are not! :) All the colors in the world are special and make the world a more beautiful place! It's just that 'Dark is Beautiful' sounds a lot nicer than 'Dark is also beautiful'! :) :)
Love the photographs? I know I do! Don't forget to check out Zippora's blog, and tell her what a great job she's done!

Tell me - has skin color discrimination affected you or someone close to you? How has this impacted you? I would love to hear your stories and thoughts!


I am submitting this entry for the Stayfree Time to Change contest which encourages you to speak out about change you would like to see in the world around you.

You can learn more about this contest here on their Facebook page!
Pin It

Thursday, March 1, 2012

White Chocolate Macadamia Cookies (and an announcement)

Pin It

I know! I know! This cookie doesn't look very fancy or impressive. But didn't your mother ever tell you not to judge a book by it's cover?

Before I talk any more about this cookie - have you entered my blog anniversary giveaway yet? No!? Seriously? Go do it now!

Now, let me tell you - this cookie is...


FLASH NEWS!

We interrupt regular programming to bring you this important announcement.

Okay, okay. Sorry about all the drama.

I am more than a little upset about this whole GFC going away thing. Not only do most of my readers get my updates via GFC, but I also subscribe to SO many of my favorite blogs via GFC. It is going to be so tiring to have to make sure that all 1023942323433 feeds in my Google Reader are functioning feeds. Okay. Maybe not THAT many, but still a lot, okay?

To do my bit, I would like to let you know how you can continue receiving updates when recipes are posted on my blog. Here are your options.

1. Subscribe to my RSS feed. You can do that by clicking HERE, or by clicking the RSS icon on the top right of my blog.

2. Subscribe for updates directly in your email inbox! You can do that by clicking HERE or entering your email address in the subscription box on the top right side of the page.

3. To follow me and receive updates via Facebook, you can 'Like' my Facebook page which can be found HERE

So there. Those are your options. You can also follow me on Twitter, Pintrest or Google Plus.

Here are your options.

I hope you will take the time to do this! :) If I am following you on GFC, I promise to take the time to make sure I am receiving your updates. Or I will email you and pester you for your RSS feed. Believe me. I've done that before.

And now, back to our regular programming.

These cookies are seriously good. I loved these cookies. As I said, they look simple, but let me tell you - looks can be deceptive!
I made a tiny batch and got yelled at! "You made just twelve tiny cookies? What's wrong with you?", I was asked. So I am sharing the full recipe with you. For your safety. Trust me.

They are soft, slightly chewy, mildly sweet - until you bite into an intensely sweet white chocolate chip - and have a slightly salty, nutty kick from the roasted salted macadamia nuts in there.

White Chocolate Macadamia Cookies
Adapted from Betty Crocker
Ingredients
1 cup butter, softened
3/4 cup granulated sugar
3/4 cup brown sugar
1 tsp vanilla
1 egg, chilled
2 1/4 cups all-purpose flour
1 tsp baking soda
1/4 tsp cinnamon powder
1/2 tsp salt
1 cup salted roasted macadamia nuts, roughly chopped
1 cup white chocolate chips

Method
1. Preheat the oven to 190. 
2. Cream together the butter, sugars, vanilla and egg until fluffy.
3. Stir in the flour, baking soda and salt and mix well to combine.
4. Stir in the chocolate chips and chopped nuts. Mix until incorporated.
5. Drop rounded spoonfuls on an ungreased baking sheet, making sure you leave at least 2 inches between the cookies.
6. Bake until the edges are starting to brown, and the centers are still slightly soft, about 8-10 minutes.
7. Remove from oven and leave on the baking tray for 10 minutes. Transfer cookies to a cooling rack to cool completely.
Have I ever told you that I detest milk? Personally, I have only two uses for milk in life - 1. as an ingredient in baking, and 2. to dunk cookies in. I love dunking cookies in milk and then giving the leftover milk to the dog. He loves it too. These cookies taste delightful with milk! I hope you will try this recipe!

There is still time to enter my giveaway. You could win Alton Brown's book 'I'm just here for the food'. I really hope you'll stop by and enter!

Toodles for now!
Pin It

Saturday, February 11, 2012

Red Velvet Madeleines

Pin It
Welcome to yet another installment in the Red Velvet Series we're enjoying! I am a total Red Velvet fiend and I am thoroughly enjoying baking and sharing these treats with you.
This is the fourth recipe I am sharing in this series, and I will share the fifth and last recipe tomorrow night, hopefully giving you enough time to plan and make one of these treats for your family in the coming week! 

As I type this, I realize how much respect I have for the bloggers who manage to get out one post a day! How do you do it? Where do you find the time, energy and inspiration? I am totally in awe of each and every one of you! Today is the 5th day in a row I am posting, and it has been so crazy. I barely got today's post out, and I am amazed at those of you who post every day! Thank you for your dedication & hard work! :)

Today's recipe is a simple treat to share with your family and friends over a nice cup of tea (or coffee, if that's your thing). It is the classic Madeleine. Well, not so classic. It IS Red Velvet madness! Can't forget that, can we?
Red Velvet Madeleines
Adapted from Joyofbaking
Makes 12 regular sized Madeleines
Ingredients
1/4 cup butter 
1/2 cup all-purpose flour
1 1/2 tbsp cocoa powder
1/4 tsp baking powder
Baking Soda, a pinch
Salt, a pinch
2 medium eggs
1/3 cup granulated sugar
1 tsp apple cider vinegar
3/4 tsp vanilla extract
Red food coloring, as desired

Method
1. Melt the butter and set aside to cool.
2. In a small bowl, mix together the flour, cocoa powder, baking powder, baking soda and salt. Stir well to combine and set aside.
3. In a medium bowl, using an electric mixer with the whisk attachment, whisk the eggs and sugar together until tripled in volume and very thick. When the beaters are lifted, the mixture will drop in a thick ribbon.
4. Add the food coloring and whisk till completely incorporated.
5. Sift in the flour mixture in three portions, folding gently between additions, taking care not to overmix or stir.
6. Stir the vanilla and vinegar into the melted butter.
7. Add the butter to the batter in three installments, folding gently after each addition. Do not overmix the batter.
8. Refrigerate the batter for at least half an hour. I left it in the fridge for about an hour.
9. Preheat the oven to 200.
10. Grease and flour a madeleine tine. Fill each mould with a heaped tablespoon of the batter, allowing the batter to drop with a mound in the center. Do not flatten the batter.
11. Bake for 10-12 minutes or until the centers spring back when touched.
12. Remove the pan from the oven and tap it hard against the counter-top to release the madeleines.
13. Turn over onto a cooling rack and allow to cool completely. 
To be honest, I don't drink tea or coffee regularly. I occasionally enjoy a cup of herbal tea, and I made myself a nice cup of fennel tea (not the tea in the pictures!) and these madeleines were delicious with it! 

They are light, cake-like, cookie-like and ever so slightly chocolaty. Red Velvet is such a cool thing, isn't it. Works in so many forms! As I sat down to plan my Red Velvet Fest, I came up with 12 different things to do with Red Velvet! Of course, I decided to attempt only 5 because I know that any more than that, and I would lose my mind trying to churn the posts out. 
If you haven't already checked them out, don't forget to visit the first three recipes in this series

Also, check out one of my very old posts, and the recipe that made me fall in love with Red Velvet 

Also, a BIG thank you to Elisabeth of Food and Thrift Finds for sharing some wonderful awards with me. I am honored to receive them! :) Thank you! 

That's a whole lot of RED and it has been SO much fun! I hope you enjoy these Madeleines and I can't wait to share my last Red Velvet recipe with you tomorrow! 
Pin It

Saturday, December 24, 2011

Christmas Pinwheel Cookies

Pin It
Before the Christmas season has passed me by, I want to get a post out.
This has been one of the busiest Christmas-es I have ever had. So many things happening that I sometimes thought I wouldn't be able to get everything done. But here's a gist of what's been happening with me.

1. We lost a friend this year - Thom Petty. You might have seen the tribute post for him. He is having a great time in heaven with Jesus, I'm sure!
2. The band I sing with - the WOW band, has been busy this season, and we've had a lot of fun singing all around the city.
3. I conducted my first baking workshop for a MOPS (Moms of preschoolers) group, and it was sooooo much fun! We made carrot cake/cupcakes with a coconut frosting and it turned out great!
4. I did another restaurant review earlier this month, and I can't wait to share it with you. Look out for that post in a couple of days!
5. We had a really lovely barbecue dinner at church and I marinated chicken & beef for 200 people! It was a lot of work, but SO rewarding & yummy!
6. We had some other fun Christmas dinners/parties (and a few birthday parties thrown in too) and I have been eating way too much good food! Not that I am complaining :)

The only disadvantage of this busy-ness has been that I have hardly had any time to bake, and even less time to blog. Here are a few things I made this season.

Blueberry-Apple Muffins
Scottish Tablet Candy (SOOOO yummy!)
No bake Oatmeal squares
Carrot Cupcakes with Coconut Frosting
Christmas-sy Pinwheel Cookies
Since these are not all particularly Christmassy desserts, I will post the recipes (and better pictures!) for these treats over the next few weeks.

To start off, here's something for the season from our home.

Christmas Pinwheel Cookies
Ingredients
3/4 cup butter, softened
1 cup white sugar
2 medium eggs
1 tsp vanilla
2 1/2 - 3 cups all purpose flour
1/2 tsp salt
1 tsp baking powder
Green food coloring
Red food coloring

Method
1. Sift the 2 1/2 cups of the flour, salt and baking powder and set aside.
2. Cream the butter and sugar until light and fluffy.
3. Add the eggs, one at a time, beating well after each addition.
4. Add the vanilla and mix until well incorporated.
5. Add the dry ingredients and mix to form a soft dough. If the dough is too sticky, add more flour. If you use medium eggs, you shouldn't need more than 2 1/2 cups.
6. Divide the dough into two equal sized portions. Divide one of the portions into halves again.
7. Wrap the larger ball of dough in clingfilm and refrigerate for at least an hour.
8. Add red food coloring to one of the smaller balls of dough, and green food coloring to the other. Knead to incorporate.
9. Wrap the balls of dough separately and refrigerate.
10. Divide the uncolored dough into two portions.
11. Refrigerate one ball. Roll the other portion into a rectangle about 1cm thick.
12. Roll out one of the colored doughs into a rectangle about 1cm thick.
13. Lay the colored dough on a piece of clingfilm, and place the white dough rectangle on top of it.
14. Using the clingfilm, roll the two doughs along the length to create a log.
15. If you desire, press some sprinkles/jimmies onto the outside of the log. Wrap well in clingfilm and refrigerate.
16. Repeat the process with the other colored dough and the remaining white dough.
17. When you are ready to bake, slice the cookies about 1/2inch thick using a sharp knife.
18. Arrange on a baking tray making sure there's at least 2 inches between each cookie.
19. Bake at 350 for 8-9 minutes, or until the sides are just starting to turn golden.
20. Let them rest on the baking tray for 2-3 minutes before transferring them to a cooling rack.

These cookies look really nice, and I think next time I will add lime zest or some spice to make the flavor a little more interesting!
From our home to yours, I pray you have a wonderful, happy & blessed Christmas filled with love, joy & laughter. God bless you! :)

Pin It

Friday, December 16, 2011

Peanut butter cookies with Chocolate Centers - For Thom Petty

Pin It
I thought long and hard about what my big comeback post would be. I haven't had a recipe post out in months, and I figured I should come back with something decadent & mouthwatering. 

Instead, this post happened.

This week, a friend passed away and went to be with the Lord. This post is for you - Thom Petty!
I felt this would be the most appropriate thing to make for Thom. Those who know him know how much of a softie he is, despite his gruff exterior. This cookie is a crisp peanut butter cookie on the outside with a melting chocolate center.

Peanut Butter Cookies w/ Chocolate Center
Ingredients
1/2 cup unsalted butter
1/2 cup sugar
1/2 cup brown sugar
1 egg
1 tsp vanilla
3/4 cup crunchy peanut butter
1 1/4 cup flour
1/2 tsp baking soda
1/2 tsp baking powder
1/2 tsp salt
12 small squares of dark/milk chocolate

Method
1. Sift together the flour, baking soda, baking powder and salt and set aside.
2. Beat the butter until light & creamy.
3. Add the sugars and continue to beat.
4. Add the egg, vanilla and the peanut butter and beat until light and fluffy.
5. Add the flour mixture and mix well until thoroughly combined.
6. Wrap the dough in clingfilm & refrigerate for an hour.
7. Divide the dough into 12 equal sized portions.
8. Press one square of chocolate into each portion and form the dough into a smooth ball with the chocolate in the center of the ball.
9. Place the dough on a baking sheet at least 3 inches apart.
10. Bake at 200C/400F for about 12 minutes or until the edges are lightly golden.
11. Allow to cool for a few minutes and transfer to a cooling rack.
12. Eat while slightly warm.
This recipe makes 12 large cookies. You could make 24 smaller ones, but the giant portions are intentional. Guests at Thom's restaurant will bear testament to the fact that his portions are huge. I remember when we were sampling his menu items before his restaurant opened many years ago. Most of us told Thom the portions were way too big. And his response was that he ate big portions, and so he wanted to make sure no one left his restaurant feeling anything less than full. Yes, he was generous too.
If you are wondering why there are Christmas decorations in the picture, it is not just because Christmas is around the corner. It is also because Thom LOVED Christmas. His restaurant is without doubt the most decorated restaurant in the city. Maybe even the country! We'll miss him most at Christmas time.
Thom Petty, we are going to miss you! Chennai is going to miss it's un-skinny chef. But I rejoice that you are safe & resting in the Lord's arms with no more pain. See you on the other side!

Pin It

Friday, July 29, 2011

Oatmeal Walnut Craisin Cookies

Pin It
We're taking Aimee to the zoo for the first time today. I am really excited. Of course, she has no idea what the zoo is, but is excited nevertheless. Toddlers are easily excited, aren't they?

All of you probably know how much packing goes into a simple day trip when there's a toddler involved. You can't forget anything. Everything little thing is crucial. So many things! And one thing you can't leave the house without is snacks. Something toddler friendly and preferably healthy. My little girl loves craisins, and while I am carrying a little box full of them for her, I thought I would also make something with craisins that she, and the adults on the trip could enjoy.
I went back to my dear friend, Ina, for a cookie recipe. I pretty much stuck to her recipe and just made a few minor substitutions. You can find the original recipe here. This recipe usually yields 36 normal sized cookies for me, but I made 24 regular sized ones, and 24 toddler sized ones, just so she can hold them firmly in her little hands.
Oatmeal Walnut Craisin Cookies
Adapted from Ina Garten's recipe on the Food Network
Ingredients
100g walnuts
1 1/2 cups (185g) all purpose flour
1 tsp baking powder
1 tsp powdered cinnamon
3/4 tsp salt
225g (1/2 pound) unsalted butter, at room temperature
1 cup dark brown sugar
1 cup granulated sugar
2 large eggs
2 tsp vanilla
3 cups oatmeal
100g craisins

Method
1. Preheat the oven to 200 degrees. You can start all your mixing while the ovens preheating.
2. Sift together the flour, baking powder, cinnamon and salt, and set aside.
3. Spread the walnuts in a single layer on a baking sheet and bake for 5-7 minutes until toasted. Set aside to cool.
4. Cream the butter and the sugars until light and fluffy.
5. Add the eggs, one at a time, beating well after each addition.
6. Add the vanilla and beat well.
7. Add the sifted flour mixture and mix until combined.
8. Chop the cooled walnuts into morsel sized bits.
9. Add the oatmeal, walnuts and craisins into the bowl and stir until combined.
10. Using an ice cream scoop or two tablespoons, drop 2 inch mounds of the cookie mix on a parchment-lined baking tray and bake for about 12 minutes or until lightly browned.
11. Transfer the baked cookies to a rack and allow them to cool completely.
12. Store in an airtight container.
I really liked these cookies. Next time, I would add more walnuts. Ina's recipe does call for more nuts than I used, but all I had at hand was a 100g pack. I slightly over-baked one of the batches, and ended up with crispy, rather than chewy cookies. Those are pretty good too, but I just prefer the chewy kind. So just keep an eye on the cookies, and don't let them get crisp. Unless you like them that way, of course!

I just noticed that I have been making so many recipes with craisins lately, you would think they were going extinct. First there were those Cranberry-Orange scones, and then the Oatmeal Cranberry muffins, and now these cookies. I will lay off the craisin recipes for a while. I promise. :)
Okay, we're off to the zoo now. Woohoo! :)
Pin It

Wednesday, June 15, 2011

Lime & Pepper Cookies

Pin It
I am totally a cookie person. I rarely eat store bought cookies, though. Nothing beats a homemade cookie! I like soft, buttery cookies or chunky, chewy cookies. And as you may already know if you've read any of my earlier posts, I am crazy about lime. So, when I saw a recipe for Lime Meltaway Cookies on Serious Eats, I knew I just had to try it. Then, I found Martha Stewart's Lime Meltaways, and I ended up combining the two recipes and adding my own spin to them to create these little beauties.


I turned the lime cookies into a slightly more grown-up cookie with the addition of fresh cracked pepper. This doesn't really make the cookie spicy, like you might think it would, but just gives the cookie a flavor that you won't soon forget. The texture of the cookies is very similar to shortbread. Maybe just a wee bit firmer. I was a little nervous at first because I made quite a few changes to the recipes, but I was very pleased with the results.


For the pepper, I found this pretty little pepper melange at the supermarket. Unfortunately, it is in one of those sealed, plastic pepper mills, and so I couldn't get the pepper corns out to show you how pretty they are! They really are very pretty - a combination of black, white, green and pink pepper, really make a pretty picture.

Lime & Pepper Cookies
Ingredients
3/4 cup unsalted butter, softened
2 tsp lime zest
1/2 tsp freshly ground coarse pepper
1/2 cup powdered sugar
1/2 tsp vanilla
2 tbsp fresh lime juice
1 1/2 cups all purpose flour
3 tbsp rice flour
2 tbsp corn flour
1/2 tsp salt

Note: If you don't have rice flour at hand, just substitute 3 tbsp of regular flour instead.

Method
1. In your mixer, cream the butter, lime zest, pepper, sugar, vanilla and lime juice at together at medium speed until very light and fluffy, about 5 minutes.
2. With the mixer running on low, add the flours and salt and continue mixing until completely incorporated.
3. Turn the mixer up and cream for a further 5 minutes.
4. Transfer the cookie dough onto a large sized piece of cling film, and form into a log.
5. Chill for 15 minutes in the refrigerator.
6. Preheat the oven to 350.
7. Slice the cookies about 1/4 inch thick, and bake for 10-12 minutes until the edges are golden brown.
8. Transfer to a cooling rack, and let the cookies cool down completely.
9. Store in an airtight container.

If the cookies are not sweet enough for you, toss the cookies in more powdered sugar while they are still warm. They were sweet enough for us.


When you bite into these cookies, the first flavor that hits you is the lime. It is unmistakable. Then you taste the butteriness of the cookies. Just when you are getting ready to take your next bite, you feel a slight tingle at the back of your mouth. That's the pepper kicking in. A few seconds later, it's gone, and you're ready for your next lime-y, buttery, peppery bite.


Have I mentioned that my daughter loves lime too? Not quite the way I do. She loves LIMES. She actually eats limes. You know the lime slices that come as garnishes on plates and drinks? She eats those. Yes. Strange, I know, but that's just way things are. Well, she liked these cookies too. At first, I was nervous about giving her a cookie with pepper in it, but she devoured it without flinching. I can't guarantee that all your kids will like these cookies too, but I think you will!


Technorati Tags:
Pin It
Real Time Web Analytics