Showing posts with label Cookies. Show all posts

Monday, July 13, 2015

Secret Recipe Club: Brown Butter Granola Breakfast Cookies

Pin It
For the last few months, I've only been blogging once a month with my Secret Recipe Club group. I hate that I am not posting regularly (owing to many reasons), but I am grateful to SRC for keeping me posting at least once a month. But I have to take a break even from SRC because it just isn't fair to the other members when I'm not posting regularly. August will be my last SRC post. I will be applying for a break from the group. I hope to be back to blogging in a few months.

This month, I just LOVED the blog I was assigned to. Not only did I find some awesome, mouth-watering recipes, but I also found so much that built me up in my spirit. Jessie Weaver is a gorgeous woman of faith, an awesome mom, wife and cook and I don't think you will be disappointed with the range of posts you will discover on her amazing blog. Thank you for everything, Jessie. I love what you write, and you have a regular reader in me!

If you've visited my blog before, you probably know all my love for breakfast baking. It's more like an obsession. Muffins, scones, rolls, quick breads - I've done it all and I do it waaaaay more often than I care to admit. I found a few awesome recipes in these categories on Jessie's blog - the gingerbread white chocolate muffins, the chai spice scones (another SRC recipe) and a few more, but there was one that grabbed my attention. I saw the words 'brown butter' in the title, and I was sold.
Brown Butter Granola Breakfast Cookies
Adapted from this recipe on jessieweaver.net
Ingredients
1 cup unsalted butter
3/4 cup honey
1 tsp salt
1 tsp baking soda
1 tsp cinnamon powder
1 tsp vanilla extract
2 eggs, lightly whisked
3/4 cup buttermilk
3 cups whole wheat flour (I used 2 cups wheat and 1 cup all-purpose)
1 cup granola (I used an unsweetened chunky one with slivered almonds, walnuts, raisins and oat clusters)
1 cup chocolate chips
1/2 cup oatmeal
3 tbsp coarse flaxseed meal

Method
1. Preheat your oven to 180C/350F and prepare a cookie sheet by lining with greaseproof paper or Silpat.
2. In a heavy-bottomed saucepan, melt the butter on low heat stirring until it is all melted. Allow it to keep cooking on low heat until the butter browns and gives off a heady, nutty aroma. This could take 10-12 minutes, and while it doesn't need stirring, you will need to watch it the whole time. It can go from browned to burnt in a matter of seconds.
3. Set the brown butter aside for 10 minutes to cool.
4. Stir in the honey, salt, baking soda, cinnamon powder and vanilla extract.
5. Add the eggs and buttermilk and stir well to combine.
6. Stir in the flour, granola, chocolate chips, oatmeal and flaxseed meal. Mix well.
7. Using an ice cream scoop, scoop out the cookie dough onto your prepared baking sheet. Allow some space between each cookie and the next. If you're shaping them by hand, form 2 inch sized balls and slightly flatten on the baking sheet. I got about 30 large cookies from this recipe.
8. Bake in batches, allowing each batch to bake 15-18 minutes. The cookies will be golden brown on the bottom and slightly risen.
9. Allow to cool on the sheet before transferring to a wire rack to cool completely.
10. Serve fresh if possible. Store leftovers in an airtight container.
I didn't make many changes to this recipes. Just added some oatmeal instead of the oat bran she recommends (I didn't have oat bran at hand), and some flaxseed meal. And I just mixed everything in the same saucepan in which I made the brown butter. It really is an amazing one-bowl recipe!

All of us absolutely loved this recipe! The cookies are not too sweet, have an amazing aroma and flavor and texture - crispy on the outside with a soft center, studded with nuts, raisins and chocolate chips. How could breakfast get any better! Thank you, Jessie! We LOVED this recipe :)

I will be back in August for one last SRC post. See you all then!


Pin It

Monday, December 15, 2014

SRC Cookie Carnival: Russian Tea Cakes

Pin It
The Christmas season is something I look forward to every single year. I love the music, the food and the fellowship. I love going to church extra early, and coming back home and watching my kids open their presents with squeals of joy. I guess you could say I just love celebrating the birth of my Saviour! 

I doesn't matter that I'm... um... as old as I am - the  season is just so festive, bright and full of life that I turn into an excited child who just can't wait for Christmas eve. But every year, come December, I am so exhausted and tired, that I can't wait for January to get here! :) Christmas is a lot of work, I guess! But at least most of the Christmas related 'work' is tons of fun! Like today's post!
This month, as a bonus, the Secret Recipe Club that I've joined just recently is having a Christmas Cookie Carnival! How fun... For this event, I was assigned a wonderful blog from my own Group B - meet Melissa from Smells Like Brownies! This chocolate-loving mom of an adorable toddler is so talented! I love her site. Her recipes look and sound fabulous, the photographs are great and her choice of recipes is amazing - I want to eat everything off the screen. And she makes the prettiest wedding cakes! I repeat - SO talented! 

Melissa had a wonderful array of cookie recipes for me to choose from and the super decadent-sounding Fleur de Sel Caramel Cookies were my first pick! Don't they sound divine? But then my eye caught these Mexican Hot Chocolate Crackle cookies! Oooooh cookies that taste like hot chocolate!? Yum! And then my very inquisitive 5 year old came peeping and as I looked through the cookies, this one caught her eye and she asked me what they were! And when I told her that they were snowball cookies, it was all settled. She said she had to have these cookies, and soon. I guess we had decided. And if I didn't give in, I was sure to hear 'snow cookies, mama' every hour for the next two weeks. Never mind that there were other cookies that sounded like heaven in a bite. We had to have snow. 
Thank you Melissa for this yummy recipe that didn't make me regret my daughter's pick. These cookies were really, really good! I've made snowball cookies before, and I've eaten my fair share. It was fun and exciting to try a new recipe! These cookies tasted rich, and nutty and were just the right level of sweet - even with all the 'snow'. The powdered sugar did make it a messy treat for the kids, but it was so worth it!
Russian Tea Cakes/Snow Cookies
Adapted from this recipe on smellslikebrownies.com 
Ingredients 
1 cup unsalted butter, softened
½ cup confectioner’s sugar, plus extra
1 tsp. vanilla extract
2¼ cups flour
1 tsp. salt
1 cup finely chopped walnuts 

Method 
1. Cream the butter and powdered sugar until smooth and fluffy. 
2. Stir in the vanilla and beat for a minute or so. 
3. Add the flour, salt and nuts and stir until it comes together. 
4. Set the mixing spoon aside and gently mix the dough with your fingers till it comes together into a ball. 
5. Pinch of bits of dough and form cookie balls about 1" in size. Lay them out on baking tray/cookie sheet leaving about an inch between each of the cookies. 
6. Bake in a preheated oven at 200C/400F for about 12 minutes. At this point the bottom of the cookie will have colored golden brown but the rest of the cookie will remain whitish. 
7. Remove the cookie sheet from the oven and working quickly, dredge each hot cookie in the powdered sugar and set on a cooling rack. The cookies aren't too hard to handle when they're hot. Just don't touch the hot baking tray. 
8. Leave the cookies on the cooling rack to cool completely. When they're completely cool, dredge them again in the powdered sugar. This time, the sugar will stick a lot better and the cookies will look like they're covered in snow. 
9. Store in an airtight cookie jar away from the reach of little hands - unless you want your whole house covered in a fine layer of powdered sugar. 

Thank you Melissa! Love love love your blog and I will also be making the other two cookies I wanted to make! I can't wait! These were so yummy and buttery and nutty and sugary and so good! The photographs turned out messy because of all the sugar and the two pairs of grubby little hands I had to keep swatting away while trying to get a decent picture! 
EDIT: Just saw the Chocolate Mint Butter Cookies! Yum! And more importantly, - CONGRATULATIONS, Melissa! :)

And thank you Sarah for all that you do for Secret Recipe Club. What a lot of work it must be! Thanks for organizing this cookie carnival! I loved being a part of it! :)

I hope you guys try this recipe. I'm sure it will get added to your Christmas baking list every year. Until next time...

Check out the links below for more awesome Christmas Cookie ideas!


Pin It

Monday, October 13, 2014

Secret Recipe Club: Chewy Red Velvet Cookies

Pin It
Can you believe I got to do TWO posts in my very first SRC month? I love Secret Recipe Club! One of the Group B bloggers wasn't able to do her post since she just had a little baby! How fun! Congrats! Enjoy your little one :)

The second site I was assigned to was Cheese Curd In Paradise! Wow. Ashley's SUCH a great cook, and has SOOOOO many lovely recipes. I loved looking at pictures of her little fella too... Such a cutie! Oh I must say I had such a hard time picking out a recipe I was going to make! I just kept bookmarking and going. It actually took me a few DAYS to find this recipe, but the minute I saw it, I knew this was the one for me! You know me and my love for Red Velvet, don't you?
Are you groaning "not another red velvet recipe"? Don't you dare! I may have done red velvet ice cream and red velvet madeleines and red velvet whoopie pies and even more red velvet stuff. Heck, I even have a recipe for a red velvet emergency - because that IS a real thing! But I have never made red velvet cookies before.

Chewy Red Velvet Cookies
Adapted from this recipe on Cheese Curd in Paradise
Ingredients
1/2 cup unsalted butter, softened
1/2 cup granulated sugar
1/2 cup brown sugar
1 egg
1 tsp vanilla
1/2 tsp red food coloring
1/2 tsp white vinegar
1 1/2 cups all purpose flour
1 tsp baking soda
1/4 tsp salt
1/3 cup cocoa powder
1/2 cup white chocolate chips

Method
1. Preheat the oven to 180C/350F and line a baking/cookie sheet with grease-proof paper.
2. Cream the butter and sugars together in a large bowl.
3. Beat in the egg and vanilla and beat until light and fluffy.
4. Stir in the food coloring
5. Stir in the vinegar.
6. Stir in the flour, baking soda, salt and cocoa powder and mix in well.
7. Fold in the white chocolate chips.
8. Drop the cookie dough using an ice cream scoop or large spoon. You want about 2 tbsp worth of dough for each cookie. Make sure you have a distance of at least 2 inches between the cookies.
9. Bake for 10-12 minutes.
10. Allow to cool on the pan for 3-4 minutes and then transfer to cooling rack to cool completely.
11. Store in an airtight container.
I love the dense, chewiness of these cookies. And I have always been a fan of white chocolate with red velvet and that's why I substituted the regular chocolate for white. My only major changes to the recipe were reducing the amount of food coloring, and adding a splash of vinegar. Somehow in my mind, red velvet recipes need to have some vinegar in them. I guess you could say I am a red velvet purist - if there's such a thing!
I loved visiting your site, Ashley! In the days that I spent browsing through your site, I have bookmarked quite a few more recipes to try! My favorites so far are your Bang Bang Chicken Skewers, the peanut butter popcorn - (which I'm planning to make this weekend!!!), and the Strawberry Basil Shortcakes - which sound divine! Thank you for sharing your awesome recipes with all of us! You are such a prolific cook...

I loved having two wonderful sites to explore and share with you on my very first month of SRC! Can't wait for my next Group B assignment!

You can visit my other SRC post for this month here.

Click on the cute froggy face below to see the other awesome recipes from SRC's Group B!


Pin It

Saturday, September 27, 2014

Awesome Chocolate Chip Cookies

Pin It
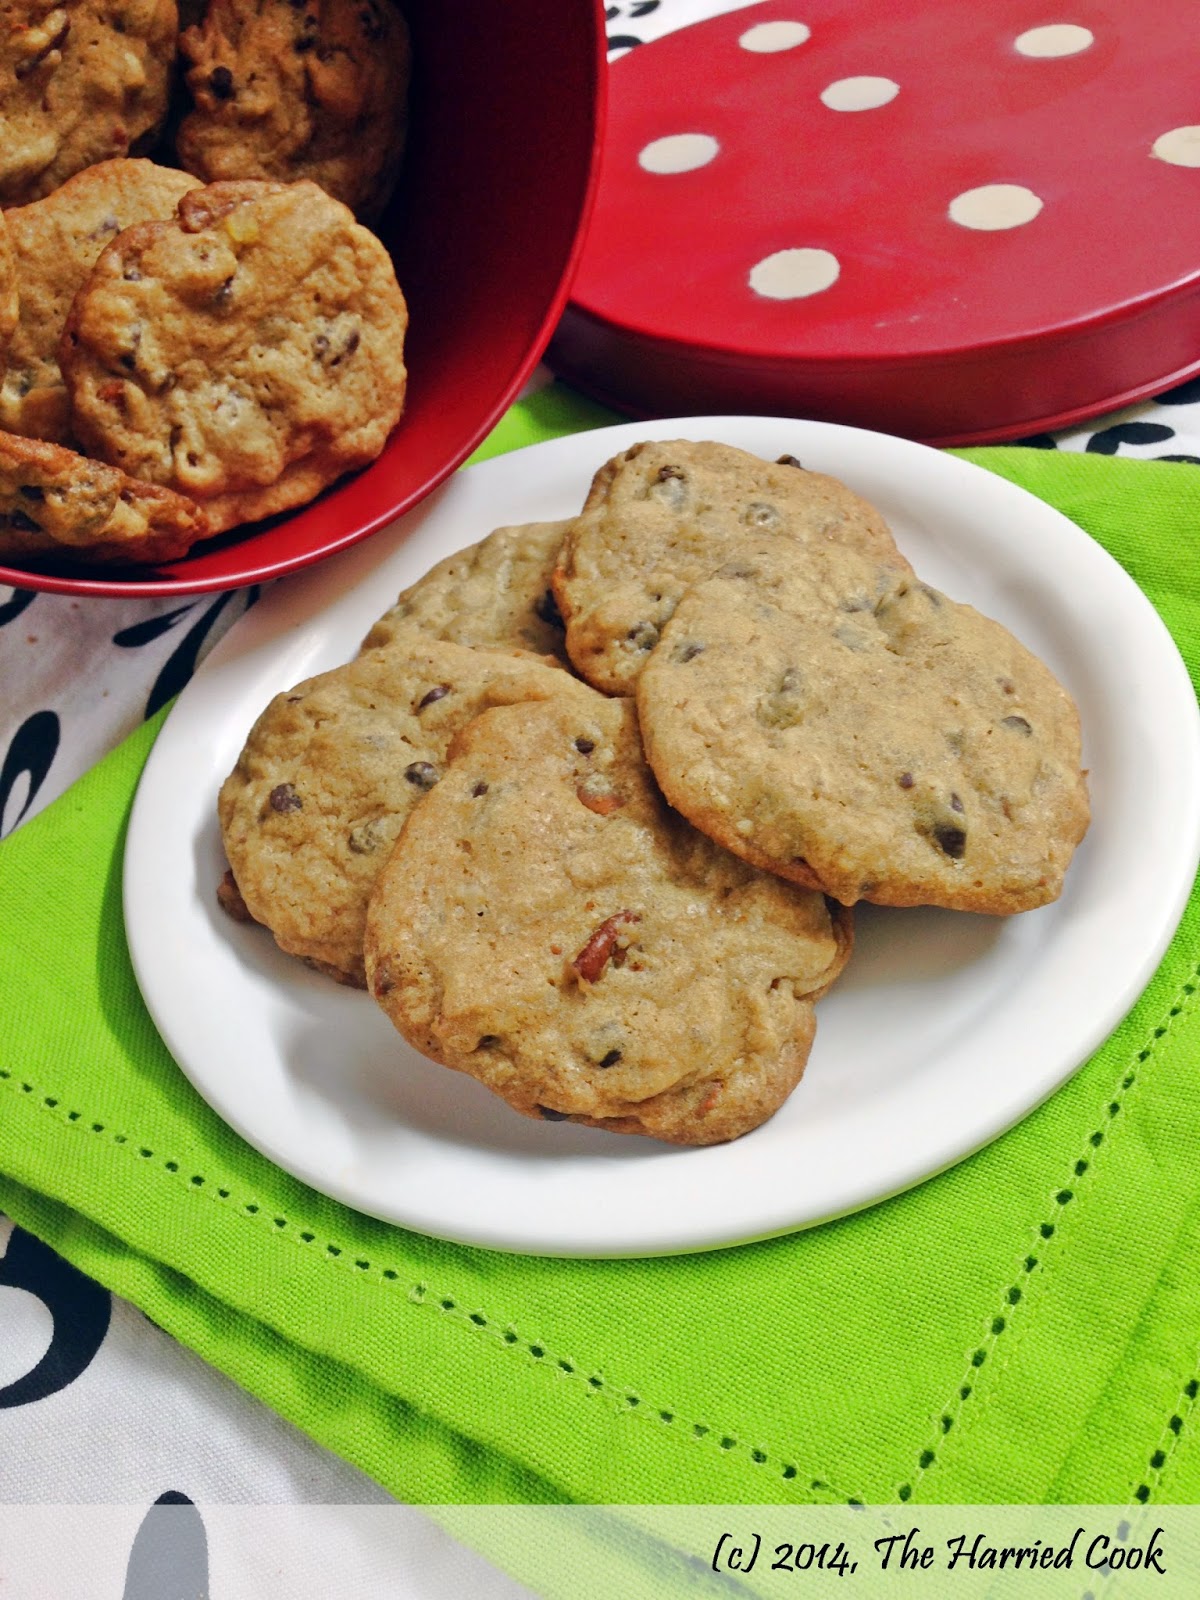
When I wrote the post with the recipe I shared of the Amish Chocolate Chip Cookies, I shared how I end up making oatmeal cookies every time I start making chocolate chip cookies. Those cookies cured me of that for a while, and then I went back to oatmeal cookies. But the other day, I wanted to make classic chocolate chip cookies and so I tried this recipe. And no one complained about the missing oatmeal.
This recipe makes a lot of cookies, and they were all gone in less than 2 days. We just couldn't stop eating them! Even my husband who watches everything he eats (unlike me!), enjoyed quite a few of these beauties!
At first bite, it feels like the cookie is a little too sweet. You feel you won't be able to eat more that one. But before you realize it, you've eaten 2 or maybe 6, and you're wondering how you're able to when it is so sweet. Don't feel too bad. Hey - its not all unhealthy, you know? Dark chocolate and pecans are good for you! They're considered health food! So there...

Awesome Chocolate Chip Cookies
Adapted from this recipe on allrecipes.com
Ingredients
1 cup unsalted butter, softened
3/4 cup granulated sugar
1 packed cup light brown sugar
2 eggs
2 tsp vanilla extract
1 tsp baking soda
2 tsp hot water
3 cups all purpose flour
1/2 tsp salt
1/2 tsp ground cinnamon
1 cup chopped dark chocolate or dark chocolate chips
1 cup chopped milk chocolate or milk chocolate chips
1 cup chopped pecans

Method
1. Preheat the oven to 180C/350F.
2. In a large bowl, cream the butter and the sugars until light and fluffy.
3. Beat in the eggs, one at a time, until the mixture is creamy and light.
4. Beat in the vanilla.
5. In a small cup, dissolve the baking soda in the hot water. Add this to the batter and mix in well.
6. Add the salt and ground cinnamon to the flour and mix well.
7. Add the flour to the batter and mix until combined.
8. Stir in the chocolate chunks and nuts.
9. Drop large tablespoonfuls of the batter onto an un-greased baking sheet. Allow a distance of at least 2 inches between each cookie dough mound.
10. Bake in the preheated oven for about 10 minutes, or until the edges are well browned.
11. Remove from the oven and allow to rest on the pan for 2-3 minutes.
12. Using a flat metal spoon or spatula, remove each cookie gently from the baking sheet and transfer to a cooling rack.
13. When completely cool, transfer to an airtight container for storage.
14. Eat.
Unlike the Amish Chocolate Chip Puff Cookies, these cookies are dense and chewy. Seriously good. I would go as far as saying - these are the BEST chocolate chip cookies! And they're highly addictive.
The edges and outside are nice and crunchy and they give way easily to that chewy, chocolaty center. I love the nuts in this cookie too. I've made it with pecans and with walnuts, and while I prefer the pecan version, most people seem to favor the walnuts in this particular cookies.

As I said earlier, this recipe makes a LOT of cookies. About 48 cookies to be exact. Feel free to halve the recipe if you don't want to drown in cookies. Pecans or walnuts, these cookies need to be made and enjoyed! I hope you like them as much as we did!

Until next time...


Pin It

Tuesday, July 22, 2014

Orange Spritz Cookies

Pin It
My kids love cookies. They're always asking for a cookie. The other day, I took the time to read through the ingredients on a bag of cookies and I was appalled. I mean cookies are basically fat, sugar and flour. Maybe some add-ins like chocolate chips or dried fruit. Maybe some leavening agent. Maybe some flavoring or  extracts. Maybe even some food coloring. I get it. I'm not unreasonable! But the things in these cookies looked like something out of my chemistry book from back when I was in school! And don't get me started on to amount of shortening and unhealthy fats in the sandwich cookies!

I am not a health freak. We do eat junk food sometimes. I am just not comfortable with so much of artificial stuff and chemicals in something my kids eat EVERY DAY! Yes, we still buy cookies. But only when we have run out of homemade ones and I haven't had the time to make more. Apart from that, we have been enjoying homemade shortbreads, fudge cookies, and my kids' favorite - these pretty spritz cookies. 
If you don't have a cookie press just shape them into 1 inch balls with your hands and lightly flatten them on the baking sheet. 

Orange Spritz Cookies 
Adapted from allrecipes.com
Ingredients 
1/2 cup unsalted butter, softened 
1/2 cup plus 2 tbsp powdered sugar 
1/4 tsp salt
1 large egg yolk
1/2 tsp vanilla extract
Zest of half an orange 
1 1/4 cups all purpose flour

Method
1. In a large bowl, cream together the softened butter, powdered sugar and the salt until creamy and light using a spatula or a whisk. You could also use an electric or stand mixer, but it is really easy to do by hand. 
2. Add the egg yolk and mix well until completely incorporated. 
3. Whisk in the vanilla and the orange zest. 
4. Mix in the flour and stir using a spatula until completely incorporated and no dry flour is seen. 
5. Preheat the oven to 180C/350F. 
6. Prepare your cookie sheet by lining it with Silpat or baking parchment paper.
7. Fit your cookie press with your plate of choice. I changed plates in between twice, making three designs. 
8. Fill the cookie press 3/4 full with the dough and press the cookies out on the baking sheet with an inch between each cookie. 
9. Bake in the preheated oven until the edges just start to turn golden brown. This doesn't take long at all - around 8-10 minutes. Keep an eye on the cookies after the 6 minute mark. 
10. Remove from the oven and allow to cool for a few minutes before transferring them to a cooling rack to cool completely. 
11. Store in an airtight jar. 
These cookies have just a hint of orange in them and that's just how we like it. If you want them more orange-y, you could use a little orange extract too. If you like the orange-chocolate combination, you could add a little cocoa powder to the dough. If it makes the dough too dry, you could always add a few drops of orange juice. 
And when the kids want a sandwich cookie, we just sandwich them with a chocolate-hazelnut spread, with jam or with regular peanut butter. So yummy!

I've made these with just plain ol' vanilla extract, with lime zest, and with an awesome pumpkin spice mix. But my orange-loving daughter declares that these are the bestest. I hope you like them too!!

<3
Pin It

Saturday, October 5, 2013

Best Ghee Biscuits

Pin It
This post almost didn't make the cut.

Should I? Shouldn't I? I debated with myself for quite a while before I decided to share this with you. Why did I think so long and hard, you ask? Well, I have a couple of reasons. 

One, this recipe is so ridiculously easy that even a child could make it. My four year old actually did most of the work on this one - hence the not-so-perfect shapes. Honest. It is such a simple recipe, I was not sure it even warranted an entire post. 

Two, I wasn't sure if I wanted to share. These little nuggets are SO good. 
I would say that "Ghee biscuits" are the Indian version of a shortbread. Ghee is nothing but clarified butter. These mildly sweet, just a wee bit salty, totally melting in my mouth biscuits are addictive and it doesn't help that they are so darn easy to make! And I think they make awesome gifts.

I got the ingredient list from a friend, and fiddled around with the proportions and this is now the way I like it!

"Ghee Biscuits"
Ingredients
110g ghee (clarified butter)
60g powdered sugar 
1/8-1/4 tsp salt
1/2 tsp vanilla extract (optional)
210g all purpose flour

Method 
1. Melt the ghee in the microwave or in a saucepan until completely liquid. Allow to cool. 
2. Stir in the sugar, salt and vanilla extract. Mix well to combine. 
3. Stir in the flour and knead into a soft and slightly crumbly dough. 
4. Form 1-2 inch balls of dough and place them on a baking sheet.
5. Bake in a preheated oven at 180C/350F for 15-18 minutes or until the bottom of each cookie is golden. Don't over-bake. 
6. Remove from the oven and allow to cool on the tray. When cool, transfer to an airtight box. 
See? I told you they were easy! These cookies are mildly sweet and a little salty as I mentioned earlier. You could adjust these levels slightly till you find the proportions you like. For me, this is just heaven. 

Don't make these cookies too often, because they are so addictive and you'll just pack on the pounds. You probably don't have as much self-control as I do! I only ate FOUR within one hour of making these. Sigh. 
I had made some food for a friend who was sick and this batch was made for her. Unfortunately, I thought of making the cookies only at the last minute, and the cookies were still in the oven when the rest of food was picked up! I was sad they didn't get to her, and I had to eat a few straight out of the oven just to make myself feel better. ;-)

In my opinion, these cookies are best nibbled on. 

Nibble on one and just let it melt on your tongue and just try and resist taking another nibble. 

Go on! I dare you! 
Pin It
Real Time Web Analytics